如何制作一款2D平台游戏之梯子和AI
作者:Paul Firth
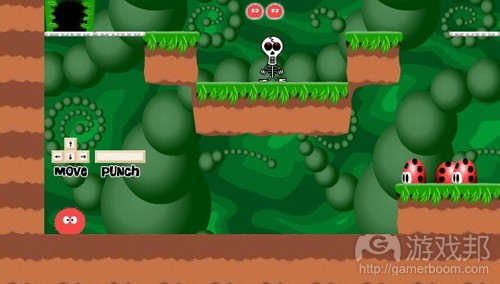
这是本系列文章的第3部分,我将继续介绍如何制作类似这样的2D平台游戏:
在这篇文章中,我要阐述的是梯子和A制作过程。(请点击阅读第1、2部分)
梯子
梯子是这款游戏中最让人头疼的部分!原因在于,它们呈现了控制机制和物理响应的不连续性。
玩家必须从受万有引力影响且能够行走和跳跃的环境过渡到不受万有引力影响且无法跳跃的环境中。由此看来,你有多种不同开始攀爬梯子的方法:
1、沿地面行走,从梯子底部开始
2、沿平台行走,从梯子顶部开始
3、在掉落或跳跃后落于梯子中部
为什么要分成这3种情况呢?
沿地面行走,从梯子底部开始
你不希望在行走通过梯子底部时自动开始攀爬,这就意味着你必须设置在梯子底部按动向上键的特殊事例(游戏邦注:一般情况下,向上键会导致角色跳跃)。
沿平台行走,从梯子顶部开始
同样,你不希望在角色行走通过梯子顶部或到达梯子顶部时自动开始攀爬,所以你同样必须设置在梯子顶部按动向下键的特殊事例。此外,这个方面还会带来更大的麻烦,因为这是游戏中唯一允许玩家向下穿过平台的情况。
在掉落或跳跃后落于梯子中部
我之前确实抛弃了这种想法,在一段时间里我将游戏设置成你无法落在梯子中部。但是玩过一段时间后,我意识到这样的设计对玩家控制技巧的要求过高,而且也会影响到游戏体验。落在梯子中部较为复杂,因为它的行为必须与平台相同,但是这个平台必须存在于你落下的任何像素上。而且,它呈现的是另一种过渡,从普通下落到梯子攀爬。
梯子样式
我在游戏中设计了两种不同的梯子:
解决问题
要处理我发现的这些问题,我需要跟踪各种状态和状态间的过渡。
package Code.Characters
{
…public class Player extends Character
{
…private var m_collideLadder:uint;
private var m_oldCollideLadder:uint;
private var m_climbLadder:Boolean;
private var m_onLadderTop:Boolean;
private var m_disableLadderTopCollision:Boolean;…
}
}private var m_collideLadder:uint;
可变的m_collideLadder每帧都会更新,呈现玩家当前碰撞的梯子片段类型(游戏邦注:比如,玩家的中心点在片段的AABB中)。当未与梯子片段发生碰撞时,它可以是eTileTypes.kLadderMid、eTileTypes.kLadderTop或eTileTypes.kInvalid。
此外,我还有:
private var m_oldCollideLadder:uint;
这跟踪的是m_collideLadder的最终状态,所以无论m_collideLadder何时改变,之前的状态都会存储在m_oldCollideLadder中。这使我可以察觉到与梯子碰撞与否之间的过渡。
对于玩家因下落或跳跃而落于梯子中部的情况,使用下列代码:
package Code.Characters
{
…public class Player extends Character
{
…/// <summary>
/// Special implementation for the player
/// </summary>
protected override function PostCollisionCode( ):void
{
super.PostCollisionCode( );// if we’re not colliding with the ladder or we’re on the ground, we’re not climbing the ladder
if ( !m_collideLadder || m_OnGround )
{
m_climbLadder = false;
}// if we fall onto the top of a ladder, we start climbing it
if ( m_oldCollideLadder==eTileTypes.kEmpty && Map.IsTileLadder(m_collideLadder) && !m_OnGround )
{
m_climbLadder = true;
m_animationController.PlayOnce( kLandAnim );
}if ( !m_OnGround&&m_OnGroundLast && m_vel.m_y > 0 )
{
m_animationController.PlayOnce( kFallAnim );
}
}
…
}
}
你应该要能够看到过渡开始的部分以及kLandAnim动画开始播放的地方。
private var m_climbLadder:Boolean;
当玩家被确认要攀爬梯子时就会使用上述设置,在这个事件中,特别事例控制机制会代替普通的万有引力/摩擦行为,使攀爬可以进行。
private var m_onLadderTop:Boolean;
当玩家被确认位于梯子顶端时碰撞系统会使用上述设置,这种设置有双重目的:生成特别事例,让我可以在角色站在平台上时运用之前的碰撞逻辑;让我可以检测到玩家输入控制机制的向下指令,这意味着玩家想要从梯子顶部开始沿梯子向下移动。
private var m_disableLadderTopCollision:Boolean;
上述设置的使用情况是:当玩家从梯子上方进入梯子时允许碰撞系统忽略梯子上方的片段,直到玩家被确认将他的中心点放在任意梯子片段的AABB中。这导致玩家直接掉落,直到他们开始与梯子中部片段发生碰撞,此时碰撞被重新激活。
特殊梯子物理效果
我在上篇文章中阐述过常规碰撞响应代码。当m_climbLadder被设置时,这段代码会被忽略,由某些新的代码来替代。
玩家有个称为“m_velTarget”的特殊变量,默认值为0,0,只有当我们被确认位于梯子上时才会使用。当玩家在梯子上左右或上下移动时,这个数值会达到最大值。
代码的主体尝试将玩家的真实速度向这个新的目标速度调整,防止玩家过快地到达目标速度,这便是特殊Player.kLadderStayStrength常量。这会防止梯子在游戏的其他部分中随玩家的移动而移动。
整个代码如下所示:
package Code.Characters
{
…public class Player extends Character
{
/// <summary>
/// Special case code for the player colliding with different tile types
/// </summary>
protected override function InnerCollide(tileAabb:AABB, tileType:int, dt:Number, i:int, j:int ):void
{
…else if ( Map.IsTileLadder( tileType ) )
{
//
// Are we colliding with the top of a ladder?
//var checkLadderMiddle:Boolean = false;
if ( Map.IsTileLadderTop( tileType ) && !m_disableLadderTopCollision )
{
m_onLadderTop = Collide.AabbVsAabbTopPlane( this, tileAabb, m_contact, i, j, m_map );if ( m_onLadderTop )
{
CollisionResponse( m_contact.m_normal, m_contact.m_dist, dt );
}
else
{
checkLadderMiddle = true;
}
}
else
{
checkLadderMiddle = true;
}if (checkLadderMiddle)
{
//
// check to see if we’re colliding with the middle of a ladder
//if (Collide.PointInAabb(m_Pos, tileAabb))
{
m_collideLadder = tileType;
m_disableLadderTopCollision = false;if ( m_climbLadder )
{
// remove a portion of the total velocity of the character
var delta:Vector2 = m_velTarget.Sub( m_vel );var len:Number = delta.m_Len;
var change:Vector2 = delta;
if ( len>kLadderStayStrength )
{
// limit the amount we can remove velocity by
change.MulScalarTo( kLadderStayStrength/len );
}m_vel.AddTo( change );
}
}
}
}…
}
}
}
相关部分在底部。
上述代码代表着什么呢?当我们满足以下条件时:
if ( m_climbLadder )
{
那么,我们就会采用梯子物理机制。首先我们计算出当前速度和目标速度之间的差异:
var delta:Vector2 = m_velTarget.Sub( m_vel );
然后,如果这个矢量的长度比我们梯子更长(游戏邦注:比如移动在1帧内无法完成),我们就必须改变移动,这样它就能与常量kLadderStayStrength相符:
var change:Vector2 = delta;
if ( len>kLadderStayStrength )
{
// limit the amount we can remove velocity by
change.MulScalarTo( kLadderStayStrength/len );
}
当这种移动改变时,我们要将这个delta添加到我们的速度矢量中:
m_vel.AddTo( change );
当玩家停止同梯子片段的碰撞时,普通碰撞解决方案代码会再次被调用,这样我们就完成了梯子的设计。
制作AI
对于这个演示版本游戏的AI制作,我确实感到颇具趣味性,整个过程的流畅性令人惊奇,几乎所有我想要的东西都在首次尝试时成功运转。在处理完纷繁复杂的梯子设计后,AI的开发着实令我耳目一新。在经过长时间的编程
后,你要学会享受这种小胜利带来的乐趣,因为这种情况是极为罕见的。
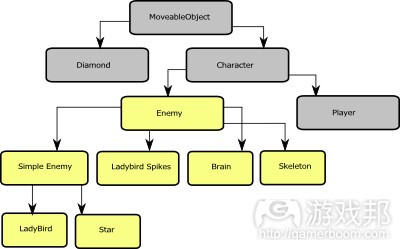
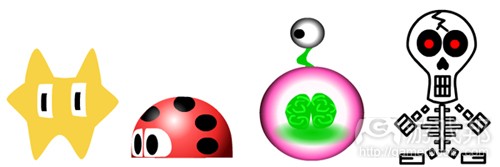
让我们再来看看我在上篇文章中展示的类等级制度:
黄色分支部分就是所有的AI等级,属于角色的一个分支。
基础类——敌人
让我们先来看看延伸出所有敌人的基础类:
package Code.Characters
{
import flash.display.*;
import Code.Maths.*;
import Code.*;
import Code.Geometry.*;
import Code.Graphics.AnimationController;
import Code.System.*;
import Code.Level.*;public class Enemy extends Character
{
// animation names
private const kHitAnim:String = “hitAnim”;/// <summary>
/// Simple constructor
/// </summary>
public function Enemy( )
{
// aways go to the left by default;
m_vel.m_x = -m_WalkSpeed;m_animationController.PlayLooping( kWalkAnim );
m_animationController.GotoRandomFrameInCurrentAnim( );
}/// <summary>
/// Simple update function
/// </summary>
public override function Update( dt:Number ):void
{
if ( m_hurtTimer > 0 )
{
m_hurtTimer–;
}super.Update( dt );
}/// <summary>
/// Hurt this enemy, player was at hurtPos
/// </summary>
public override function Hurt( hurtPos:Vector2 ):void
{
if ( m_hurtTimer==0 )
{
m_hurtTimer = kEnemyHurtFrames;m_animationController.PlayOnce( kHitAnim );
m_animationController.SetEndOfAnimCallback( DeleteEnemy );
}
}/// <summary>
/// Animation callback used to delete this enemy and spawn a pick-up
/// </summary>
private function DeleteEnemy( animName:String ):void
{
// mark this enemy as dead, it will be deleted
m_dead = true;// spawn a pickup
m_platformer.SpawnMo( DiamondPickupFla, m_pos.Clone( ), true );
}/// <summary>
/// What speed should this guy walk at?
/// </summary>
protected function get m_WalkSpeed( ):Number
{
throw new NotImplementedException;
}/// <summary>
/// Does he kill on touch?
/// </summary>
public function get m_KillsOnTouch( ):Boolean
{
throw new NotImplementedException;
}
}
}
需要通过具体的实施来确定两个属性:m_WalkSpeed和m_KillsOnTouch。m_WalkSpeed用于构造器中,正如其名称所示,它代表敌人移动的速度。m_KillsOnTouch用于碰撞检测系统中,确定特定敌人在碰到玩家时是否会将其杀死。
所有敌人都要提供两个带有特定名字的动画,供这个基础类引用:
1、walkAnim——敌人拥有的行走动画
2、hitAnim——当敌人被玩家击中时播放的动画
个别类型的敌人或许还要有额外的动画,但是最少要包含以上两种。
还有个值得一提的功能是Hurt(),事实上它是在Character中进行定义。代码在这里被覆写成自定义执行,经过几帧后触发hitAnim,当动画确实播放时附加回叫信号,这标志着敌人应当从画面中删除,同时在敌人消失的地方生成可拾取物品。
简单的敌人
这又是个共享的非具体类,包含两种类型敌人的行为。
package Code.Characters
{
import flash.display.*;
import Code.Maths.*;
import Code.*;
import Code.Geometry.*;
import Code.Graphics.AnimationController;
import Code.System.*;
import Code.Physics.*;public class SimpleEnemy extends Enemy
{
/// <summary>
///
/// </summary>
public function SimpleEnemy()
{
super();
}/// <summary>
/// Simple update function which just checks for kReverseDirection markers
/// </summary>
public override function Update( dt:Number ):void
{
if ( m_hurtTimer == 0 )
{
// form AABB for character
var min:Vector2 = m_pos.Sub( m_halfExtents );
var max:Vector2 = m_pos.Add( m_halfExtents );m_map.DoActionToTilesWithinAabb( min, max, InnerCollide, dt );
}super.Update( dt );
}/// <summary>
/// Is the current tile a reverse direction maker? If so, change direction
/// </summary>
protected override function InnerCollide( tileAabb:AABB, tileType:int, dt:Number, i:int, j:int ):void
{
if ( tileType==eTileTypes.kReverseDirection && MoveableObject.HeadingTowards(tileAabb.m_Centre, this) )
{
// toggle direction
m_vel.m_x *= -1;
this.scaleX *= -1;
}
}/// <summary>
/// This enemy type is always updated, this is to stop them from bunching up
/// due to the off-screen deactivation code
/// </summary>
public override function get m_ForceUpdate( ):Boolean
{
return true;
}
}
}
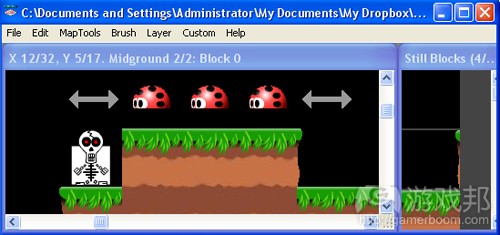
它们的基本行为是朝某个固定方向移动,直到它们碰到显示他们应当改变方向的特别标识类型。这种标识类型总是被放置在地图的中碰撞层次中,随其他AI角色移动。
标志本身有个特别的片段(游戏邦注:如上图所示),这样地图编辑者才能看到其在地图中的位置。在运行时,这些片段就会变得不可见,或者片段本身根本就不带有任何可视化数据。
上图显示它们在关卡中所处的位置。
这种行为的相关代码如下:
/// <summary>
/// Simple update function which just checks for kReverseDirection markers
/// </summary>
public override function Update( dt:Number ):void
{
if ( m_hurtTimer == 0 )
{
// form AABB for character
var min:Vector2 = m_pos.Sub( m_halfExtents );
var max:Vector2 = m_pos.Add( m_halfExtents );m_map.DoActionToTilesWithinAabb( min, max, InnerCollide, dt );
}super.Update( dt );
}
为角色范围形成AABB,随后调用至碰撞系统,归还与这个AABB相交的所有片段。随后,碰撞系统回调回叫功能InnerCollide:
/// <summary>
/// Is the current tile a reverse direction maker? If so, change direction
/// </summary>
protected override function InnerCollide( tileAabb:AABB, tileType:int, dt:Number, i:int, j:int ):void
{
if ( tileType==eTileTypes.kReverseDirection && MoveableObject.HeadingTowards(tileAabb.m_Centre, this) )
{
// toggle direction
m_vel.m_x *= -1;
this.scaleX *= -1;
}
}上述代码检测碰撞的片段类型是否是eTileTypes.kReverseDirection,如果确实如此且如果敌人的移动方向是朝这个片段,那么我们就会调转敌人的移动方向,让它们朝另一个方向移动。最后那个条件(游戏邦注:即检测敌人方向)非常重要,否则仍然会继续与下一帧中相同的方向改变标志发生碰撞,这会导致敌人不断改变移动方向。
以下是计算物体是否正朝向某个点(游戏邦注:这个点位于X轴上)移动的函数,仅供参考:
/// <summary>
/// Is the given candidate heading towards towardsPoint?
/// </summary>
static public function HeadingTowards( towardsPoint:Vector2, candidate:MoveableObject ):Boolean
{
var deltaX:Number = towardsPoint.m_x-candidate.m_Pos.m_x;
var headingTowards:Boolean = deltaX*candidate.m_Vel.m_x>0;return headingTowards;
}
我发现这个函数可以用在许多地方。
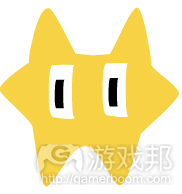
星星
正是这项设计让我们感受到了抽象化设计的便利性。
以下是这种敌人的执行代码:
package Code.Characters
{
public class Star extends SimpleEnemy
{
private const kWalkSpeed:Number = 40;
private const kWalkAnimMultiplier:Number = 0.125;/// <summary>
///
/// </summary>
public function Star()
{
super();
}/// <summary>
/// Simple accessor
/// </summary>
protected override function get m_WalkSpeed( ):Number
{
return kWalkSpeed;
}/// <summary>
/// Simple accessor
/// </summary>
protected override function get m_AnimSpeedMultiplier( ):Number
{
return kWalkAnimMultiplier;
}/// <summary>
/// Kills on touch
/// </summary>
public override function get m_KillsOnTouch( ):Boolean
{
return true;
}
}
}
正如你所看到的那样,他的执行只是3个简单的存取器,完全可以免去具体的解释!所有的功能都由他起源的类来实现。
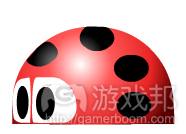
瓢虫
这种敌人略显复杂,因为它有种特殊的行为,它暂停时会播放一种动画,放出其他物体时会播放另一种动画,随后又回到原本的行为上。
package Code.Characters
{
import Code.Maths.*;
import Code.Physics.*;public class LadyBird extends SimpleEnemy
{
// animation names
private const kFireInAnim:String = “fireInAnim”;
private const kFireOutAnim:String = “fireOutAnim”;private const kWalkSpeed:Number = 40;
private const kWalkAnimMultiplier:Number = 1;
private const kFireSpikesDelay:int = 60;
private const kTriggerTimerRadius:Number = 200;private var m_fireSpikesCounter:int;
private var m_originalXVel:Number;/// <summary>
///
/// </summary>
public function LadyBird()
{
super();m_fireSpikesCounter = kFireSpikesDelay;
}/// <summary>
///
/// </summary>
public override function Update( dt:Number ):void
{
super.Update( dt );var withinRadius:Boolean = m_platformer.m_Player.m_Pos.Sub( m_pos ).m_Len<kTriggerTimerRadius;
var facingPlayer:Boolean = MoveableObject.HeadingTowards( m_platformer.m_Player.m_Pos, this );if (withinRadius && facingPlayer && m_hurtTimer==0 )
{
// every so often, we spawn some spikes
if ( m_fireSpikesCounter>0 )
{
m_fireSpikesCounter–;
}
else if (m_animationController.m_Playing == kWalkAnim)
{
// begin a series of callbacks which eventually plays the spawn anim
m_animationController.StopAtEnd( );
m_animationController.SetEndOfAnimCallback( WaitTillEndOfAnim );
}
}
}/// <summary>
///
/// </summary>
private function WaitTillEndOfAnim( animName:String ):void
{
m_animationController.PlayOnce( kFireInAnim );
m_animationController.SetEndOfAnimCallback( SpawnSpikes );// pause motion
m_originalXVel = m_vel.m_x;if ( m_hurtTimer==0 )
{
m_vel.m_x = 0;
}
}/// <summary>
///
/// </summary>
private function SpawnSpikes( animName:String ):void
{
var velX:Number = -this.scaleX*kWalkSpeed*2;var spikes:Character = Character(m_platformer.SpawnMo( LadySpikesFla, m_pos.Clone(), true, velX ));
// put behind us in display list order
m_platformer.setChildIndex( spikes, m_platformer.getChildIndex( this )-1 );m_animationController.PlayOnce( kFireOutAnim );
m_animationController.SetEndOfAnimCallback( ResumeNormalAnim );
}/// <summary>
///
/// </summary>
private function ResumeNormalAnim( animName:String ):void
{
m_animationController.PlayLooping( kWalkAnim );// reset counter
m_fireSpikesCounter = kFireSpikesDelay;// resume motion
if ( m_hurtTimer==0 )
{
m_vel.m_x = m_originalXVel;
}
}/// <summary>
///
/// </summary>
protected override function get m_WalkSpeed( ):Number
{
return kWalkSpeed;
}/// <summary>
///
/// </summary>
protected override function get m_AnimSpeedMultiplier( ):Number
{
return kWalkAnimMultiplier;
}/// <summary>
///
/// </summary>
public override function get m_KillsOnTouch( ):Boolean
{
return false;
}
}
}
让我们来看看主更新循环:
/// <summary>
///
/// </summary>
public override function Update( dt:Number ):void
{
super.Update( dt );var withinRadius:Boolean = m_platformer.m_Player.m_Pos.Sub( m_pos ).m_Len<kTriggerTimerRadius;
var facingPlayer:Boolean = MoveableObject.HeadingTowards( m_platformer.m_Player.m_Pos, this );if (withinRadius && facingPlayer && m_hurtTimer==0 )
{
// every so often, we spawn some spikes
if ( m_fireSpikesCounter>0 )
{
m_fireSpikesCounter–;
}
else if (m_animationController.m_Playing == kWalkAnim)
{
// begin a series of callbacks which eventually plays the spawn anim
m_animationController.StopAtEnd( );
m_animationController.SetEndOfAnimCallback( WaitTillEndOfAnim );
}
}
}
那么,整个过程是怎样的呢?首先,我们通过简单的运算来确定玩家是否在敌人的攻击范围内。我们还计算出敌人是否正面对玩家。如果这两项条件都满足,我们就消耗1个计数器,当计数器值变为0时,我们通过回叫信号来
触发一系列动画:
首先是当代当前动画的播放完成,这样就能够确保动画帧数相匹配,因为我设计的是动画相互连接。
/// <summary>
///
/// </summary>
private function WaitTillEndOfAnim( animName:String ):void
{
m_animationController.PlayOnce( kFireInAnim );
m_animationController.SetEndOfAnimCallback( SpawnSpikes );// pause motion
m_originalXVel = m_vel.m_x;if ( m_hurtTimer==0 )
{
m_vel.m_x = 0;
}
}
当上述回叫被调用时,我们触发生成尖状物的动画。这样,玩家才知道需要准备躲避。我还设置在此种情况下敌人的移动停止,记录原本的动作,这样才能在该动作后继续。
/// <summary>
///
/// </summary>
private function SpawnSpikes( animName:String ):void
{
var velX:Number = -this.scaleX*kWalkSpeed*2;var spikes:Character = Character(m_platformer.SpawnMo( LadySpikesFla, m_pos.Clone(), true, velX ));
// put behind us in display list order
m_platformer.setChildIndex( spikes, m_platformer.getChildIndex( this )-1 );m_animationController.PlayOnce( kFireOutAnim );
m_animationController.SetEndOfAnimCallback( ResumeNormalAnim );
}
尖状物生成动画播放完成后,我就在游戏中生成新的物体,这也是个较为简答的类,受万有引力影响,进行全碰撞检测,而且玩家触碰后会被杀死。我确保敌人在释放完尖状物后朝原先面对的方向继续移动,最后播放开火动画,确立与普通动画完结的帧相符的同步器。
/// <summary>
///
/// </summary>
private function ResumeNormalAnim( animName:String ):void
{
m_animationController.PlayLooping( kWalkAnim );// reset counter
m_fireSpikesCounter = kFireSpikesDelay;// resume motion
if ( m_hurtTimer==0 )
{
m_vel.m_x = m_originalXVel;
}
}
之前动画完成后,开火动作就完成了,所以我们继续播放普通的行走动画,重置计数器,恢复敌人原本的动作。
大脑
这种类型的敌人的行为也非常简单:玩家接触后会被杀死,它会移动一段时间,然后暂停一段时间,然后继续移动,如此重复。当它开始移动时,它的朝向是玩家当前所处的位置。
package Code.Characters
{
import Code.Maths.*;public class Brain extends Enemy
{
private const kWalkSpeed:Number = 80;private const kThinkSeconds:Number = 2;
private const kMoveSeconds:Number = 1;private var m_thinkTimer:Number;
private var m_moveTimer:Number;
private var m_think:Boolean;public function Brain( )
{
m_thinkTimer = Scalar.RandBetween( 0, kThinkSeconds );
m_think = true;
}/// >summary<
/// Pause, then target the player and move for a bit, repeat
/// >/summary<
public override function Update( dt:Number ):void
{
super.Update( dt );if (!IsHurt())
{
if ( m_think )
{
// have we gone past our think timer limit?
if ( m_thinkTimer>0 )
{
// toggle modes
m_think = false;// work out a new target velocity
m_vel = m_platformer.m_Player.m_Pos.Sub( m_pos ).UnitTo( ).MulScalarTo( kWalkSpeed );// reset this timer
m_moveTimer = kMoveSeconds;
}m_thinkTimer -= dt;
}
else
{
// have we gone past our move timer limit?
if ( m_moveTimer>0 )
{
// toggle modes
m_think = true;// stop moving
m_vel.Clear( );// reset this timer
m_thinkTimer = kThinkSeconds;
}m_moveTimer -= dt;
}
}
}/// >summary<
/// Simple accessor
/// >/summary<
protected override function get m_WalkSpeed( ):Number
{
return kWalkSpeed;
}/// >summary<
/// Simple accessor
/// >/summary<
public override function get m_KillsOnTouch( ):Boolean
{
return true;
}
}
}
所有的效果都通过更新函数来实现。正如你所看到的,代码中有些简单的计时器,会根据敌人目前所处的状况(游戏邦注:即m_think的条件是否为真)计时。当计时器的值小于0时,敌人改变模式,选择一个方向开始移动。
// work out a new target velocity
m_vel = m_platformer.m_Player.m_Pos.Sub( m_pos ).UnitTo( ).MulScalarTo( kWalkSpeed );
这个新的方向以速度的形式呈现。速度取决于从敌人到玩家的矢量,通过敌人的kWalkSpeed决定单位长度和缩放。这会导致敌人匀速向玩家的方向移动。只要你到达目标地点,他接触到玩家后便会杀死玩家。
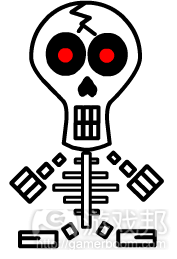
骷髅
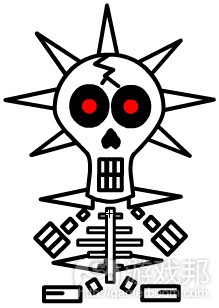
这是最后一个AI角色,其行为是所有AI角色中最为复杂的。
尽管如此,其所有的行为都通过动画来驱动,这使它相当灵活。
package Code.Characters
{
import Code.Maths.Vector2;public class Skeleton extends Enemy
{
// animation names
private const kJumpAnim:String = “jumpAnim”;
private const kDeadlyAnim:String = “deadlyAnim”;private const kJumpStrength:Number = 800;
private var m_jumping:Boolean;
public function Skeleton( )
{
super( );ResetJumpSequence(null);
}/// >summary<
/// Stand still, play walk anim
/// >/summary<
private function ResetJumpSequence( animName:String ):void
{
// stand still
m_vel.m_x = 0;
m_jumping = false;m_animationController.PlayOnce( kWalkAnim );
m_animationController.SetEndOfAnimCallback( PlayJumpAnim );
}/// >summary<
/// Play the jump anim
/// >/summary<
private function PlayJumpAnim( animName:String ):void
{
m_animationController.PlayOnce( kJumpAnim );
m_animationController.SetEndOfAnimCallback( JumpTowardPlayer );
}/// >summary<
/// Actually jump towards the player
/// >/summary<
private function JumpTowardPlayer( animName:String ):void
{
if ( !IsHurt( ) )
{
// work out a new target velocity
var targetPos:Vector2 = m_platformer.m_Player.m_Pos.Add( Vector2.RandomRadius( 100 ) );
var playerUnitDirection:Vector2 = targetPos.SubFrom( m_pos ).UnitTo( );// must jump upwards!
playerUnitDirection.m_y = -2;// re-normalise
playerUnitDirection.UnitTo( );// jump towards player
m_vel.AddTo( playerUnitDirection.MulScalarTo( kJumpStrength ) );m_jumping = true;
m_animationController.SetEndOfAnimCallback( null );
}
}/// >summary<
/// Check for landing, play the deadly animation when landed
/// >/summary<
public override function Update( dt:Number ):void
{
super.Update( dt );if ( m_jumping && !IsHurt() )
{
if ( m_OnGround&&!m_OnGroundLast )
{
// landed!
m_animationController.PlayOnce( kDeadlyAnim );
m_animationController.SetEndOfAnimCallback( ResetJumpSequence );
}
}
}/// >summary<
/// Apply collision detection only when not hurt
/// >/summary<
public override function get m_HasWorldCollision( ):Boolean
{
return !IsHurt();
}/// >summary<
/// Apply gravity only when not hurt
/// >/summary<
protected override function get m_ApplyGravity( ):Boolean
{
return !IsHurt();
}/// >summary<
/// Apply friction only when not hurt
/// >/summary<
protected override function get m_ApplyFriction( ):Boolean
{
return !IsHurt();
}/// >summary<
/// Doesn’t walk
/// >/summary<
protected override function get m_WalkSpeed( ):Number
{
return 0;
}/// >summary<
/// Force update when jumping so he’s not left in mid air when going off screen
/// >/summary<
public override function get m_ForceUpdate( ):Boolean
{
return super.m_ForceUpdate || m_jumping;
}/// >summary<
/// Only kills on touch when the deadly anim is playing
/// >/summary<
public override function get m_KillsOnTouch( ):Boolean
{
return m_animationController.m_Playing==kDeadlyAnim;
}
}
}
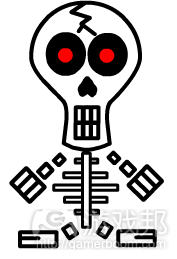
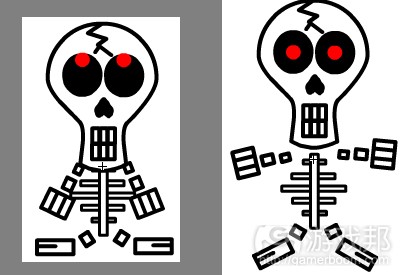
如同瓢虫中的设置,大量动画会按序列播放,相互触发:
(他的眼睛只是左右移动)
(做准备和跳跃——给玩家适当的警告)
(落地并伸出致命尖状物——他会杀死接触到的玩家)
其中,唯一需要特别提及的部分代码是骷髅选择的跳跃方向:
/// >summary<
/// Actually jump towards the player
/// >/summary<
private function JumpTowardPlayer( animName:String ):void
{
if ( !IsHurt( ) )
{
// work out a new target velocity
var targetPos:Vector2 = m_platformer.m_Player.m_Pos.Add( Vector2.RandomRadius( 100 ) );
var playerUnitDirection:Vector2 = targetPos.SubFrom( m_pos ).UnitTo( );// must jump upwards!
playerUnitDirection.m_y = -2;// re-normalise
playerUnitDirection.UnitTo( );// jump towards player
m_vel.AddTo( playerUnitDirection.MulScalarTo( kJumpStrength ) );m_jumping = true;
m_animationController.SetEndOfAnimCallback( null );
}
}
代码会在玩家周围随机选择位置:
// work out a new target velocity
var targetPos:Vector2 = m_platformer.m_Player.m_Pos.Add( Vector2.RandomRadius( 100 ) );
如此设置是为了避免同时有多个骷髅着落在相同的地点上,这看起来显得很不自然。然后,这个目标地点会被转化成单位长度方向矢量,从骷髅指向玩家:
var playerUnitDirection:Vector2 = targetPos.SubFrom( m_pos ).UnitTo( );
但是,当物体在跳跃时,应当会产生向上的位置,所以我将矢量的Y轴值设为-2。这会打破单位长度限制,所以我必须重新将其正常化:
// must jump upwards!
playerUnitDirection.m_y = -2;// re-normalise
playerUnitDirection.UnitTo( );
之所以要将值设定为-2而不是-1或其他数值,是因为这会强迫最终矢量会大部分指向上方,几乎没有侧向动作。如果我将值设为-1,动作的传播会更广。
你可以使用这样的正常化来制作不同的传播样式,随机单位质量被添加到已知的固定方向矢量中,然后正常化。我过去曾用这种技术来制作粒子系统的散发性传播,先随机确定单位半球中的点,在加上某些预定的前进方向,然后将其正常化。
通过设定骷髅的速度和清除动画反馈,我实现了骷髅的跳跃:
// jump towards player
m_vel.AddTo( playerUnitDirection.MulScalarTo( kJumpStrength ) );m_jumping = true;
m_animationController.SetEndOfAnimCallback( null );
结语
这是2D平台游戏制作教程的最后一篇,我希望能够对你有所帮助!
游戏邦注:本文发稿于2011年12月20日,所涉时间、事件和数据均以此为准。(本文为游戏邦/gamerboom.com编译,拒绝任何不保留版权的转载,如需转载请联系:游戏邦)
How to make a 2d Platform Game – part 3 ladders and AI
Paul Firth
Hello and welcome back to my blog!
This is part 3 in a series of articles where I talk about how to go about making a 2d platform game like this one:
In this particular episode I’m going to talk about the horror of Ladders and the joy of AI.
Ladders
Ok, so ladders are a complete pain in the ass on all fronts! The reason being is that they represent a discontinuity in control mechanism and physics response.
The player must transition from walking along in an environment where they experience gravity and can jump to one where they do not and cannot jump. On top of that, you have several different methods of starting the climb:
Walking along the floor and joining the bottom of a ladder
Walking along the top of a platform and joining the top of a ladder
Landing on the middle of the ladder after falling or doing a jump
So why have these distinctions?
Walking along the floor and joining the bottom of a ladder
You don’t want to walk past the bottom of a ladder and automatically start climbing it, so that means you must have a special case for being at the bottom of the ladder and pressing up (which would normally have jumped you).
Walking along the top of a platform and joining the top of a ladder
Again, you don’t want to start climbing down a ladder just by walking over the very top of one, or indeed by landing on the top, so you need a special case for pressing down while being on the top of the ladder. Additionally, this is made even more of a pain because this is the only instance in the game where the player can pass down through a platform (in order to join the ladder).
Landing on the middle of the ladder after falling or doing a jump
I did wrestle with this idea and for a while I had it set so you couldn’t land on the middle of a ladder but after a while of playing I realised this was going to be too fiddly for the player and might lead to a bad play experience. Landing on the middle of the ladder is tricky because it has to act exactly like a platform, but a platform which exists at whatever pixel you land. Also, it represents yet another transition from normal falling to ladder climbing.
Ladder tile types
I have two different tiles which represent a ladder:
The middle section and:
The top part. The top part is special since it acts like a jump through platform and a ladder, depending on where the player is in relation to it.
Solving the problem
In order to address each of these issues I found I needed to track a fair amount of state and transitions between state.
The variable m_collideLadder is updated every frame and represents the ladder tile type that the player is currently colliding with (i.e. player’s centre point is within the AABB of the tile). It can either be eTileTypes.kLadderMid, eTileTypes.kLadderTop, or eTileTypes.kInvalid when not colliding with a ladder tile.
In addition I have:
This tracks the last state of m_collideLadder, so whenvever m_collideLadder changes, the previous state is stored in m_oldCollideLadder. This allows me to detect transitions between colliding with the ladder and not.
In particular the case where the player lands on the middle of a ladder by falling or jumping looks like this:
You should be able to see that part where this transition is picked up, and the kLandAnim animation gets played.
This is set when the player is confirmed as climbing the ladder; in this event a special case control mechanism will take over from the normal gravity/friction behaviour which actually enables the climbing itself.
This is set by the collision system when the player is confirmed as being on the top of a ladder – this has a dual purpose; it lets me have a special case so I can apply the same collision logic as I would do when standing on a jump-through platform and it also allows me to detect the down arrow in the player input control mechanism as an indication that the player wants to join the ladder at the top.
This is set when joining the ladder at the top and allows the collision system to ignore the ladder top tile until the player is confirmed as having his centre point in the AABB of any ladder tile.
This causes the player to fall briefly down until they start colliding with the middle of the ladder tile, where collision is then re-enabled.
Special ladder physics
I covered the regular collision response code in the last article (the part where friction is applied etc). When m_climbLadder is set, this code is ignored and some new code takes over.
The player has a special variable called m_velTarget which is 0,0 by default and only comes into use when we’re confirmed as being on a ladder. This gets set to the maximum player speed in the X or Y axis inside the player input system when the player is moving left/right or up/down and is on a ladder.
The main body of the code tries to alter the player’s actual velocity (which is Player.m_vel) towards this new target velocity, and to prevent the player from arriving at the target velocity too quickly there is a special Player.kLadderStayStrength constant. This prevents the ladder movement from contrasting with the player’s movement in the rest of the game.
The full code looks like this:
The relevant part is at the bottom.
What’s going on in the above code? Well, once we’re inside the condition:
Then we’re actually doing the ladder physics. First of all we work out the difference between our current velocity and the desired velocity:
Then, if the length of this vector is longer than our ladder stay strength amount (i.e. the movement is too much to do in one frame), we have to clamp the movement so its just as much as we’re allowed to move by the constant kLadderStayStrength:
Once this has been clamped we add this delta to our velocity vector and we’re done:
Once the player stops colliding with a ladder tile, the normal collision resolution code takes over again and we’re done with ladders completely!
The joy of AI
I really enjoyed working on the AI for this demo because it went so amazingly smoothly, nearly everything I wanted to try worked first time. It was refreshing after all the messing around with the ladder stuff; you learn to enjoy these small victories after you’ve been programming for a while because they’re so rare.
Lets have another look at the class hierarchy I showed in the last article:
The complete AI hierarchy is shown as the yellow branch which inherits from Character.
Enemy, the base class
Ok, so lets have a look at the base class which all enemies derive from:
It requires any concrete implementations to define a couple of attributes: m_WalkSpeed and m_KillsOnTouch. m_WalkSpeed is used in the constructor and as the name suggests is the speed at which the enemy walks. m_KillsOnTouch is used in the collision detection system and defines whether this particular enemy will kill the player on touch.
All enemies are required to provide a couple of animations with specific names which are referenced in this base class (or in Character from which this derives):
‘walkAnim’ – the walk animation this enemy has
‘hitAnim’ – the animation to play when this enemy is punched by the player
The individual enemy types may well provide additional animations, but the above is the bare minimum.
The other function worth mentioning is Hurt() which is actually defined in Character. This is overridden here with a custom implementation which counts down a few frames, then triggers the ‘hitAnim’ and attaches a callback which will happen when the animation is done playing; this marks the enemy for deletion and also spawns a pick-up where the enemy was at the time.
Simple enemy
This is another shared, non-concrete class which encompasses the behaviour of two of the enemy types.
Their basic behaviour is to head in a constant direction until they encounter a special marker type which indicates they should reverse direction. This marker type is always mapped in the middle collision layer in the map along with all other AI stuff.
The marker itself gets a special tile (shown above) so the mapper (i.e me) can see where I’ve placed it in the map. At runtime, these tiles are turned invisible, or rather they don’t actually have any visual data exported with them.
The above shows them in a level in Mappy.
The relevant code is for this behaviour is:
…which forms an AABB for the extents of the character and then calls out to the collision system to return all tiles which intersect with this AABB. The collision system then calls back to my callback function InnerCollide:
…this checks the tile type being collided with is of type eTileTypes.kReverseDirection, if so and if the enemy is heading towards this tile then we toggle the enemy’s direction and also have him face the opposite way. That last condition (which checks the enemy’s direction) is very important, otherwise it could be that the enemy is still going to be colliding with the same change direction marker next frame; this would lead to a very confused enemy who would toggle direction constantly.
For reference, here is the utility function to work out if an object is heading towards a point (in the X axis):
I’ve found this useful in a couple of places.
Star
This is where we really start to feel the benefit of all this abstraction.
Here is the complete implementation of this enemy:
As you can see, he is nothing more than three simple accessors which don’t even require an explanation! All the functionality is performed by the classes he derives from.
Ladybird
This one is a little more complex because he has a special behaviour where he pauses, plays an anim, emits another object, player another anim and then resumes his original motion.
Side note: I have no idea why we call this creature a ‘ladybird’ in the uk – logic dictates that ‘ladybug’ (the american name) is surely more fitting!
Lets have a look at the main update loop:
So, what’s going in here? Firstly we do some simple maths to determine whether the player is within some radius of the enemy. We also work out if the enemy is facing the player (after all, no point trying to attack the player if he’s behind you). If both of these conditions are true we decrement a counter, once this counter gets to 0, we trigger a sequence of animations via callbacks:
The first simply waits until the end of the current anim – this is to make sure the animation frames match up; since I designed the anims to follow on from each other.
When the above callback is called, we trigger the actual animation for spawning the spikes. This is done so the player knows to prepare themselves to get out of the way. I also pause the motion of the creature at this point, taking a note of what its original motion was so I can restore it afterwards.
Once the spawn spikes animation has finished, I actually spawn a new object, which is another very simple class which obeys gravity and does full collision but also kills on touch. I make sure it heads in the same direction that the original enemy is facing, make sure it appears behind this enemy and lastly play the fired animation which sets up the synchronisation to match with the frame the normal animation ended on.
Once the previous animation has finished, the firing action is complete, so we resume playing the regular walk animation, reset the counter and restore the original motion of the enemy.
The brain
This enemy type has a pretty simple behaviour as well: it kills on touch and it will move for a while, then pause for a while and then carry on. When it starts to move it heads towards wherever the player was at the time.
All the magic is within the Update function. As you can see there are a couple of simple timers which tick down depending on what mode the enemy is currently in (either m_think==true or not). When the think timer becomes less than 0, the enemy toggles modes and picks a direction to move.
This new direction takes the form of a velocity. This velocity is based on the vector from the enemy to the player, which is then made unit length and scaled by the kWalkSpeed of the enemy. This will cause the enemy to move in the direction of the player at a constant speed. Once he gets there he kills on touch.
The skeleton
This is the final AI character and has the most complex behaviour of them all.
Its all driven via the animations though, which makes it rather flexible.
Like in the case of the LadyBird there are a number of animations which all lead on from each other when played in sequence:
(His eyes just move left to right)
(Prepares to and then finally jumps – to give the player fair warning)
(Lands and deadly spikes protrude – he will kill on touch at this point)
The only part of the code which needs a special mention is where the skeleton is choosing which direction to jump in:
The code picks a random position around the player:
This was done to stop multiple skeletons from landing in the exact same spot too much, which looked unnatural. Then, this target position is turned into a unit length direction vector, which points from the skeleton towards the player:
But of course when jumping, one must always jump upwards, so I simply set the y axis of the vector to be -2. This then breaks the unit length constraint, so I have to renormalise again:
The reason it was -2 and not -1 or some other number is that this forces the final vector to be mostly pointing upwards with just a little side to side motion. If I’d chosen -1, it would have been a more even spread.
You can use normalisation like this to create different spread patterns, whereby a random unit vector is added to a known fixed direction vector, then renormalised. I’ve used this technique in the past to create an emission spread for a particle system which needed to emit particles in a cone formation; it was random point in a unit sphere plus some predefined forward direction (scaled as appropriate) and then renormalised.
Then I actually perform the jump by setting the skeleton’s velocity and clear the animation callback to reset the sequence:
And that’s it!
That concludes my series on how to make a 2d platformer, I hope you’ve enjoyed reading it! (Source: wildbunny.co.uk)
上一篇:叙事元素是反馈形式而非游戏机制


