


游戏测试过程之测试当日的工作内容
作者:Paul Sztajer
今天我们要谈论的是测试当天要做些什么。这里我们假设你进行的是现场测试,而非在线测试(前面我们已谈过测试目的,测试地点和测试族群,决定测评内容,定量测试,定性测试)。
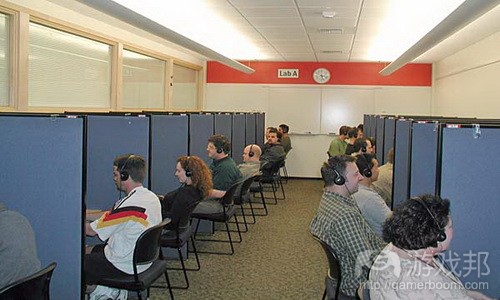
playtest lab from useit.com
步骤1:准备工作
这里的准备工作非常重要。你定希望自己能够拥有合适空间进行测试,让测试者处于舒服状态。
把测试工作安排成瞄准特定测试者的约定——你指定测试者的参与时间,告知他们测试过程的持续时间(游戏邦注:而不是让大批人同时参与,坐着干等)。下个约定应让你有充足时间进行重新设置,稍作休息。若你1天进行若干个测试,将会非常疲惫,所以能在各测试后缓口气非常重要。
必要准备工作:
* 测试所有设备两次
* 在测试者到达前打印所有表格
* 如果有可能,备份所用所有系统
* 准备好纸笔(即便采用自动记录,也不要忘记做笔记)
* 点心和饮料。这是非常重要的部分:你请别人测试你的游戏(内容也许还存在许多漏洞),所以至少在测试地提供些许食物。
* 设定计划。给工作内容设定时间表
完成准备工作,就进入下个步骤:测试工作本身。
步骤2:测试工作
在此之前,我简要说下人员安排:尤其是安排多少开发人员参与测试工作。一方面,只安排1位高级开发人员可能会让测试者感到压迫。另一方面,安排过少开发人员,这会让你错过某些内容。两位开发人员是个合理数量:一个开发者观察测试活动的屏幕,另一个观察测试者和他们的反应。
在实际测试过程中,最重要的是确保不要左右玩家。除非你特别想要教授玩家某些内容,要不就住口,让他们自己完成。只有在他们明显无法完成任务的情况下你才能告诉他们怎么做。
正确判断适当协助时机是个非常不易掌握的技能,你只能从经验中学习。
在测试开始前决定你想要观察的内容,将其记录下来,全心关注这些内容。若你瞄准其他内容,将会错失重要数据,最终只能获得较少有效数据。
如果你愿意的话,你还可以记录玩家的声音和视频,这会是非常有用的资源。但记住浏览所有记录内容会耗费很长时间,在紧张的开发周期,你可能无法进行这项工作。
另外,实际测试工作应遵守你的计划。你的目标是尽可能确保测试工作愉快进行(游戏邦注:也许你下次还会请他们测试其他作品),同时尽可能多地收集数据。
步骤3:后续工作
测试过后,你应腾出15分钟同团队其他成员回顾和讨论进展情况。凭直觉判断游戏所要进行的重要调整,以及你应该进行的改变。(本文为游戏邦/gamerboom.com编译,如需转载请联系:游戏邦)
Playtesting 106: On the Day
by Paul Sztajer
Reposted from www.throwthelookingglass.com
This is part 6 in a series on how to playtest games (part 1).
So it’s been a while since I’ve posted one of these, as we’ve recently taken on quite a few more people at Throw the Looking Glass and I’ve been doing a lot of work working out how to structure our studio going forward (more on this soon!). So sorry about the delay – I probably won’t be posting these quite as fast as I used to going forward, but I’ll aim for one a week.
Today, we’re going to look at what to do on the day of your playtest. This assumes you’re doing on-site testing rather than online testing (if you’re going with online, release it and see what happens!). So without further ado, let’s get started!
Step 1: The Prep
Preparation’s pretty important here. You really want to make sure you’ve got a decent space to playtest in, and that you’re able to make your testers as comfortable as you can.
Playtesting should be organised as an appointment for each specific tester – you specify a certain time for the playtester to come in, and tell them how long the test will take (as opposed to getting a whole lot of people in at once and making them wait). The next appointment should give you enough time to reset, take a breather etc. If you’re doing a number of playtests in a day, it’ll be a pretty tiring day, so it’s really good to give yourself some breathing space after each test.
Some stuff you need to make sure you do:
* Have your game in a stable state (it’s good to fix the featureset for a week or so to weed out bugs, though it almost never happens that way)
* Test all your equipment. Twice.
* Make sure any forms etc. are printed before your testers get there.
* If possible, have a backup for any systems you’re using
* Have pen and paper ready (even if you’re autorecording things, making notes is vital)
* Snacks and drinks. This is one of the most important things: you’re asking people to take time to test your game in its (possibly very buggy) state, so at least feed them while they’re there.
* Have a plan. Timetable what you’re doing when.
Now that we’ve done the prep, we’ll go onto the next part: the test itself.
Step 2: The Test
Before we go forward, I want to make a quick note about personnel: in particular, how many developers should run the playtest. On the one hand, having a high developer:tester ratio can make be intimidating to the playtesters. On the other, too few developers and you’ll miss things. Generally, having two developers at a test is a good number: one developer can look at the screen for play events, while the other can look at the tester and their reactions.
During the actual test, the most important thing is to make sure you don’t lead the player on. Unless you’ve specifically decided to teach the player something, SHUT UP and let them work it out for themselves. You should only tell them what to do if it’s patently obvious that they’re not going to work something out themselves.
Working out when and when not to help the tester is an incredibly hard skill to learn, and you’ll only learn it from experience.
Decide before the test starts exactly what you want to monitor and note down, and monitor exactly that and no more. If you start looking for other things, you’ll end up missing important data and then you’ll end up having less usable data than you need.
If you like, you can also record audio and video of the players, as this can be a really useful resource. HOWEVER, realise that going through all of the recordings takes a long time, and there’s a decent chance you’ll never get to it in a busy development cycle.
Otherwise, the actual test should be a matter of just following your plan. Your goal is to make the tests as enjoyable for the players as possible (as you probably want them to want to test your game again later), while gathering as much data as you can.
Step 3: Afterwards
Straight after the test, you should really take 15 minutes or so to go over and/or discuss what happened with the rest of your team. Work out what your gut instinct is on the most important changes to your game, and work out what you think you should change. When we look at analysis next, we’ll be examining how you can confirm these gut instincts.
Then, have a rest. Have a drink. It’ll have been a long day, so take the rest of it off!
That’s it for this time – next time, we’ll start looking at analysis.(Source:gamasutra)
下一篇:编程游戏可助新手掌握现实编程方法

")
")
")
")


 闽公网安备35020302001549号