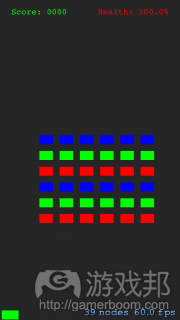
如何用Sprite Kit制作《太空入侵者》(1)
作者:Joel Shapiro
《太空入侵者》是游戏史上具有重大意义的一款游戏。这款由西角友宏(Tomohiro Nishikado)制作的游戏于1978年由Taito Corporation发行,收益达数十亿美元。它成为一种文化符号,吸引无数并不擅长玩游戏的人把游戏当成爱好。(请点击此处阅读本文第2部分)
当年,《太空入侵者》是一款街机游戏,卷走了那一代玩家不少零花钱。后来Atari 2600家用游戏机上市,《太空入侵者》成为拉到Atari硬件销量的“杀手级应用”。
(原版《太空入侵者》是一款街机游戏)
在本教程中,我将教大家如何用Sprite Kit制作一款iOS版的《太空入侵者》。Sprite Kit是随iOS 7一起推出的2D游戏框架。
为了学习本教程,你必须熟悉Sprite Kit的基础。否则,你最好先学习一下Sprite Kit的入门教程。
另外,为了实现本教程的大部分效果,你需要一部运行iOS7的iPhone或iPod Touch和一个Apple开发者帐号。因为你需要使用iOS模拟器不具有的加速计来使飞船移动,如果你没有iOS7设备或开发者帐号,虽然你仍然可以完成本教程,但你的飞船将不能移动。
言归正传,我们开始制作外星人吧!
开始
苹果提供了叫作Sprite Kit Game的XCode 5模板。对于从无到有制作游戏,Sprite Kit Game是非常实用的。然而,为了让你更快上手,你要先下载本教程的初始项目。它是以Sprite Kit模板为基础的,已经帮你做完一些单调乏味的工作。
下载并解压这个项目后,找到SKInvaders目录,双击SKInvaders.xcodeproj,在Xcode中打开这个项目。
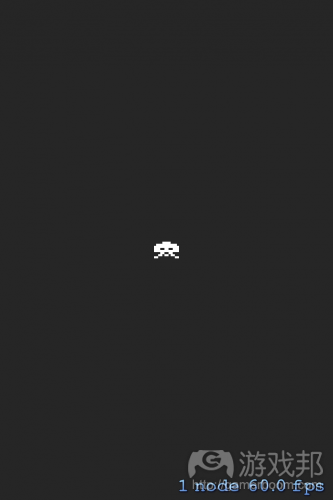
点击Xcode工具条(左上角的第一个按钮)上的Run按钮,创建并运行这个项目;或者使用键盘快捷键Command + R。你应该能看到以下屏幕出现在你的设备或模拟器上:
异形——这个外星入侵者正是看着你!然而,如果你看到以上屏幕,那么你就可以看下面的内容了。
GameScene的作用
为了完成你的《太空入侵者》,你要编写几个独立的游戏逻辑;本教程将是一个非常好的构建和精炼游戏逻辑的练习。它还能帮助你巩固理解如何将Sprite Kit元素组装在一起以产生游戏中的活动。
我们来看看这款游戏是如何设置的。打开GameViewController.m,向下滚动到viewDidLoad。这个方法是所有UIKit应用的关键,在GameViewController将它的视图加载到内存后运行。它的作用是,作为运行时进一步自定义应用UI的地点。
看看viewDidLoad的有趣的部分:
- (void)viewDidLoad
{
// … omitted …SKView * skView = (SKView *)self.view;
// … omitted …
//1 Create and configure the scene.
SKScene * scene = [GameScene sceneWithSize:skView.bounds.size];
scene.scaleMode = SKSceneScaleModeAspectFill;//2 Present the scene.
[skView presentScene:scene];
}
以上代码创建和以如下顺序显示场景(scene):
1、制作具有相同尺寸的场景作为它的封闭视图。scaleMode确保这个场景的大小足以充满整个视图(view)。
2、呈现这个场景,把它绘制在屏幕上。
当GameScene显示在屏幕上后,它取代GameViewController并驱动游戏的其他部分。
打开GameScene.m,看看它的结构是怎么样的:
#import “GameScene.h”
#import “GameOverScene.h”
#import <CoreMotion/CoreMotion.h>#pragma mark – Custom Type Definitions
#pragma mark – Private GameScene Properties
@interface GameScene ()
@property BOOL contentCreated;
@end@implementation GameScene
#pragma mark Object Lifecycle Management
#pragma mark – Scene Setup and Content Creation
- (void)didMoveToView:(SKView *)view
{
if (!self.contentCreated) {
[self createContent];
self.contentCreated = YES;
}
}- (void)createContent
{
// … omitted …
}#pragma mark – Scene Update
- (void)update:(NSTimeInterval)currentTime
{
}#pragma mark – Scene Update Helpers
#pragma mark – Invader Movement Helpers
#pragma mark – Bullet Helpers
#pragma mark – User Tap Helpers
#pragma mark – HUD Helpers
#pragma mark – Physics Contact Helpers
#pragma mark – Game End Helpers
@end
你应该注意到这里有许多#pragma mark-XXX型的语句。这些叫作“编译程序指令”(compiler directives),因为它们控制编译器。这些特殊的pragma(编译器指令)的唯一作用就是让源文件易更容易查找。
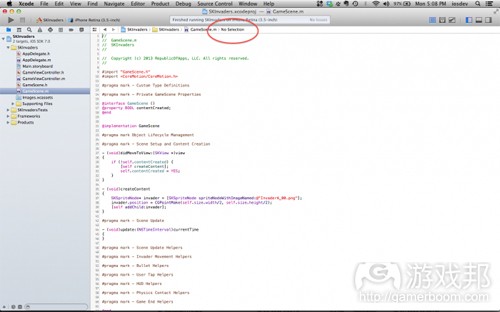
你是不是想问,pragma如何使源文件更容易查找?注意GameScene.m旁边写的是“No Selection”,如下图所示:
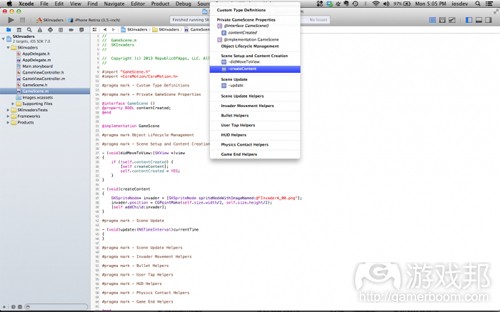
如果你点击“No Selection”,会弹出一个小菜单,如下图所示:
那就是你的所有pragma的列表!点击任意pragma,就会跳到文件的那个部分。这个特征现在看起来还不太有用,但当你添加大量“消灭入侵者”的代码后,你就会觉得这些pragma非常非常实用了!
制作太空入侵者
在你开始写代码前,先想一想GameScene类。它在什么时候初始化和呈现在屏幕上?什么时候最适合在屏幕上出现它的内容?
你可能会想到场景的初始化程序initWithSize:正好满足需要,但这个场景可能不能按初始化程序运行的时间完全配置。所以最好是当场景已经被视图展示出来时再做一个场景的容器,因为在那时,场景运行的环境已经“准备就绪”。
视图触发场景的didMoveToView:方法,使场景呈现在游戏世界中。找到didMoveToView:,你会看到如下代码:
- (void)didMoveToView:(SKView *)view
{
if (!self.contentCreated) {
[self createContent];
self.contentCreated = YES;
}
}
这个方法用BOOL属性contentCreated调用createContent,确保你不会二次创建场景的内容。
这个属性是在靠近文件开头部分的Objective-C类拓展中定义的:
#pragma mark – Private GameScene Properties
@interface GameScene ()
@property BOOL contentCreated;
@end
正如pragma指出的,这个类拓展允许你给GameScene类添加“专用”属性,而不展现给其他外部类或代码。你仍然得到使用Objective-C属性的好处,但你的GameScene状态是在内部保存的,不能被其他外部类虚位修改。同样地,它不会混杂你的其他类看到的数据类型的命名空间。
你可以在你的文件中定义重要的常量为专用定义。找到 #pragma mark – Custom Type Definitions后添加如下代码:
//1
typedef enum InvaderType {
InvaderTypeA,
InvaderTypeB,
InvaderTypeC
} InvaderType;//2
#define kInvaderSize CGSizeMake(24, 16)
#define kInvaderGridSpacing CGSizeMake(12, 12)
#define kInvaderRowCount 6
#define kInvaderColCount 6
//3
#define kInvaderName @”invader”
以上类型定义和常量定义负责的任务如下:
1、定义敌人的可能类型。你之后可以在switch声明中使用这个,也就是当你需要做如展示各类敌人的不同sprite图象时。typedef也使InvaderType成为正式的Objective-C类型,它是用于方法参数和变量的类型检查。这保证你不会漏掉错误的方法参数或把它赋给错误的变量。
2、定义敌人的大小,和确保它们按横行竖列的布局出现在屏幕上。
3、定义名称,当在屏幕上搜索敌人时,你将使用它来确定敌人。
像这样定义常量比使用数字如6或字符串@“invader”来得好(容易拼写错误)。想象一下当你想打@“invader”时却误输入@“Invader”,然后花了数小时寻找一个简单但却把一切都搞砸了的错字。使用像kInvaderRowCount和kInvaderName这样的常量可以防止令人沮丧的bug,以及方便其他程序员理解这些常量的意思。
现在可以做“入侵者”了!添加如下方法到GameScene.m,就接在createContent之后:
//1
SKColor* invaderColor;
switch (invaderType) {
case InvaderTypeA:
invaderColor = [SKColor redColor];
break;
case InvaderTypeB:
invaderColor = [SKColor greenColor];
break;
case InvaderTypeC:
default:
invaderColor = [SKColor blueColor];
break;
}//2
SKSpriteNode* invader = [SKSpriteNode spriteNodeWithColor:invaderColor size:kInvaderSize];
invader.name = kInvaderName;return invader;
}
makeInvaderOfType:,顾名思义,创造给定类型的入侵者的sprite。以上代码的作用是:
1、使用invaderType参数确定入侵者的颜色。
2、调用SKSpriteNode的spriteNodeWithColor:size:方法来分配和初始化sprite,sprite渲染为具有给定颜色invaderColor和大小kInvaderSize的矩形。
好吧,所以有色方块并不能代表我们所想象中的凶残的敌人。你可能会有冲动先设计入侵者sprite图像,然后就幻想着可以动画化它们的所有好方法,但最好的办法其实是专心做好游戏逻辑先,再来关心美术方面。
添加makeInvaderOfType:还不足以在屏幕上表现入侵者。你需要一些东西来调用makeInvaderOfType:,然后把新创造的sprites放在场景里。
仍然是在GameScene.m,把以下方法直接添加到makeInvaderOfType:之后:
-(void)setupInvaders {
//1
CGPoint baseOrigin = CGPointMake(kInvaderSize.width / 2, 180);
for (NSUInteger row = 0; row < kInvaderRowCount; ++row) {
//2
InvaderType invaderType;
if (row % 3 == 0) invaderType = InvaderTypeA;
else if (row % 3 == 1) invaderType = InvaderTypeB;
else invaderType = InvaderTypeC;//3
CGPoint invaderPosition = CGPointMake(baseOrigin.x, row * (kInvaderGridSpacing.height + kInvaderSize.height) + baseOrigin.y);//4
for (NSUInteger col = 0; col < kInvaderColCount; ++col) {
//5
SKNode* invader = [self makeInvaderOfType:invaderType];
invader.position = invaderPosition;
[self addChild:invader];
//6
invaderPosition.x += kInvaderSize.width + kInvaderGridSpacing.width;
}
}
}
以上方法把入侵者按横行竖列布局在屏幕上。每行只有一种类型的入侵者。这个逻辑似乎很复杂,但如果你把它分解开来,就容易理解了:
1、行循环。
2、根据行数给这一行的所有入侵者选择一个InvaderType。
3、以同样的方法算出这一行的第一个入侵者应该出现的位置。
4、列循环。
5、给当前行和列生成入侵者,并添加到场景中。
6、更新invaderPosition,这样下一个入侵者就不会错位了。
现在,你只需要把这些入侵者展示在屏幕上。用以下代码替换createContent中的当前代码:
[self setupInvaders];
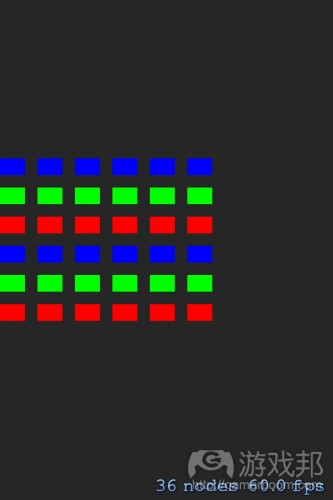
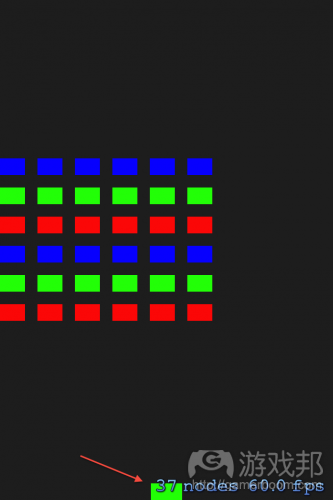
创建并运行你的应用,你看到的入侵者布局应该如下图所示:
制作飞船
当这些邪恶的入侵者出现在屏幕上时,你的正义飞船不能离得太远。与入侵者的做法一样,首先必须定义一些常量。
添加如下代码到#define kInvaderName语句之后:
#define kShipSize CGSizeMake(30, 16)
#define kShipName @”ship”
kShipSize表示飞船的大小,kShipName表示飞船的名称。
接着添加如下两个方法到setupInvaders:后面:
-(void)setupShip {
//1
SKNode* ship = [self makeShip];
//2
ship.position = CGPointMake(self.size.width / 2.0f, kShipSize.height/2.0f);
[self addChild:ship];
}-(SKNode*)makeShip {
SKNode* ship = [SKSpriteNode spriteNodeWithColor:[SKColor greenColor] size:kShipSize];
ship.name = kShipName;
return ship;
}
以下是上述两个方法的作用:
1、使用makeShip生成飞船。你可以简单地重复使用makeShip,如果之后你需要制作另一个飞船的话(即如果当前飞船被外星人摧毁,且玩家还有剩余“命数”)。
2、把飞船放在屏幕上。在Sprite Kit中,源头是在屏幕的左下角。anchorPoint是座标为(0,0)位于sprite区域左下方和座标为(1,1)、右上方的unit square。因为有默认的anchorPoint(0.5, 0.5),即它的中心就是飞船所在位置的中心。把飞船放在kShipSize.height/2.0f ,意味着飞船将一半露出来。如果你查看公式,你会看到飞船的底部与屏幕的底部完全一致。
为了使飞船出现在屏幕上,添加如下语句到createContent的底部:
[self setupShip];
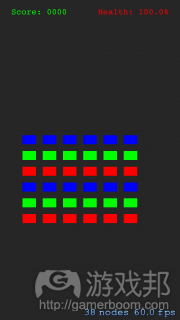
创建和运行你的应用,你应该看到飞船在在屏幕上,如下图所示:
不要怕,地球人,你的飞船正在保护你们!
添加HUD
如果不能看到得分,玩这样的《太空入侵者》也没什么意思,对吧?接下我们要给游戏添加HUD。作为一个守护地球的太空战士,你的表现会受到指挥官的监视。他们对你的“技术(得分)”和“战备(命值)”都非常关心。
添加如下常量到GameScene.m的开头部分,也就是在#define kShipName的下方:
#define kScoreHudName @”scoreHud”
#define kHealthHudName @”healthHud”
现在,通过插入以下方法到makeShip后面,添加你的HUD:
-(void)setupHud {
SKLabelNode* scoreLabel = [SKLabelNode labelNodeWithFontNamed:@"Courier"];
//1
scoreLabel.name = kScoreHudName;
scoreLabel.fontSize = 15;
//2
scoreLabel.fontColor = [SKColor greenColor];
scoreLabel.text = [NSString stringWithFormat:@"Score: %04u", 0];
//3
scoreLabel.position = CGPointMake(20 + scoreLabel.frame.size.width/2, self.size.height – (20 + scoreLabel.frame.size.height/2));
[self addChild:scoreLabel];SKLabelNode* healthLabel = [SKLabelNode labelNodeWithFontNamed:@"Courier"];
//4
healthLabel.name = kHealthHudName;
healthLabel.fontSize = 15;
//5
healthLabel.fontColor = [SKColor redColor];
healthLabel.text = [NSString stringWithFormat:@"Health: %.1f%%", 100.0f];
//6
healthLabel.position = CGPointMake(self.size.width – healthLabel.frame.size.width/2 – 20, self.size.height – (20 + healthLabel.frame.size.height/2));
[self addChild:healthLabel];
}
这是在屏幕上创建和添加文本标签的样板代码。相关的要点如下:
1、给得分标签一个名称,这样之后当你需要更新显示的得分时,你就能找到它了。
2、把得分标签设为绿色。
3、把得分标签放在屏幕的左上方。
4、给命值标签一个名称,这样之后当你需要更新显示的命值时,你就能找到它了。
5、把命值标签设为红色;红色和绿色是这类指示器的常用颜色,且容易与混乱的战斗元素区别开来。
6、把命值标签放在屏幕的右上方。
添加如下语句到createContent底部,以调用HUD的设置方法:
[self setupHud];
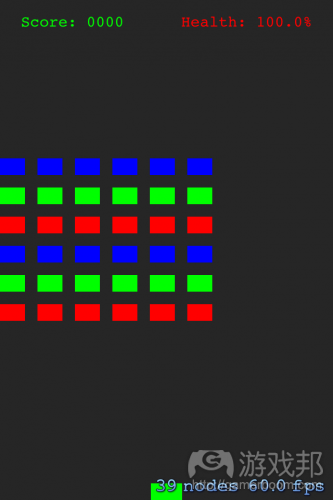
创建并运行你的游戏,你应该如下图所示的屏幕:
入侵者?做好了。飞船?做好了。HUD?做好了。现在你所需要的是把它们都关联起来的动态活动!
添加入侵者的活动
为了把你的游戏渲染到屏幕上,Sprite Kit使用了game loop,它能够不断地搜索需要屏幕上的元素更新的状态变化。这个game loop有几个作用,但你你应该对更新你的场景的机制有兴趣。你要重载update:方法,它是你的GameScene.m文件的存根。
当你的游戏顺畅运行,渲染效率为60帧每秒(游戏邦注:iOS设备能支持的最大值为60fps),update:会以这个速度调用。这时候可以修改场景的状态,如改变得分、移除死亡的侵略者的图形或移动飞船。
你将使用update:让侵略者在屏幕上横向和纵向移动。第一次Sprite Kit调用update:,就像在问你“你的场景改变了吗?”、“你的场景改变了吗?”……回答这个问题是你的工作—-你通过写代码回答这个问题。
在GameScene.m的开头,即InvaderType枚举的定义下插入以下代码:
typedef enum InvaderMovementDirection {
InvaderMovementDirectionRight,
InvaderMovementDirectionLeft,
InvaderMovementDirectionDownThenRight,
InvaderMovementDirectionDownThenLeft,
InvaderMovementDirectionNone
} InvaderMovementDirection;
入侵者有固定的移动模式:右,右,下,左,左,下,右,右……所以你要使用InvaderMovementDirection来追踪侵略者的模式进度。例如,InvaderMovementDirectionRight意思是入侵者在右边,移动模式的右半部分。、
接着,在这个相同的文件中找到类拓展,并插入以下属性到已有的contentCreated的属性下方:
@property InvaderMovementDirection invaderMovementDirection;
@property NSTimeInterval timeOfLastMove;
@property NSTimeInterval timePerMove;
添加以下代码到createContent的开头:
//1
self.invaderMovementDirection = InvaderMovementDirectionRight;
//2
self.timePerMove = 1.0;
//3
self.timeOfLastMove = 0.0;
这个一次性设置代码初始化入侵者的移动:
1、一开始,入侵者向右移动。
2、入侵者每秒移动一步。即向左、向右或向下移动都需要1秒钟的时间。
3、入侵者还没移动,即设置时间为0.
现在,你就要让入侵者移动起来了。添加以下代码到#pragma mark – Scene Update Helpers下面:
// This method will get invoked by update:
-(void)moveInvadersForUpdate:(NSTimeInterval)currentTime {
//1
if (currentTime – self.timeOfLastMove < self.timePerMove) return;//2
[self enumerateChildNodesWithName:kInvaderName usingBlock:^(SKNode *node, BOOL *stop) {
switch (self.invaderMovementDirection) {
case InvaderMovementDirectionRight:
node.position = CGPointMake(node.position.x + 10, node.position.y);
break;
case InvaderMovementDirectionLeft:
node.position = CGPointMake(node.position.x - 10, node.position.y);
break;
case InvaderMovementDirectionDownThenLeft:
case InvaderMovementDirectionDownThenRight:
node.position = CGPointMake(node.position.x, node.position.y - 10);
break;
InvaderMovementDirectionNone:
default:
break;
}
}];//3
self.timeOfLastMove = currentTime;
}
这是以上代码的故障:
1、如果还没到移动的时间,就退出该方法。moveInvadersForUpdate:每秒调用60次,但你不希望入侵者移动得这么频繁,因为这个速度对正常人来说太快了。
2、你的场景把所有入侵者保存为子节点;你使用setupInvaders的addChild:把它们添加到场景,用它的名称属性识别各个入侵者。调用kInvaderName;这使循环跳过你的飞船和HUD。块移动的作用是向右、左或下移动入侵者10像素,取决于invaderMovementDirection的值。
3、记录入侵者的移动,这样当这个方法下次调用时,侵略者就会再次移动,直到规定的一秒时间周期走完。
为了让入侵者移动,用以下代码替换已存在的update:方法:
-(void)update:(NSTimeInterval)currentTime {
[self moveInvadersForUpdate:currentTime];
}
创建并运行你的应用;你应该看到入侵者缓慢地通过屏幕。继续观察,你最终会看到以下屏幕:
什么情况?为什么入侵者消失了?也许这些侵略者没有你想的那么可怕!
入侵者还不知道当触到操作区域的边缘时,自己必须向下移动并改变方向一次。看来你得帮助这些侵略者找到路了!
控制入侵者的方向
添加如下代码到 #pragma mark – Invader Movement Helpers后面:
-(void)determineInvaderMovementDirection {
//1
__block InvaderMovementDirection proposedMovementDirection = self.invaderMovementDirection;//2
[self enumerateChildNodesWithName:kInvaderName usingBlock:^(SKNode *node, BOOL *stop) {
switch (self.invaderMovementDirection) {
case InvaderMovementDirectionRight:
//3
if (CGRectGetMaxX(node.frame) >= node.scene.size.width - 1.0f) {
proposedMovementDirection = InvaderMovementDirectionDownThenLeft;
*stop = YES;
}
break;
case InvaderMovementDirectionLeft:
//4
if (CGRectGetMinX(node.frame) <= 1.0f) {
proposedMovementDirection = InvaderMovementDirectionDownThenRight;
*stop = YES;
}
break;
case InvaderMovementDirectionDownThenLeft:
//5
proposedMovementDirection = InvaderMovementDirectionLeft;
*stop = YES;
break;
case InvaderMovementDirectionDownThenRight:
//6
proposedMovementDirection = InvaderMovementDirectionRight;
*stop = YES;
break;
default:
break;
}
}];//7
if (proposedMovementDirection != self.invaderMovementDirection) {
self.invaderMovementDirection = proposedMovementDirection;
}
}
以下是这段代码的作用:
1、因为块获取入侵者是按默认的const(常量,意味着它们是不可以修改的),你必须用 __block限制proposedMovementDirection,这样你才可以在//2中修改它。
2、循环屏幕上的所有入侵者,用作为参数的侵略者调用块。
3、如果入侵者的右边在屏幕的右边缘的1点内,这就要移出屏幕。设置proposedMovementDirection,这亲入侵者就会先下移动再向左移动。你比较入侵者的帧(游戏邦注:包含它在场景的座标系的内容的帧)和这个场景的宽度。因为这个场景有一个默认(0,0)座标的anchorPoint,被缩放以充满它的父视图,这个比较保证你测试入侵者是否触到视图的边缘。
4、如果入侵者的左边缘在屏幕的左边缘的1点内,它就要称出屏幕。设置proposedMovementDirection迪样侵略者就先向下再向右移动。
5、如果入侵者正在向下然后向左移动,这时它们已经向下移动了,所以它们现在应该向左移动。当你把determineInvaderMovementDirection和moveInvadersForUpdate:结合起来时,这是如何运作的就显得非常明显了。
6、如果入侵者正在向下然后向右移动,这时它们已经向下移动了,所以它们现在应该向右移动。
7、如果这种计划的入侵者移动方向不同于当前入侵者移动方向,那么就用计划的方向更新当前方向。
添加以下代码到moveInvadersForUpdate:中的determineInvaderMovementDirection,就是在self.timeOfLastMove的条件检查之后:
[self determineInvaderMovementDirection];
为什么添加determineInvaderMovementDirection的调用到检查self.timeOfLastMove之后很重要?那是因为你希望入侵者移动方向只当侵略者确实正在移动时才改变。入侵者只有当检查self.timeOfLastMove——即这个条件表达式为真时,通过进才移动。
如果你添加以上这一行新代码到moveInvadersForUpdate:的第一行,会怎么样呢?如果你那么做了,会出现两个bug:
1、更新移动方向太频繁——60帧每秒,当你知道它可以每秒只改变一次时。
2、入侵者永远不会向下移动,因为从InvaderMovementDirectionDownThenLeft到InvaderMovementDirectionLeft的状态过渡在二者之间没有入侵者移动时才发生。通过检查self.timeOfLastMove的moveInvadersForUpdate:的下一次调用会有self.invaderMovementDirection == InvaderMovementDirectionLeft执行,并保持入侵者向左移动,跳过向下移动。类似的bug会因InvaderMovementDirectionDownThenRight和InvaderMovementDirectionRight而存在。
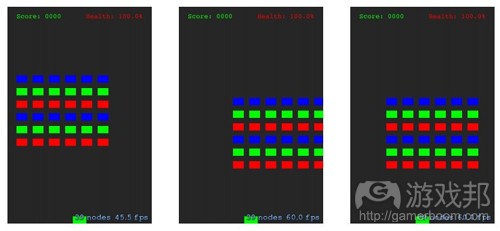
创建和运行你的应用,你会看到入侵者正如期望的那样横向和纵向移动。如下图所示:
注:你可能已经注意到,入侵者的移动有些不顺。那是因为你的代码每秒移动入侵者一次——移动距离是适合的。但原版游戏的移动是不顺的,所以保持这个特征可以让你的游戏看起来更正宗。
添加飞船的活动
好消息:你的监督者现在可以看到入侵者的移动,决定你的飞船必须有一个推进系统!为了提高效率,任何优秀的推进系统都必须有良好的操作系统。换句话说,作为飞行员的你如何让飞船的推进系统知道你想做什么?
务必记住,手机游戏不是电脑/街机游戏,所以电脑/街机操作方法不能照搬到手机上。
在电脑/街机版的《太空入侵者》中,你有一个控制飞船移动的实体操作杆和射击入侵者的发射键。而手机设备如iPhone或iPad就不是这样了。
有些游戏企图使用虚拟操作杆或虚拟D板,但我认为这些方法很少能管用。
想一想你通常是如何使用你的iPhone的:用一只手托着它,用另一只手点击/滑动屏幕。
记住一手托iPhone的人体工学,思考几种可能的飞船移动和开火的操作模式:
触击一下就是移动飞船同,触击两下就是发射加农炮:
假设当你触击一下飞船的左边,飞船就向左移,触击右边就向右移,触击两下飞船就开火。这个操作模式有几个缺点。
第一,用相同的方式识别单触击和双触击,需要延迟识别单触击直到双触击失败或失效。当你正在疯狂地触击屏幕时,这个延迟会使操作非常迟钝。第二,单触击和双触击有时候会很混乱。第三,当你的飞船接近屏幕的左边缘或右边缘时,就很难触击了。
滑动移动飞船,单触击开火:
这个方法稍好一些。单触击开火很合适,因为这个动作都是不连续的:一下触击相当于一次开火。很直观。滑动适合用来移动飞船吗?
不可行是因为滑动是一种不连续的动作。换句话说,无论你是滑动了还是滑动不到能当作滑动的长度,控制飞船向左向右移动的量都会打破玩家关于滑动及其功能的心理模型。在所有其他应用中,滑动是不连续的,滑动的长度是没有意义的。所以这种操作方式也不可行。
设备向左/右倾斜移动飞船,单触击开火:
单触击开火已经被确定是可行的。但倾斜设备来移动飞船呢?这是你的最佳选择,因为你已经用手掌托着手机,通过倾斜来移动你的飞船只需要手腕稍稍活动一下。
既然确定了操作方式,现在你可以想法通过倾斜移动你的飞船了。
用设备活动控制飞船移动
你可能对UIAccelerometer很熟悉,自可检测设备倾斜的iOS 2.0发布起,它就可以使用了。然而,iOS 5.0弃用UIAccelerometer了,所以iOS 7应用应该使用CMMotionManager,它是Apple的CoreMotion框架的一部分。
CoreMotion库已经被添加到初始项目中,所以你不必再添加一次了。
你的代码可以从CMMotionManager检索到数据,方法能两种:
把加速计数据挤入代码
在这种情况下,你提供带块的CMMotionManager,这个块可以经常调用加速计数据。这与你的场景的每秒60帧的update:方法不适合。你只想在这些项目中抽样加速计数据—-那些把戏可能不会与CMMotionManager决定把数据放进你的代码的活动一致。
从代码中抽出加速计数据
在这种情况下,你调用CMMotionManager且当需要时向它获取数据。把这些调用放在你的场景的update:方法中,与你的系统的记号排列一致。你将以每秒60次的速度取样加速计。所以不必担心延迟。
你的应用应该只使用一个CMMotionManager实例来保证你的获得最可靠的数据。为了达到那个效果,添加以下属性到你的类拓展:
@property (strong) CMMotionManager* motionManager;
现在,添加如下代码到didMoveToView:,就在self.contentCreated = YES;语句下面:
self.motionManager = [[CMMotionManager alloc] init];
[self.motionManager startAccelerometerUpdates];
这个新代码生成otion manager和accelerometer数据。在这时,你可以使用otion manager和它的accelerometer数据来控制飞船的移动。
添加如下方法到moveInvadersForUpdate:后面:
-(void)processUserMotionForUpdate:(NSTimeInterval)currentTime {
//1
SKSpriteNode* ship = (SKSpriteNode*)[self childNodeWithName:kShipName];
//2
CMAccelerometerData* data = self.motionManager.accelerometerData;
//3
if (fabs(data.acceleration.x) > 0.2) {
//4 How do you move the ship?
NSLog(@”How do you move the ship: %@”, ship);
}
}
仔细检查这个方法,你会发现:
1、从屏幕上获得飞船以便移动它。
2、从motion manager中获得accelerometer数据。
3、如果你的设备是用屏幕朝上和按键的主页键来调整方向的,那么向右倾斜设备会产生data.acceleration.x > 0,而向左倾斜产生data.acceleration.x < 0。这个检查结果0.2意味着设备被认为是完全平放的(data.acceleration.x == 0),只要它接近于0(data.acceleration.x的值落在[-0.2, 0.2]内)。0.2没有什么特殊的,它只是看起来对我管用。这种小技巧可以让你的操作系统更可靠,更少让玩家受挫。
4、你到底如何使用data.acceleration.x来移动飞船?你希望小值能将飞船移动一小段距离,大值移动一大段距离。答案是——下一部分将介绍的物质物理学!
通过物理学将动作控制变成移动
Sprite Kit有一个基于Box 2D的强大的内置物理系统,Box 2D可以模拟大量物理现象,如力、转化、旋转、碰撞和接触察觉。每一个SKNode和SKSpriteNode都有一个附属于它的SKPhysicsBody。这个SKPhysicsBody表示物理模拟。
添加如下代码到makeShip中的最后的return ship;之前:
//1
ship.physicsBody = [SKPhysicsBody bodyWithRectangleOfSize:ship.frame.size];
//2
ship.physicsBody.dynamic = YES;
//3
ship.physicsBody.affectedByGravity = NO;
//4
ship.physicsBody.mass = 0.02;
轮流看各个注释,你会发现:
1、创建与飞船同样大小的矩形物理刚体。
2、使形状具有动态,这使它能承受碰撞和其他外力作用。
3、你不希望飞船跌落到屏幕下方,所以你要指定它不受重力影响。
4、给飞船任意质量,这样它的移动会显得更自然。
现在用以下代码替换processUserMotionForUpdate:中的NSLog声明(接在注释//4后面):
[ship.physicsBody applyForce:CGVectorMake(40.0 * data.acceleration.x, 0)];
新代码把力在与data.acceleration.x相同的方向上赋给飞船的物理刚体。数字40.0是使飞船运行显得自然的随机值。
最后,添加如下代码到update:的开头:
[self processUserMotionForUpdate:currentTime];
你的新processUserMotionForUpdate:现在与场景更新一样,每秒被调用60次。
注:如果你已经在模拟器里测试了你的代码,现在可以切换到你的设备里测试了。你要等到在真正的设备上运行游戏才能测试倾斜代码。
创建并运行你的游戏,试着向左或向右倾斜你的设备,你的飞船会响应加速计,如下图所示:
你看到了什么?你的飞船飞出屏幕的边界,消失在黑暗的太空中。如果你向相反方向倾斜的时间够久,你可能会看到你的飞船又回来了。但现在,这样的操作太古怪,太敏感了。这样你是杀不死任何入侵者的!
在物理模拟阶段时,防止飞船飞出屏幕的简单更实用的方法是,给屏幕的边缘构建一个叫作edge loop的东西。它是没有体积和质量仍然能与你的飞船碰撞的物理刚体。你可以把它想象成围绕着屏幕的无限薄的墙体。
因为你的GameScene是一种SKNode,你可以给它的刚体创建一个edge loop。
添加以下代码到createContent,在[self setupInvaders];语句的前面:
self.physicsBody = [SKPhysicsBody bodyWithEdgeLoopFromRect:self.frame];
这个新代码物理刚体添加到你的场景。
创建并运行你的游戏,试试通过倾斜设备来控制飞船的移动:
你看到了什么?如果你倾斜设备够久,你的飞船会与屏幕的边缘碰撞。它不会再离开屏幕。问题解决了!
取决于飞船的势头,你可能也会看到飞船从屏幕的边缘反弹回来,而不是停在那里。这是Sprite Kit的物理引擎的另一个优点——restitution属性。反弹效果不仅看起来酷,而且可以让玩家清楚地知道屏幕边缘就是不可以越过的边界。
然后呢?
到目前为止,你已经制作了入侵者、飞船、HUD并把它们都绘制在屏幕上了。你还写好了让入侵者自动移动和使飞船随着设备倾斜移动的代码逻辑。
在本教程的第二部分,你将给飞船和入侵者添加开火动作,还有一些让你知道飞船什么时候击中侵略者的碰撞检测。你还要通过添加声音效果和用图像替换现在的有色矩形(作为点位符来表示入分侵者和飞船)来润饰你的游戏。(本文为游戏邦/gamerboom.com编译,拒绝任何不保留版权的转载,如需转载请联系:游戏邦)
How To Make a Game Like Space Invaders with Sprite Kit Tutorial: Part 1
by Joel Shapiro
Space Invaders is one of the most important video games ever developed. Created by Tomohiro Nishikado and released in 1978 by Taito Corporation, it earned billions of dollars in revenue. It became a cultural icon, inspiring legions of non-geeks to take up video games as a hobby.
Space Invaders used to be played in big game cabinets in video arcades, chewing up our allowances one quarter at a time. When the Atari 2600 home video game console went to market, Space Invaders was the “killer app” that drove sales of Atari hardware.
In this tutorial, you’ll build an iOS version of Space Invaders using Sprite Kit, the 2D game framework newly introduced in iOS 7.
This tutorial assumes you are familiar with the basics of Sprite Kit. If you are completely new to Sprite Kit, you should go through our Sprite Kit tutorial for beginners first.
Also, you will need an iPhone or iPod Touch running iOS 7 and an Apple developer account in order to get the most out of this tutorial. That is because you will be moving the ship in this game using the accelerometer, which is not present on the iOS simulator. If you don’t have an iOS 7 device or developer account, you can still complete the tutorial — you just won’t be able to move your ship.
Without further ado, let’s get ready to blast some aliens!
An original Space Invaders arcade cabinet
Getting Started
Apple provides an XCode 5 template named Sprite Kit Game which is pretty useful if you want to create your next smash hit from scratch. However, in order to get you started quickly, download the starter project for this tutorial. It’s based on the Sprite Kit template and already has some of the more tedious work done for you.
Once you’ve downloaded and unzipped the project, navigate to the SKInvaders directory and double-click SKInvaders.xcodeproj to open the project in Xcode.
Build and run the project by selecting the Run button from the Xcode toolbar (the first button on the top left) or by using the keyboard shortcut Command + R. You should see the following screen appear on your device or your simulator:
Creepy – the invaders are watching you already! However, if you see the screen above, this means you’re ready to move forward.
The Role of GameScene
To complete your Space Invaders game, you’ll have to code several independent bits of game logic; this tutorial will serve as a great exercise in constructing and refining game logic. It will also reinforce your understanding of how Sprite Kit elements fit together to produce the action in a game.
Most of the action in your game takes place in the stubbed-out GameScene class. You’ll spend most of this tutorial filling out GameScene with your game code.
Let’s take a look at how the game is set up. Open GameViewController.m and scroll down to viewDidLoad. This method is key to all UIKit apps and runs after GameViewController loads its view into memory. It’s intended as a spot for you to further customize your app’s UI at runtime.
Take a look at the interesting parts of viewDidLoad below:
- (void)viewDidLoad
{
// … omitted …
SKView * skView = (SKView *)self.view;
// … omitted …
//1 Create and configure the scene.
SKScene * scene = [GameScene sceneWithSize:skView.bounds.size];
scene.scaleMode = SKSceneScaleModeAspectFill;
//2 Present the scene.
[skView presentScene:scene];
}
The section of code shown above creates and displays the scene as follows:
First, create the scene with the same dimensions as its containing view. scaleMode ensures that the scene is large enough to fill the entire view.
Next, present the scene to draw it on-screen.
Once GameScene is on-screen, it takes over from GameViewController and drives the rest of your game.
Open GameScene.m and take a look at how it’s organized:
#import “GameScene.h”
#import “GameOverScene.h”
#import <CoreMotion/CoreMotion.h>
#pragma mark – Custom Type Definitions
#pragma mark – Private GameScene Properties
@interface GameScene ()
@property BOOL contentCreated;
@end
@implementation GameScene
#pragma mark Object Lifecycle Management
#pragma mark – Scene Setup and Content Creation
- (void)didMoveToView:(SKView *)view
{
if (!self.contentCreated) {
[self createContent];
self.contentCreated = YES;
}
}
- (void)createContent
{
// … omitted …
}
#pragma mark – Scene Update
- (void)update:(NSTimeInterval)currentTime
{
}
#pragma mark – Scene Update Helpers
#pragma mark – Invader Movement Helpers
#pragma mark – Bullet Helpers
#pragma mark – User Tap Helpers
#pragma mark – HUD Helpers
#pragma mark – Physics Contact Helpers
#pragma mark – Game End Helpers
@end
You’ll notice that there are a lot of #pragma mark – Something or Other type lines in the file. These are called compiler directives since they control the compiler. These particular pragmas are used solely to make the source file easier to navigate.
How do pragmas make source navigation easier, you ask? Notice the area in the bar next to GameScene.m that says “No Selection”, as below:
If you click on “No Selection”, a little menu pops up, as so:
Hey — that’s a list of all of your pragmas! Click on any pragma to jump to that section of the file. This feature doesn’t look like it has much value at present, but once you’ve added a bunch of invader-killing code, these pragmas will be a really…er… pragmatic way of navigating through your file! :]
Creating the Evil Invaders from Space
Before you start coding, take a moment to consider the GameScene class. When is it initialized and presented on screen? When is the best time to set up your scene with its content?
You might think the scene’s initializer, initWithSize: fits the bill, but the scene may not be fully configured or scaled at the time its initializer runs. It’s better to create a scene’s content once the scene has been presented by a view, since at that point the environment in which the scene operates is “ready to go.”
A view invokes the scene’s didMoveToView: method to present it to the world. Navigate to didMoveToView: and you’ll see the following:
- (void)didMoveToView:(SKView *)view
{
if (!self.contentCreated) {
[self createContent];
self.contentCreated = YES;
}
}
This method simply invokes createContent using the BOOL property contentCreated to make sure you don’t create your scene’s content more than once. This property is defined in an Objective-C Class Extension found near the top of the file, as below:
#pragma mark – Private GameScene Properties
@interface GameScene ()
@property BOOL contentCreated;
@end
As the pragma points out, this class extension allows you to add “private” properties to your GameScene class, without revealing them to other external classes or code. You still get the benefit of using Objective-C properties, but your GameScene state is stored internally and can’t be modified by other external classes. As well, it doesn’t clutter the namespace of datatypes that your other classes see.
Just as you did in your private scene properties, you can define important constants as private definitions within your file. Navigate to #pragma mark – Custom Type Definitions and add the following code:
//1
typedef enum InvaderType {
InvaderTypeA,
InvaderTypeB,
InvaderTypeC
} InvaderType;
//2
#define kInvaderSize CGSizeMake(24, 16)
#define kInvaderGridSpacing CGSizeMake(12, 12)
#define kInvaderRowCount 6
#define kInvaderColCount 6
//3
#define kInvaderName @”invader”
The above type definition and constant definitions take care of the following tasks:
Define the possible types of invader enemies. You can use this in switch statements later when you need to do things such as displaying different sprite images for each enemy type. The typedef also makes InvaderType a formal Objective-C type that is type-checked for method arguments and variables. This ensures that you don’t pass the wrong method argument or assign it to the wrong variable.
Define the size of the invaders and that they’ll be laid out in a grid of rows and columns on the screen.
Define a name you’ll use to identify invaders when searching for them in the scene.
It’s good practice to define constants like this rather than using raw numbers like 6 (also known as “magic numbers”) or raw strings like @”invader” (“magic strings”) that are prone to typos. Imagine mistyping @”Invader” where you meant @”invader” and spending hours debugging to find that a simple typo messed everything up. Using constants like kInvaderRowCount and kInvaderName prevents frustrating bugs — and makes it clear to other programmers what these constant values mean.
All right, time to make some invaders! Add the following method to GameScene.m directly after createContent:
-(SKNode*)makeInvaderOfType:(InvaderType)invaderType {
//1
SKColor* invaderColor;
switch (invaderType) {
case InvaderTypeA:
invaderColor = [SKColor redColor];
break;
case InvaderTypeB:
invaderColor = [SKColor greenColor];
break;
case InvaderTypeC:
default:
invaderColor = [SKColor blueColor];
break;
}
//2
SKSpriteNode* invader = [SKSpriteNode spriteNodeWithColor:invaderColor size:kInvaderSize];
invader.name = kInvaderName;
return invader;
}
makeInvaderOfType:, as the name implies, creates an invader sprite of a given type. You take the following actions in the above code:
Use the invaderType parameter to determine the color of the invader.
Call the handy convenience method spriteNodeWithColor:size: of SKSpriteNode to allocate and initialize a sprite that renders as a rectangle of the given color invaderColor with size kInvaderSize.
Okay, so a colored block is not the most menacing enemy imaginable. It may be tempting to design invader sprite images and dream about all the cool ways you can animate them, but the best approach is to focus on the game logic first, and worry about aesthetics later.
Adding makeInvaderOfType: isn’t quite enough to display the invaders on the screen. You’ll need something to invoke makeInvaderOfType: and place the newly created sprites in the scene.
Still in GameScene.m add the following method directly after makeInvaderOfType::
-(void)setupInvaders {
//1
CGPoint baseOrigin = CGPointMake(kInvaderSize.width / 2, 180);
for (NSUInteger row = 0; row < kInvaderRowCount; ++row) {
//2
InvaderType invaderType;
if (row % 3 == 0) invaderType = InvaderTypeA;
else if (row % 3 == 1) invaderType = InvaderTypeB;
else invaderType = InvaderTypeC;
//3
CGPoint invaderPosition = CGPointMake(baseOrigin.x, row * (kInvaderGridSpacing.height + kInvaderSize.height) + baseOrigin.y);
//4
for (NSUInteger col = 0; col < kInvaderColCount; ++col) {
//5
SKNode* invader = [self makeInvaderOfType:invaderType];
invader.position = invaderPosition;
[self addChild:invader];
//6
invaderPosition.x += kInvaderSize.width + kInvaderGridSpacing.width;
}
}
}
The above method lays out invaders in a grid of rows and columns. Each row contains only a single type of invader. The logic looks complicated, but if you break it down, it makes perfect sense:
Loop over the rows.
Choose a single InvaderType for all invaders in this row based on the row number.
Do some math to figure out where the first invader in this row should be positioned.
Loop over the columns.
Create an invader for the current row and column and add it to the scene.
Update the invaderPosition so that it’s correct for the next invader.
Now, you just need to display the invaders on the screen. Replace the current code in createContent with the following:
[self setupInvaders];
Build and run your app; you should see a bunch of invaders on the screen, as shown below:
The rectangular alien overlords are here! :]
Create Your Valiant Ship
With those evil invaders on screen, your mighty ship can’t be far behind. Just as you did for the invaders, you first need to define a few constants.
Add the following code immediately below the #define kInvaderName line:
#define kShipSize CGSizeMake(30, 16)
#define kShipName @”ship”
kShipSize stores the size of the ship, and kShipName stores the name you will set on the sprite node, so you can easily look it up later.
Next, add the following two methods just after setupInvaders:
-(void)setupShip {
//1
SKNode* ship = [self makeShip];
//2
ship.position = CGPointMake(self.size.width / 2.0f, kShipSize.height/2.0f);
[self addChild:ship];
}
-(SKNode*)makeShip {
SKNode* ship = [SKSpriteNode spriteNodeWithColor:[SKColor greenColor] size:kShipSize];
ship.name = kShipName;
return ship;
}
Here’s the interesting bits of logic in the two methods above:
Create a ship using makeShip. You can easily reuse makeShip later if you need to create another ship (e.g. if the current ship gets destroyed by an invader and the player has “lives” left).
Place the ship on the screen. In Sprite Kit, the origin is at the lower left corner of the screen. The anchorPoint is based on a unit square with (0, 0) at the lower left of the sprite’s area and (1, 1) at its top right. Since SKSpriteNode has a default anchorPoint of (0.5, 0.5), i.e., its center, the ship’s position is the position of its center. Positioning the ship at kShipSize.height/2.0f means that half of the ship’s height will protrude below its position and half above. If you check the math, you’ll see that the ship’s bottom aligns exactly with the bottom of the scene.
To display your ship on the screen, add the following line to the end of createContent:
[self setupShip];
Build and run your app; and you should see your ship arrive on the scene, as below:
Fear not, citizens of Earth! Your trusty spaceship is here to save the day!
Adding the Heads Up Display (HUD)
It wouldn’t be much fun to play Space Invaders if you didn’t keep score, would it? You’re going to add a heads-up display (or HUD) to your game. As a star pilot defending Earth, your performance is being monitored by your commanding officers. They’re interested in both your “kills” (score) and “battle readiness” (health).
Add the following constants at the top of GameScene.m, just below #define kShipName:
#define kScoreHudName @”scoreHud”
#define kHealthHudName @”healthHud”
Now, add your HUD by inserting the following method right after makeShip:
-(void)setupHud {
SKLabelNode* scoreLabel = [SKLabelNode labelNodeWithFontNamed:@"Courier"];
//1
scoreLabel.name = kScoreHudName;
scoreLabel.fontSize = 15;
//2
scoreLabel.fontColor = [SKColor greenColor];
scoreLabel.text = [NSString stringWithFormat:@"Score: %04u", 0];
//3
scoreLabel.position = CGPointMake(20 + scoreLabel.frame.size.width/2, self.size.height – (20 + scoreLabel.frame.size.height/2));
[self addChild:scoreLabel];
SKLabelNode* healthLabel = [SKLabelNode labelNodeWithFontNamed:@"Courier"];
//4
healthLabel.name = kHealthHudName;
healthLabel.fontSize = 15;
//5
healthLabel.fontColor = [SKColor redColor];
healthLabel.text = [NSString stringWithFormat:@"Health: %.1f%%", 100.0f];
//6
healthLabel.position = CGPointMake(self.size.width – healthLabel.frame.size.width/2 – 20, self.size.height – (20 + healthLabel.frame.size.height/2));
[self addChild:healthLabel];
}
This is boilerplate code for creating and adding text labels to a scene. The relevant bits are as follows:
Give the score label a name so you can find it later when you need to update the displayed score.
Color the score label green.
Position the score label near the top left corner of the screen.
Give the health label a name so you can reference it later when you need to update the displayed health.
Color the health label red; the red and green indicators are common colors for these indicators in games, and they’re easy to differentiate in the middle of furious gameplay.
Position the health label near the top right corner of the screen.
Add the following line to the end of createContent to call the setup method for your HUD:
[self setupHud];
Build and run your app; you should see the HUD in all of its red and green glory on your screen as shown below:
Invaders? Check. Ship? Check. HUD? Check. Now all you need is a little dynamic action to tie it all together!
Adding Motion to the Invaders
To render your game onto the screen, Sprite Kit uses a game loop which searches endlessly for state changes that require on-screen elements to be updated. The game loop does several things, but you’ll be interested in the mechanisms that update your scene. You do this by overriding the update: method, which you’ll find as a stub in your GameScene.m file.
When your game is running smoothly and renders 60 frames-per-second (iOS devices are hardware-locked to a max of 60 fps), update: will be called 60 times per second. This is where you modify the state of your scene, such as altering scores, removing dead invader sprites, or moving your ship around…
You’ll use update: to make your invaders move across and down the screen. Each time Sprite Kit invokes update:, it’s asking you “Did your scene change?”, “Did your scene change?”… It’s your job to answer that question — and you’ll write some code to do just that.
Insert the following code at the top of GameScene.m, just below the definition of the InvaderType enum:
typedef enum InvaderMovementDirection {
InvaderMovementDirectionRight,
InvaderMovementDirectionLeft,
InvaderMovementDirectionDownThenRight,
InvaderMovementDirectionDownThenLeft,
InvaderMovementDirectionNone
} InvaderMovementDirection;
Invaders move in a fixed pattern: right, right, down, left, left, down, right, right, … so you’ll use the InvaderMovementDirection type to track the invaders’ progress through this pattern. For example, InvaderMovementDirectionRight means the invaders are in the right, right portion of their pattern.
Next, find the class extension in the same file and insert the following properties just below the existing property for contentCreated:
@property InvaderMovementDirection invaderMovementDirection;
@property NSTimeInterval timeOfLastMove;
@property NSTimeInterval timePerMove;
Add the following code to the very top of createContent:
//1
self.invaderMovementDirection = InvaderMovementDirectionRight;
//2
self.timePerMove = 1.0;
//3
self.timeOfLastMove = 0.0;
This one-time setup code initializes invader movement as follows:
Invaders begin by moving to the right.
Invaders take 1 second for each move. Each step left, right or down takes 1 second.
Invaders haven’t moved yet, so set the time to zero.
Now, you’re ready to make the invaders move. Add the following code just below #pragma mark – Scene Update Helpers:
// This method will get invoked by update:
-(void)moveInvadersForUpdate:(NSTimeInterval)currentTime {
//1
if (currentTime – self.timeOfLastMove < self.timePerMove) return;
//2
[self enumerateChildNodesWithName:kInvaderName usingBlock:^(SKNode *node, BOOL *stop) {
switch (self.invaderMovementDirection) {
case InvaderMovementDirectionRight:
node.position = CGPointMake(node.position.x + 10, node.position.y);
break;
case InvaderMovementDirectionLeft:
node.position = CGPointMake(node.position.x - 10, node.position.y);
break;
case InvaderMovementDirectionDownThenLeft:
case InvaderMovementDirectionDownThenRight:
node.position = CGPointMake(node.position.x, node.position.y - 10);
break;
InvaderMovementDirectionNone:
default:
break;
}
}];
//3
self.timeOfLastMove = currentTime;
}
Here’s a breakdown of the code above, comment by comment:
If it’s not yet time to move, then exit the method. moveInvadersForUpdate: is invoked 60 times per second, but you don’t want the invaders to move that often since the movement would be too fast for a normal person to see.
Recall that your scene holds all of the invaders as child nodes; you added them to the scene using addChild: in setupInvaders identifying each invader by its name property. Invoking enumerateChildNodesWithName:usingBlock: only loops over the invaders because they’re named kInvaderName; this makes the loop skip your ship and the HUD. The guts of the block moves the invaders 10 pixels either right, left or down depending on the value of invaderMovementDirection.
Record that you just moved the invaders, so that the next time this method is invoked (1/60th of a second from now), the invaders won’t move again till the set time period of one second has elapsed.
To make your invaders move, replace the existing update: method with the following:
-(void)update:(NSTimeInterval)currentTime {
[self moveInvadersForUpdate:currentTime];
}
Build and run your app; you should see your invaders slowly walk their way across the screen. Keep watching, and you’ll eventually see the following screen:
Hmmm, what happened? Why did the invaders disappear? Maybe the invaders aren’t as menacing as you thought!
The invaders don’t yet know that they need to move down and change their direction once they hit the side of the playing field.
Guess you’ll need to help those invaders find their way!
Controlling the Invaders’ Direction
Adding the following code just after #pragma mark – Invader Movement Helpers:
-(void)determineInvaderMovementDirection {
//1
__block InvaderMovementDirection proposedMovementDirection = self.invaderMovementDirection;
//2
[self enumerateChildNodesWithName:kInvaderName usingBlock:^(SKNode *node, BOOL *stop) {
switch (self.invaderMovementDirection) {
case InvaderMovementDirectionRight:
//3
if (CGRectGetMaxX(node.frame) >= node.scene.size.width - 1.0f) {
proposedMovementDirection = InvaderMovementDirectionDownThenLeft;
*stop = YES;
}
break;
case InvaderMovementDirectionLeft:
//4
if (CGRectGetMinX(node.frame) <= 1.0f) {
proposedMovementDirection = InvaderMovementDirectionDownThenRight;
*stop = YES;
}
break;
case InvaderMovementDirectionDownThenLeft:
//5
proposedMovementDirection = InvaderMovementDirectionLeft;
*stop = YES;
break;
case InvaderMovementDirectionDownThenRight:
//6
proposedMovementDirection = InvaderMovementDirectionRight;
*stop = YES;
break;
default:
break;
}
}];
//7
if (proposedMovementDirection != self.invaderMovementDirection) {
self.invaderMovementDirection = proposedMovementDirection;
}
}
Here’s what’s going on in the above code:
Since local variables accessed by a block are by default const (that is, they cannot be changed), you must qualify proposedMovementDirection with __block so that you can modify it in //2.
Loop over all the invaders in the scene and invoke the block with the invader as an argument.
If the invader’s right edge is within 1 point of the right edge of the scene, it’s about to move offscreen. Set proposedMovementDirection so that the invaders move down then left. You compare the invader’s frame (the frame that contains its content in the scene’s coordinate system) with the scene width. Since the scene has an anchorPoint of (0, 0) by default, and is scaled to fill its parent view, this comparison ensures you’re testing against the view’s edges.
If the invader’s left edge is within 1 point of the left edge of the scene, it’s about to move offscreen. Set proposedMovementDirection so that invaders move down then right.
If invaders are moving down then left, they’ve already moved down at this point, so they should now move left. How this works will become more obvious when you integrate determineInvaderMovementDirection with moveInvadersForUpdate:.
If the invaders are moving down then right, they’ve already moved down at this point, so they should now move right.
If the proposed invader movement direction is different than the current invader movement direction, update the current direction to the proposed direction.
Add the following code to determineInvaderMovementDirection within moveInvadersForUpdate:, immediately after the conditional check of self.timeOfLastMove:
[self determineInvaderMovementDirection];
Why is it important that you add the invocation of determineInvaderMovementDirection only after the check on self.timeOfLastMove? That’s because you want the invader movement direction to change only when the invaders are actually moving. Invaders only move when the check on self.timeOfLastMove passes — i.e., the conditional expression is true.
What would happen if you added the new line of code above as the very first line of code in moveInvadersForUpdate:? If you did that, then there would be two bugs:
You’d be trying to update the movement direction way too often — 60 times per second — when you know it can only change at most once per second.
The invaders would never move down, as the state transition from InvaderMovementDirectionDownThenLeft to InvaderMovementDirectionLeft would occur without an invader movement in between. The next invocation of moveInvadersForUpdate: that passed the check on self.timeOfLastMove would be executed with self.invaderMovementDirection == InvaderMovementDirectionLeft and would keep moving the invaders left, skipping the down move. A similar bug would exist for InvaderMovementDirectionDownThenRight and InvaderMovementDirectionRight.
Build and run your app; you’ll see the invaders moving as expected across and down the screen, as below:
Moving right
Moving down then left
Moving left
Note: You might have noticed that the invaders’ movement is jerky. That’s a consequence of your code only moving invaders once per second — and moving them a decent distance at that. But the movement in the original game was jerky, so keeping this feature helps your game seem more authentic.
Adding Motion to your Ship
Good news: your supervisors can see the invaders moving now and have decided that your ship needs a propulsion system! To be effective, any good propulsion system needs a good control system. In other words, how do you, the ship’s pilot, tell the ship’s propulsion system what to do?
The important thing to remember about mobile games is the following:
Mobile games are not desktop/arcade games and desktop/arcade controls don’t port well to mobile.
In a desktop or arcade version of Space Invaders, you’d have a physical joystick and fire button to move your ship and shoot invaders. Such is not the case on a mobile device such as an iPhone or iPad.
Some games attempt to use virtual joysticks or virtual D-pads but these rarely work well, in my opinion.
Think about how you use your iPhone most often: holding it with one hand. That leaves only one hand to tap/swipe/gesture on the screen.
Keeping the ergonomics of holding your iPhone with one hand in mind, consider several potential control schemes for moving your ship and firing your laser cannon:
Single-tap to move, double-tap to fire:
Suppose you single-tapped on the left side of the ship to move it left, single-tapped on the right of the ship to move it right, and double-tapped to make it fire. This wouldn’t work well for a couple of reasons.
First, recognizing both single-taps and double-taps in the same view requires you to delay recognition of the single-tap until the double-tap fails or times out. When you’re furiously tapping the screen, this delay will make the controls unacceptably laggy.
Second, single-taps and double-taps might sometimes get confused, both by you, the pilot, and by the code. Third, the ship movement single-taps won’t work well when your ship is near the extreme left- or right-edge of the screen. Scratch that control scheme!
Swipe to move, single-tap to fire:
This approach is a little better. Single-tapping to fire your laser cannon makes sense as both are discrete actions: one tap equals one blast from your canon. It’s intuitive. But what about using swipes to move your ship?
This won’t work because swipes are considered a discrete gesture. In other words, either you swiped or you didn’t. Using the length of a swipe to proportionally control the amount of left or right thrust applied to your ship breaks your user’s mental model of what swipes mean and the way they function. In all other apps, swipes are discrete and the length of a swipe is not considered meaningful. Scratch this control scheme as well.
Tilt your device left/right to move, single-tap to fire:
It’s already been established that a single-tap to fire works well. But what about tilting your device left and right to move your ship left and right? This is your best option, as you’re already holding your iPhone in the palm of your hand and tilting your device to either side merely requires you to twist your wrist a bit. You have a winner!
Now that you’ve settled on the control scheme, you’ll first tackle tilting your device to move your ship.
Controlling Ship Movements with Device Motion
You might be familiar with UIAccelerometer, which has been available since iOS 2.0 for detecting device tilt. However, UIAccelerometer was deprecated in iOS 5.0, so iOS 7 apps should use CMMotionManager, which is part of Apple’s CoreMotion framework.
The CoreMotion library has already been added to the starter project, so there’s no need for you to add it.
Your code can retrieve accelerometer data from CMMotionManager in two different ways:
Pushing accelerometer data to your code
In this scenario, you provide CMMotionManager with a block that it calls regularly with accelerometer data. This doesn’t fit well with your scene’s update: method that ticks at regular intervals of 1/60th of a second. You only want to sample accelerometer data during those ticks — and those ticks likely won’t line up with the moment that CMMotionManager decides to push data to your code.
Pulling accelerometer data from your code
In this scenario, you call CMMotionManager and ask it for data when you need it. Placing these calls inside your scene’s update:
method aligns nicely with the ticks of your system. You’ll be sampling accelerometer data 60 times per second, so there’s no need to worry about lag.
Your app should only use a single instance of CMMotionManager to ensure you get the most reliable data. To that effect, add the following property to your class extension:
@property (strong) CMMotionManager* motionManager;
Now, add the following code to didMoveToView:, right after the self.contentCreated = YES; line:
self.motionManager = [[CMMotionManager alloc] init];
[self.motionManager startAccelerometerUpdates];
This new code creates your motion manager and kicks off the production of accelerometer data. At this point, you can use the motion manager and its accelerometer data to control your ship’s movement.
Add the following method just below moveInvadersForUpdate::
-(void)processUserMotionForUpdate:(NSTimeInterval)currentTime {
//1
SKSpriteNode* ship = (SKSpriteNode*)[self childNodeWithName:kShipName];
//2
CMAccelerometerData* data = self.motionManager.accelerometerData;
//3
if (fabs(data.acceleration.x) > 0.2) {
//4 How do you move the ship?
NSLog(@”How do you move the ship: %@”, ship);
}
}
Dissecting this method, you’ll find the following:
Get the ship from the scene so you can move it.
Get the accelerometer data from the motion manager.
If your device is oriented with the screen facing up and the home button at the bottom, then tilting the device to the right produces data.acceleration.x > 0, whereas tilting it to the left produces data.acceleration.x < 0. The check against 0.2 means that the device will be considered perfectly flat/no thrust (technically data.acceleration.x == 0) as long as it’s close enough to zero (data.acceleration.x in the range [-0.2, 0.2]). There’s nothing special about 0.2, it just seemed to work well for me. Little tricks like this will make your control system more reliable and less frustrating for users.
Hmmm, how do you actually use data.acceleration.x to move the ship? You want small values to move the ship a little and large values to move the ship a lot. The answer is — physics, which you’ll cover in the next section!
Translating Motion Controls into Movement via Physics
Sprite Kit has a powerful built-in physics system based on Box 2D that can simulate a wide range of physics like forces, translation, rotation, collisions, and contact detection. Each SKNode, and thus each SKScene and SKSpriteNode, has an SKPhysicsBody attached to it. This SKPhysicsBody represents the node in the physics simulation.
Add the following code right before the final return ship; line in makeShip:
//1
ship.physicsBody = [SKPhysicsBody bodyWithRectangleOfSize:ship.frame.size];
//2
ship.physicsBody.dynamic = YES;
//3
ship.physicsBody.affectedByGravity = NO;
//4
ship.physicsBody.mass = 0.02;
Taking each comment in turn, you’ll see the following:
Create a rectangular physics body the same size as the ship.
Make the shape dynamic; this makes it subject to things such as collisions and other outside forces.
You don’t want the ship to drop off the bottom of the screen, so you indicate that it’s not affected by gravity.
Give the ship an arbitrary mass so that its movement feels natural.
Now replace the NSLog statement in processUserMotionForUpdate: (right after comment //4) with the following:
[ship.physicsBody applyForce:CGVectorMake(40.0 * data.acceleration.x, 0)];
The new code applies a force to the ship’s physics body in the same direction as data.acceleration.x. The number 40.0 is an arbitrary value to make the ship’s motion feel natural.
Finally, add the following line to the top of update::
[self processUserMotionForUpdate:currentTime];
Your new processUserMotionForUpdate: now gets called 60 times per second as the scene updates.
Note: If you’ve been testing your code on simulator up till now, this would be the time to switch to your device. You won’t be able to test the tilt code unless you are running the game on an actual device.
Build and run your game and try tilting your device left or right; your ship should respond to the accelerometer, as follows:
What do you see? Your ship will fly off the side of the screen, lost in the deep, dark reaches of space. If you tilt hard and long enough in the opposite direction, you might get your ship to come flying back the other way. But at present, the controls are way too flaky and sensitive. You’ll never kill any invaders like this!
An easy and reliable way to prevent things from escaping the bounds of your screen during a physics simulation is to build what’s called an edge loop around the boundary of your screen. An edge loop is a physics body that has no volume or mass but can still collide with your ship. Think of it as an infinitely-thin wall around your scene.
Since your GameScene is a kind of SKNode, you can give it its own physics body to create the edge loop.
Add the following code to createContent right before the [self setupInvaders]; line:
self.physicsBody = [SKPhysicsBody bodyWithEdgeLoopFromRect:self.frame];
The new code adds the physics body to your scene.
Build and run your game once more and try tilting your device to move your ship, as below:
What do see? If you tilt your device far enough to one side, your ship will collide with the edge of the screen. It no longer flies off the edge of the screen. Problem solved!
Depending on the ship’s momentum,you may also see the ship bouncing off the edge of the screen, instead of just stopping there. This is an added bonus that comes for free from Sprite Kit’s physics engine — it’s a property called restitution. Not only does it look cool, but it is what’s known as an affordance since bouncing the ship back towards the center of the screen clearly communicates to the user that the edge of the screen is a boundary that cannot be crossed.
Where to Go From Here?
Here is the example project for the game up to this point.
So far, you’ve created invaders, your ship, and a Heads Up Display (HUD) and drawn them on-screen. You’ve also coded logic to make the invaders move automatically and to make your ship move as you tilt your device.
In part two of this tutorial, you’ll add firing actions to your ship as well as the invaders, along with some collision detection so you’ll know when you’ve hit the invaders — and vice versa! You’ll also polish your game by adding both sound effects as well as realistic images to replace the colored rectangles that currently serve as placeholders for invaders and your ship.(source:raywenderlich)
上一篇:开发者分享地下城关卡设计经验


