供独立游戏开发者参考的2D美工教程(三)
作者:Chris Hildenbrand
在本教程的前两个部分,我们已经分别学习了圆形工具、矩形工具、填充、组合对象和渐变场景等。现在我们开始学习一些更有趣的东西吧。(请点击此处阅读本教程第一、第二、第四、第五、第六部分内容)
制作游戏角色
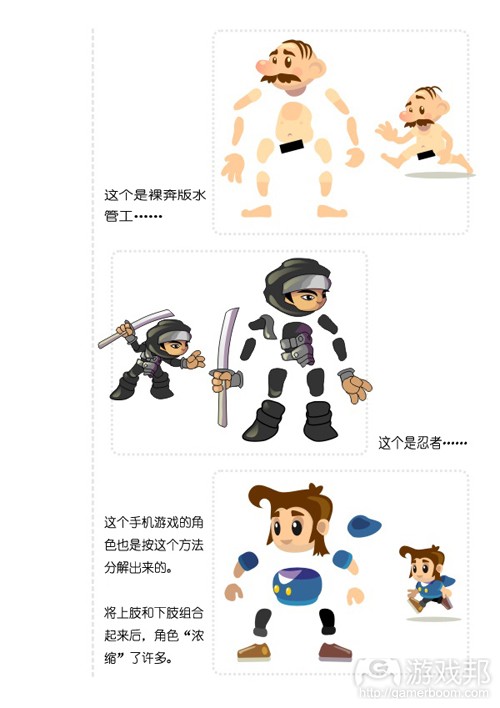
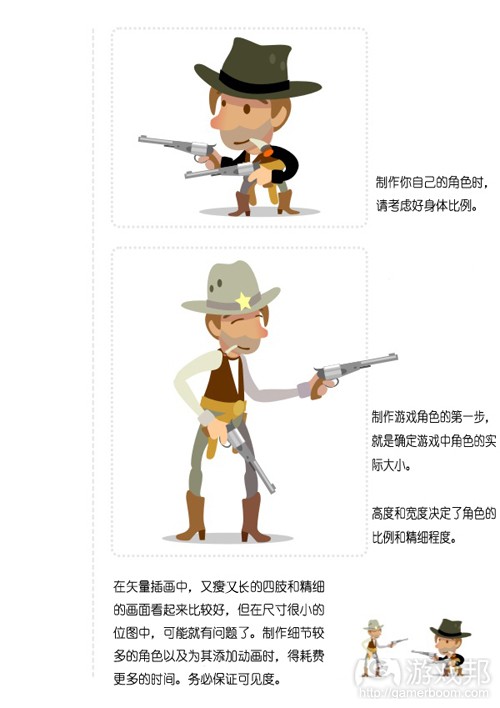
我们开始制作一个简单的2D角色。网上有不少关于制作角色和添加动画的材料和教程——不过大多数是写给美工和动画师看的。我会尽量把2D角色分解成简单的部分,以便大家学习。
(游戏邦注:本次教程中涉及上次教程所讲授的技巧,如果你已掌握,那么学习这个稍微复杂一点的教程应该会更顺利。)
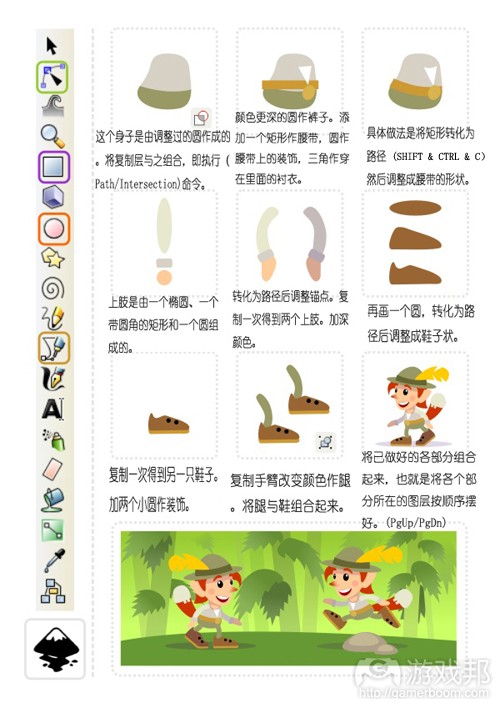
接下来,我们可以考虑创意问题了。首先在头脑里构思一个角色,然后画出身体和四肢等,最后将所有部分组合成一个完整的角色。
注:
如果是从草图、涂鸦或概念画开始,最好能在图层中加入位图,然后在最上一层作画 (Layer/ Add Layer or SHIFT+CTRL+N)。新建图层(SHIFT+CTRL+N),选择草稿加入位图。锁定图层,然后选定工作层(如图层1)。
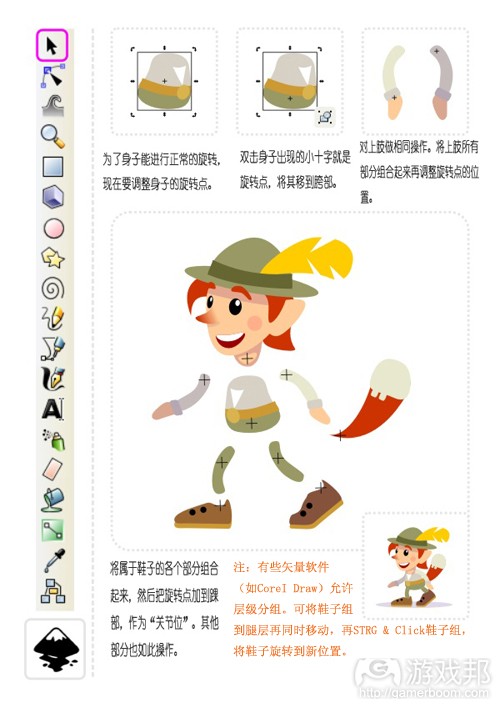
为了使之后的动画工作更容易些,我们要先将角色的各个部分加上旋转点(轴心点)。注意每个部分的旋转点,如上肢的旋转点是在肩膀上。将各个附件组合成整体后调整旋转点位置。
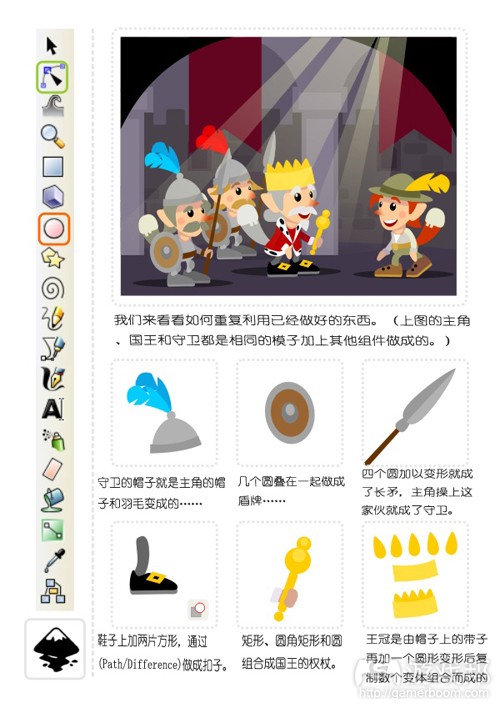
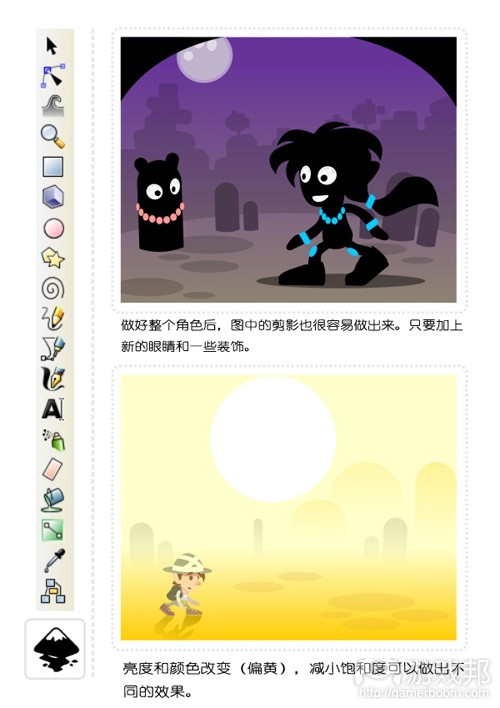
角色制作到此结束。接下来我们可以利用已经做出的东西制作出更多变体。
(本文为游戏邦/gamerboom.com编译,拒绝任何不保留版权的转载,如需转载请联系:游戏邦)
2D Game Art For Programmers – Part 3
by Chris Hildenbrand
After the initial playing around with circles and squares, learning a little bit about the fills and combining objects [part 1] and the playing around with gradients to set a scene [part 2] it’s time to get to the fun stuff.
Creating a game character
Let’s get started on a simple 2D character. There are a lot of resources and tutorial out there on character creation and animation – most of which written by and for artists and animators. I will try and break in down to simple elements and easy to follow steps.
Note:
Some of the techniques used in this tutorial have been covered in earlier post. They should help you working your way through this a little bit more complex tutorial.
It’s time to start getting creative. Building a character from scratch we start with the head and create the body and limbs before assembling the elements into the final figure.
Note:
When working from a sketch, scribble or concept drawing it’s helpful to import the bitmap image into a new layer at the bottom of your stack and work on top (Layer/ Add Layer or SHIFT+CTRL+N). Bring up the Layers (SHIFT+CTRL+N), select the sketch layer and import the bitmap. Lock the layer and select the work layer (e.g. Layer 1).
In order to make it easier to animate the character later grouping elements and assigning better pivot points is really helpful. Rather than turn an object like an arm at it’s centre it makes more sense to turn it at the shoulder. In order to do that, select objects that ‘belong’ together and move the pivot points.
This concludes the creation process. Now it’s time to go in and play with the shapes, create some variations and make the most of the objects we have created so far.
I hope you enjoyed the tutorial so far. Have fun with vectors and stay tuned for the next post ‘Taking on animation in inkscape’. (source:gamasutra)
上一篇:分析游戏中收集机制的设置及其意义






 闽公网安备35020302001549号