解析手机游戏《Tiny Wings》开发步骤(二)
本系列教程向你展示如何制作类似《Tiny Wings》的手机游戏,这是第二部分的内容。
在第一部分内容里,我们阐述了如何制作游戏的动态山体和背景材质。
在此系列教程的第二部分,我们将阐述某些有趣的东西,如何为游戏添加主角并使用Box2D来模拟其移动!
以下教程的背景是,你对Cocos2D和Box2D很熟悉。如果你还是个Cocos2D或Box2D新手,需要先去看看其他的Cocos2D和Box2D教程。
开始动工
先下载我们在上文中发布的项目样例。
接下来,我们要添加“Hello, Box2D!”代码。我们将创造Box2D世界,添加某些代码设立调试绘图并增加某些测试形状,确保我们目前为止做出来的所有东西都能生效。
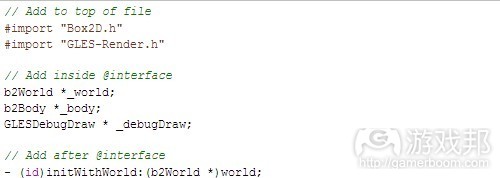
首先,对HelloWorldLayer.h做如下修改:
这包括Box2D标题文件和调试绘图文件,预设定变量跟随Box2D世界和调试绘图类改变。
它还将点每米比例(游戏邦注:即代码中的“PTM_RATIO”)设定为32.0。作为老手,我们需要用此在Box2D单元(米)和Cocos2D单元(点)之间转化。
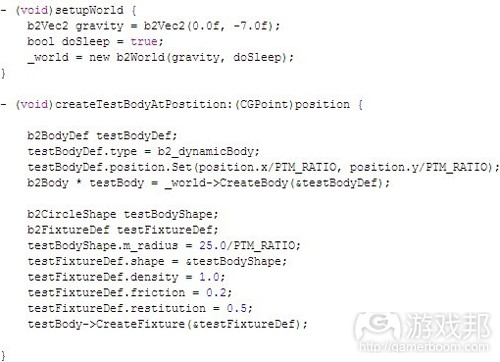
然后在HelloWorldLayer.mm中在初始方法之上增加下列新方法:
如果你对Box2D很熟悉,应该检查这些方法。
setupWorld方法创造出带有引力的Box2D世界,重力加速度略小于地球标准9.8m/s2。
createTestBodyAtPosition方法的作用是构造一个测试对象-一个半径为25点的圆,在你做触摸测试的时候,这个方法将产生一个测试对象,并且测试完成后销毁该对象
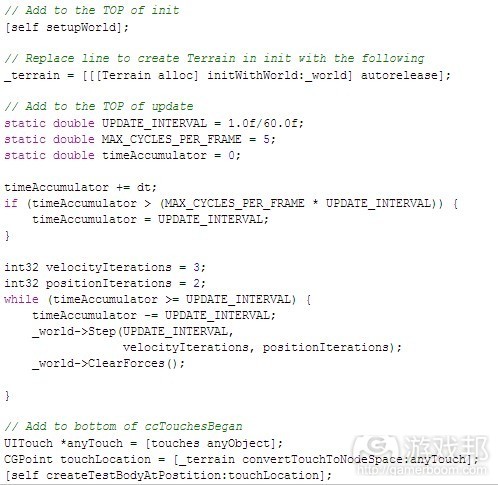
HelloWorldLayer这个文件的代码还不完整,我们还需要做一些修改:
你向源代码添加的这段代码只是调用你先前编写的新方法来设立Box2D世界。采用这种方法,最终它可以利用该世界来为山体创造Box2D物体。接下来,我们将为此编写某些占位符代码。
你添加至更新的代码让Box2D有时间通过调用_world->Step在每次更新中运行物理模拟。应该注意的是,这执行的是固定的时间步,在运行物理模拟时比变动时间步要好。要获悉更多这种做法如何发挥作用的信息,查看Cocos2D书籍中的Box2D章节。
你添加至ccTouchesBegan中的代码通过运行助手方法来在任何你点击的地方创造Box2D物体。再次声明,这只是用来调试并证实到目前为止Box2D运转良好。
应该注意的是,触屏协调置于地形协调中。这是因为地形会移动,我们想要的是触电在地形中的位置,而不是在屏幕上的位置。
接下来,我们对Terrain.h/m做以下改变:
这只包含Box2D,创造某些实例变量来追踪我们为山体制作的Box2D世界和Box2D物体,Box2D世界将成为新初始程序的参数。
随后添加以下新方法至Terrain.m,位于generateHills之上:
这只是个辅助方法,沿山体底部创造Box2D物体,即为“地面”。这只是个临时的方法,因而我们可以添加物体,让它们与其他东西碰撞而不是永无止境地下落,后期我们会将其替换,将山体本身模型化。
到现在为止,所有事物都指出X轴是关键。
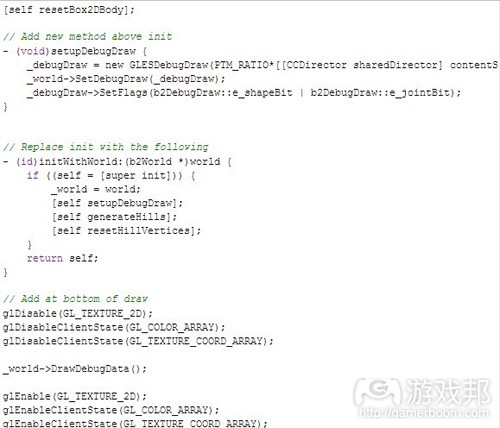
接下来,修改Terrain.m以调用此代码,设立调试绘图:
每当山体最高点被重置,我们就调用resetBox2DBody来创造Box2D呈现可视山体。现在物体还未改变(游戏邦注:只是增加了一条线代表地面),但接下来我们会修补Box2D物体,将可视山体模型化。
为Box2D物体设立调试绘图需要setupDebugDraw和绘图代码。如果你对Box2D很熟悉,应该检查下。
但是,你可能会产生疑问,为何调试绘图代码在Terrain.m中,而不是HelloWorldLayer.mm。这是因为,在此游戏中画面滚动通过移动Terrain.m来执行。因而,为使Box2D轴系统与屏幕视图相符,我们需要将调试绘图代码添加至Terrain.m中。
现在做最后一步。如果你尝试现在编辑,会出现大量错误。这是因为Terrain.m导入Terrain.h,Terrain.h导入HelloWorldLayer.h,HelloWorldLayer.h导入Box2D.h。导入C++代码(游戏邦注:如Box2D)的.m文件总是会有大量的错误。
幸运的是,解决方法很简单,将Terrain.m重命名为Terrain.mm即可。
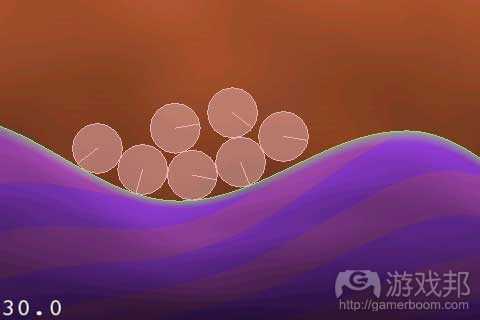
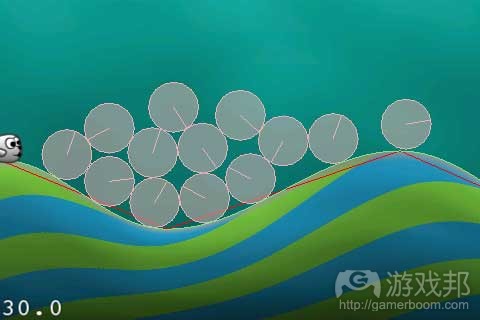
编辑然后运行,现在当你点击屏幕时,会看到许多圆物体掉到屏幕中!
在Box2D中确定山体形状
现在,我们有个Box2D形状来在屏幕底部呈现地面,但是我们真正需要的是呈现山体的形状。
幸运的是,这很简单,因为所有东西都以准备就绪!
1、我们有一系列山脉至高点(borderVertices),我们在上个教程生成resetHillVertices三角形条带时创造出来的。
2、无论至高点何时改变,我们都有个方法可以调用(resetBox2DBody)。
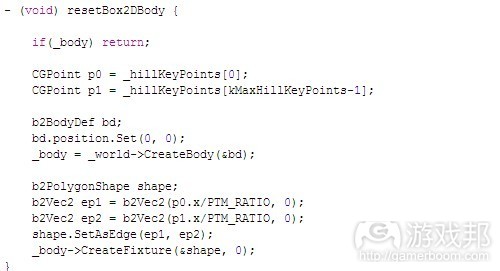
因而,我们只需要替换resetBox2DBody来为borderVertices的每个入口创造边缘!用下列代码将其替换:
新执行首先会看下是否已存在Box2D物体,在继续之前会先摧毁老物体。
然后它会创造新物体,开始不断在系列边界至高点中循环,包括山体的至高点。在每个片段中,它可以创造出连接两个至高点的边界。
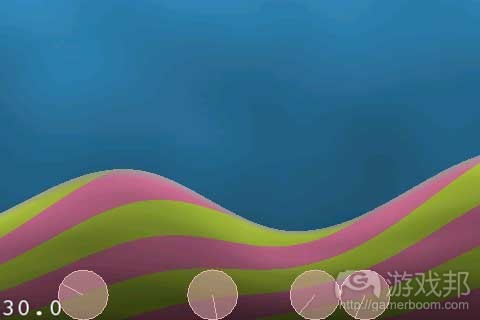
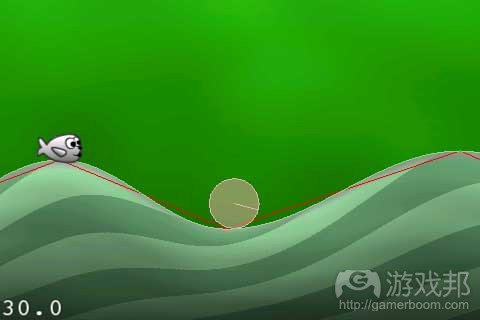
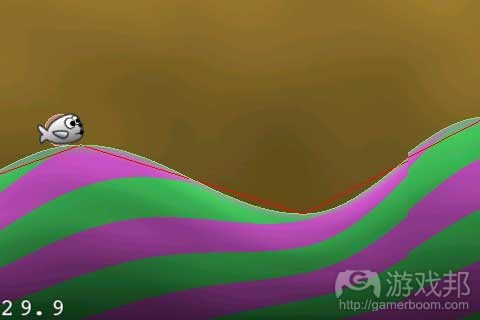
这确实很容易。将其编辑并执行,现在你得到的是良好的Box2D物体,沿着山体斜坡移动!
添加海豹
我们做的这个项目名为《Tiny Seal》,但现在还没有海豹!
这是件很悲剧的事情,所以现在必须马上解决。
首先,下载并解压这个项目的资源包,将“Sprite Sheets”和“Sounds”拖动到Xcode项目上。确认每个地址簿选择“复制内容到目标群组文件夹”,然后点击“完成”。
Go to File\New\New File,选择iOS\Cocoa Touch\Objective-C类,点击“下一步”。输入CCSprite作为次类别,点击“下一步”,将文件命名为Hero.mm(游戏邦注:必须使用.mm扩展名,因为文件将使用Box2D),然后点击“完成”。
以下列代码替换Hero.h:
这是个非常简单的工作,只是导入Box2D.h然后预设变量随世界和Box2D物体改变。
然后转向Hero.mm,以下列代码替换:
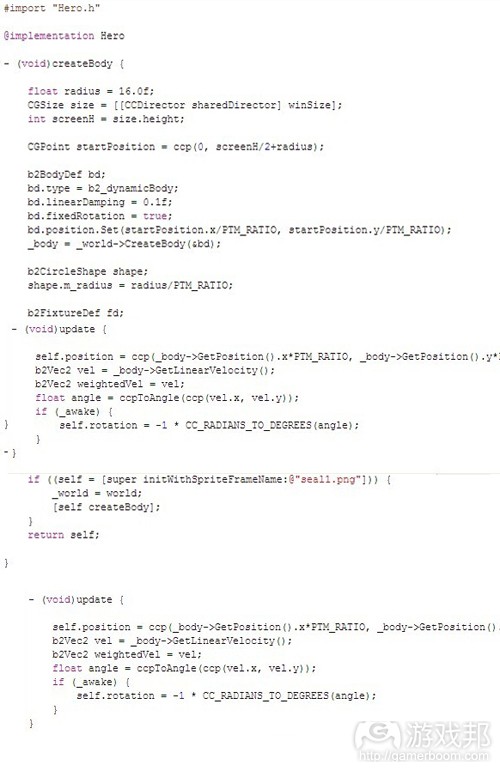
createBody方法创造的圆形代表海豹。除了半径有所差别外,这几乎与你之前编写的createTestBodyAtPosition方法相同。
而且,摩擦力设为0,这样海豹就会变得特别光滑。弹性也设为0,这样海豹在撞到地面是就不会弹射起来。
这段代码还设定某些线性阻尼,可以随时间逐渐减少。将物体设定为无法旋转,因为在这款游戏中根本不需要旋转。
initWithWorld方法将精灵初始化为特别精灵框架,调用上述createBody方法。
上述方法更新海豹的位置,使其与Box2D物体位置相匹配,精灵的转动根据海豹的位置来决定。
接下来,你需要修改Terrain.h和Terrain.mm,因为我们要在Terrain.m中插入精灵节点。
首先,对Terrain.h做下列修改:
然后,对Terrain.mm做下列修改:
这只是为TinySeal.png精灵层面创造了节点,将精灵框架定义从TinySeal.plist装载至精灵框架中。
这样整个过程就几乎完成了!只需对HelloWorldLayer.h做下列修改:
然后对HelloWorldLayer.mm做如下修改:
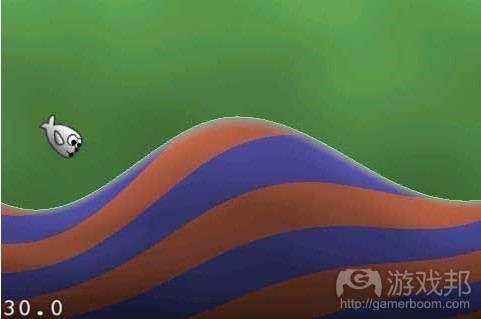
编译运行,现在你应该会看到屏幕左侧有只快乐的海豹!
但令人感到厌烦的是,他的位置在画面之外,最好让他再往右边移点。
幸运的是,这个问题很容易便可以解决。只需要打开Terrain.mm,然后将setOffsetX替换如下:
这样海豹就往右移了一点。编译运行,现在你可以看到海豹显示得更多了!
让海豹移动
现在,我们的游戏即将完成了。我们已经设计出了海豹,只需要让他动起来就可以了!
我们将采用以下策略:
1、首次点击屏幕时,让海豹向右跳一点,准备开始移动。
2、当触点向下移动时,给海豹施加作用力让它向下移动。这会让他迅速沿山体下滑,如果有足够的速度,就会在遇到下座山时飞起来。
3、添加代码确保海豹每次能移动一定的距离,我们不想看到海豹卡在某处!
让我们执行上述做法。对Hero.h做如下修改:
然后,对Hero.mm做如下修改:
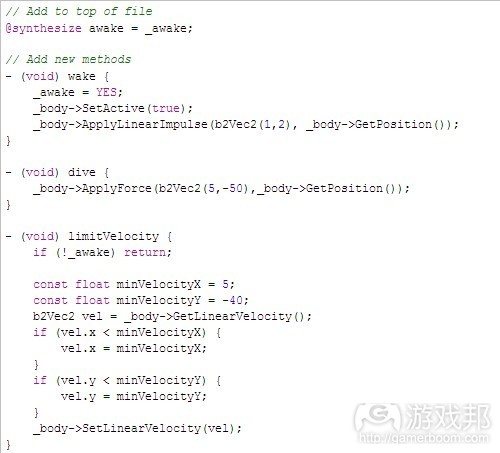
唤醒方法用冲力来让海豹产生最初的移动。
下潜方法运用强大的向下冲力,以及轻微的向右冲力。向下的冲力会让海豹滑下山体,而山体的坡度越大,海豹在遇到下个山体时飞起来的幅度也越大。
limitVelocity只是确保海豹在X轴上至少以5m/s2的加速度移动,在Y轴上的加速度达到-40m/s2。
这部分内容就快要完成了,只要对HelloWorldLayer有些许修改即可。在@interface中添加下列示例变量:
BOOL _tapDown;
然后对HelloWorldLayer.mm做如下修改:
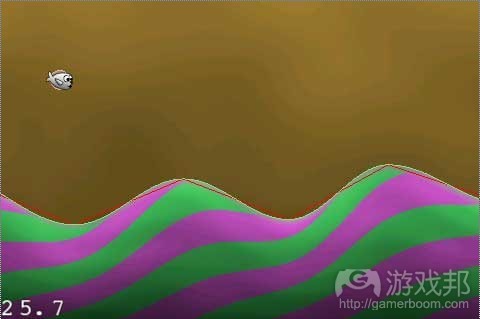
编译运行,现在你应该可以看到飞翔的海豹!
修正海豹的摇晃问题
你在测试关卡时会发现,海豹在地面滑行时摇摇晃晃。
解决该问题的方法之一是采用线性速度,而不总是将位置定在当前速度上。
让我们尝试下这种方法,添加以下代码至Hero.h:
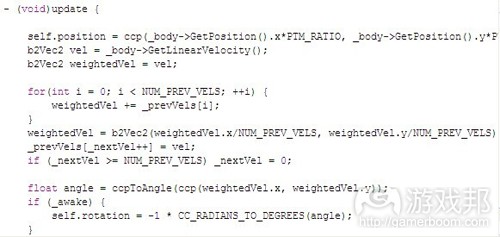
然后采用以下代码修改Hero.mm中的更新方法:
编译运行,现在你应该会看到海豹的飞行更为平稳!
缩小
《Tiny Wings》中有个很酷的效果,就是在海豹飞高时场景会缩小。这增添了某种特别酷的感觉,好似你真正在移动!
要添加此效果,只需在HelloWorldLayer.mm的更新方法_hero update调用之后简单添加下列代码:
如果海豹在winSize.height*3/4,范围值为1。如果其位置< winSize.height*3/4,范围值会变大。如果其位置> winSize.height*3/4,范围值缩小。
编译运行,试试看你自己能飞多高!
动画和音乐
游戏肯定要有些动画和音乐!
只要花很短的时间就能做出让人欣赏的东西。对Hero.h做下列修改:
这只是设定我们制作的动画以及海豹没有下滑时的调用方法。
下一步,对Hero.mm做下列修改:
这为海豹正常移动时创造动画效果,确定动画运行的方法。下滑的动画是个独立的框架,所以我们也增加个助手方法来设置。
然后,我们对HelloWorldLayer.mm做些许改变:
最后修改Terrain.mm,在绘制方法中调用_world->DrawDebugData。
编译运行,现在你的海豹可以各种方法在山体上着陆!
下一步的工作
以上是教程的示例代码。
现在你已经有了个基本的游戏。为何不改变海豹的移动行为,使他沿山体上下的移动更为自然呢?或者开始添加可供收集的道具,山体的装饰,以及可以获取的分数,充分发挥你的想象力吧!(本文为游戏邦/gamerboom.com编译,如需转载请联系:游戏邦)
How To Create A Game Like Tiny Wings Part 2
This is the second part of a tutorial series that shows you how to make a game like the popular Tiny Wings game by Andreas Illiger!
In the prerequisite for this tutorial series, we first covered how to create dynamic hill and background textures for the game.
In the first part of the tutorial series, we covered how to create the dynamic hills that you need in the game.
In this second and final part of the series, we’ll finally get to the fun stuff – how to add the main character to the game, and use Box2D to simulate his movement!
As a reminder, this tutorial is based on a great demo project written by Sergey Tikhonov – so special thanks again to Sergey!
This tutorial assumes you are familiar with Cocos2D and Box2D. If you are new to Cocos2D or Box2D, you should check out some of the other Cocos2D and Box2D tutorials on this site first.
Getting Started
If you don’t have it already, download a copy of the sample project where we left it off in the previous tutorial.
Next, we’re going to add what I like to think of as the “Hello, Box2D!” code. We’ll create a Box2D world and add some code to set up debug drawing and add some test shapes, just to make sure we have everything working so far.
Start by making the following modifications to HelloWorldLayer.h:
This includes the Box2D header file and the debug draw header file, and predeclares the variable to keep track of the Box2D world and debug draw class.
It also declares the pixel-to-meter ratio (PTM_RATIO) to 32.0. As a refresher, this is what we need to use to convert between Box2D units (meters) and Cocos2D units (points).
Then add the following new methods to HelloWorldLayer.mm, above the init method:
If you’re familiar with Box2D, these methods should be review.
The setupWorld method creates a Box2D world with a certain amount of gravity – a little less than “Earth standard” of -9.8 m/s².
The createTestBodyAtPostition method creates a test object – a circle with a 25 point radius. We’ll use this to create a test object wherever you tap for testing purposes, and we’ll remove this later on.
You’re not done with HelloWorldLayer.mm yet – make a few more modifications to it now:
The code you added to init just calls the new method you wrote earlier to set up the Box2D world. We also modify the line to initialize the Terrain class to pass in the Box2D world. This way it can use the world to create a Box2D body for the hill eventually. We’ll write some placeholder code for this next.
The code you added to update gives Box2D time to run its physics simulation each update by calling _world->Step. Note that this is a fixed-timestep implementation, which is better than variable rate timesteps when running physics simulations. For more information on how this works, check out our Cocos2D book‘s Box2D chapters.
The code you added to ccTouchesBegan runs the helper method to create a Box2D body wherever you tapped. Again, this is just for debugging to verify Box2D is working OK so far.
Notice that this gets the coordinate of the touch within the terrain coordinates. This is because the terrain will be scrolling, and we want to know the position within the terrain, not the position on the screen.
Next, let’s make some changes to Terrain.h/m. Make the following changes to Terrain.h:
This just includes Box2D, creates some instance variables to keep track of the Box2D world and the Box2D body we’ll be creating for the hills, and predeclares our new initializer that will take the Box2D world as a parameter.
Then add the following new method to Terrain.m, above generateHills:
This is just a helper method that creates a Box2D body along the bottom of the hill, to represent the “ground.” This is just a temporary method so we can add bodies and have them hit something rather than falling endlessly, we’ll replace this later to model the hill itself.
For now, all it does is figure out the x-coordinate for the first and last keypoints, and draw an edge connecting the two.
Next, add a few more modifications to Terrain.m in order to call this code, and set up debug drawing:
Every time the hill vertices are reset, we call resetBox2DBody to create the Box2D representation of the visible hills. Right now the body never changes (it’s just adding a line for the ground) but later on we’ll fix up the Box2D body to model the visible hills.
setupDebugDraw and the draw code is what you need to set up debug drawing for the Box2D objects. If you’re familiar with Box2D, this should be review.
However, you may be wondering why the debug draw code is in Terrain.m, instead of in HelloWorldLayer.mm. This is because scrolling is implemented in this game by moving Terrain.m. So to match up the coordinate system of Box2D with what’s visible on the screen, we need to add the debug drawing code into Terrain.m.
One last step. If you try to compile right now, you’ll get a ton of errors. This is because Terrain.m imports Terrain.h, which imports HelloWorldLayer.h, which imports Box2D.h. And whenever you have a .m file import C++ code (like Box2D) you get a ton of errors.
Luckily the solution is simple – renamed Terrain.m to Terrain.mm.
Compile and run, and now as you tap you can see a lot of circle objects fall into your scene!
Shaping the Hills in Box2D
Right now we have a Box2D shape representing the ground along the bottom of the screen, but what we really want is a shape representing the hills.
Luckily, this is quite easy since we already have all of the pieces in place!
We have an array of the vertices of the top of the hill (borderVertices). We created this in the last tutorial when we generated the triangle strip in resetHillVertices.
We have a method that is called whenever the vertices change (resetBox2DBody).
So we just need to replace resetBox2DBody to create edges for each entry in borderVertices! Replace it with the following code:
This new implementation first looks to see if there’s already a Box2D body, and destroys the old one first before continuing.
Then it creates a new body, and starts looping through the array of border vertices, which contain the vertices for the top of the hill. For each piece, it creates an edge connecting the two.
Pretty easy, eh? Compile and run, and now you’ll have a nice Box2D body following the slope of your hills!
Adding the Seal
All this time we’ve been working with a project named Tiny Seal, but there’s no seal!
That is just a tragedy, so let’s address that right away.
First, download and unzip the resources file for this project, and drag the “Sprite Sheets” and “Sounds” directories into your Xcode project. For each directory, verify “Copy items into destination group’s folder” is selected, and click Finish.
Go to File\New\New File, choose iOS\Cocoa Touch\Objective-C class, and click Next. Enter CCSprite for Subclass of and click Next, name the file Hero.mm (note the .mm extension since this file will use Box2D), and click Finish.
Replace Hero.h with the following:
This is pretty simple stuff – just imports Box2D.h and predeclares a variable to keep track of the world and the Box2D body for the seal.
Then switch to Hero.mm and replace it with the following:
The createBody method creates a circle shape representing the seal. This is almost exactly the same as the createTestBodyAtPosition method you wrote earlier, except it bases the radius on the seal size (actually smaller than the seal, for the collisions to work right).
Also, the friction is set to 0 (so the seal is extremely slippery) and the restitution is set to 0 (so the seal doesn’t bounce when he hits the ground).
It also sets some linear damping on the body so it tends to slow down over time, and sets the body to fixed rotation since it doesn’t really need to rotate for this game.
The initWithWorld method initializes the sprite to a particular sprite frame (seal1.png), squirrels away a copy of the world, and calls the above createBody method.
The update method updates the position of the seal sprite to match the position of the Box2D body, and the rotation of the sprite based on the seal’s velocity.
Next, you need to make a few modifications to Terrain.h and Terrain.mm, because we’re going to add a sprite batch node inside Terrain.m.
Start by making the following modifications to Terrain.h:
And then the following modifications to Terrain.mm:
This simply creates a batch node for the TinySeal.png sprite sheet, and loads the sprite frame definitions from TinySeal.plist into the sprite frame cache.
Almost done! Just make the following modifications to HelloWorldLayer.h:
And the following to HelloWorldLayer.mm:
Compile and run, and you should now see a happy seal on the left side of the screen!
But it’s kind of annoying he’s offscreen. It would be better if we showed him more to the right a bit.
Luckily this is easy to fix! Just open up Terrain.mm and replace setOffsetX with the following:
This adds one eighth of the winSize.width to the passed-in offset, so the seal appears to the right a bit. Compile and run, and now the seal is more visible!
Making the Seal Move
We’re getting close to a game at this point – we have a seal, we just need to let him fly!
The strategy we’re going to take is the following:
The first time the screen is tapped, make the seal jump up to the right a bit to get him started.
Whenever a touch is held down, apply a force to the seal to push him down. This will make him go quickly down hills, giving him velocity that will make him fly up when he goes up the next hill.
Add some code to make sure the seal moves at least a set amount. We don’t want the poor seal to get stuck!
Let’s try this out. Make the following modifications to Hero.h:
Then make the following modifications to Hero.mm:
The wake method applies an impulse to the upper right to get the seal initially moving.
The dive method applies a strong impulse down, and an impulse slightly to the right. The down impulse will cause the seal to collide off of the hill, and the stronger the slope of the hill the more the bird will want to “fly up” once the next hill arrives.
limitVelocity just makes sure the seal is moving at least 5m/s² along the x-axis, and no less than -40m/s² along the y-axis.
Almost done – just a few modifications to HelloWorldLayer. Start with HelloWorldLayer.h by adding the following instance variable inside the @interface:
And the following changes to HelloWorldLayer.mm:
Compile and run, and now you should have a seal that can fly through the air!
Fixing a Shaky Seal
You may notice when trying out the level that the seal switches rotation in a shaky manner as he slides along the ground.
One way to fix this is to take the weighted average of the past few linear velocities instead of always setting the position on the current velocity.
Let’s try this out. Add the following to Hero.h:
And modify the update method in Hero.mm as follows:
This takes the average of the past 5 velocities instead of always taking just the linear velocity. Compile and run, and now you should see a much smoother seal!
Zooming Out
One cool effect that Tiny Wings does is it zooms out the level the higher you go. This not only keeps the hero in view, but it adds to a cool feeling that you’re really moving!
To add this, simply add the following lines after the call to [_hero update] in HelloWorldLayer.mm’s update method:
If the hero is at winSize.height*3/4, the scale will be 1. If he is < winSize.height*3/4, the scale will increase. If he is > winSize.height*3/4, the scale will decrease, effectively zooming out.
Compile and run, and see how high you can fly!
Gratuitous Animation and Music
You know I couldn’t leave you guys hanging without some gratuitous animation and music!
Will only take a second for a bit more awesomeness! Start by making the following changes to Hero.h:
This just declares the animation we’ll be creating, and a method we’ll call whenever the seal is NOT diving.
Next make the following modifications to Hero.mm:
This creates an animation for when the seal is moving normally, and a method to run that animation. The “animation” for diving is actually just a single frame, so we add a helper method to set that too.
Finally make a few changes to HelloWorldLayer.mm:
Finally go to Terrain.mm and comment out the call to _world->DrawDebugData in the draw method.
Compile and run the code, and now your seal can ride the hills in style!
Where To Go From Here?
Here is the sample code from the above tutorial.
At this point, you have a basic game working. Why not try to tweak the behavior of the seal so he moves in a more natural way up and down the hills? Or start adding in items to pick up, decorations on the hills, points to collect – your imagination is the only limit!
If you extend the game to add any cool new features or have any comments or questions, please join the forum discussion below! (Source: RAYWENDERLICH)














 闽公网安备35020302001549号