Junxue Li分享设计等角建筑的经验
作者:Junxue Li
这个标题有点误导性,实际上它并非关于如何设计的问题,比如怎样使用色彩、格式、如何绘图……这些是我们在美术院校的长期培训中就已经掌握的技能,所以我不会在此讨论这方面的内容。本文将提供一些在特定领域方面的实用技巧,它们有助于你制作出更适用于制作管道的等角资产的概念艺术。
在切入正题之前:
你得先确定三件事:
1.灵感来源
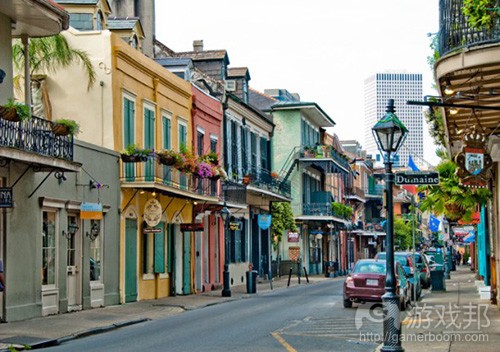
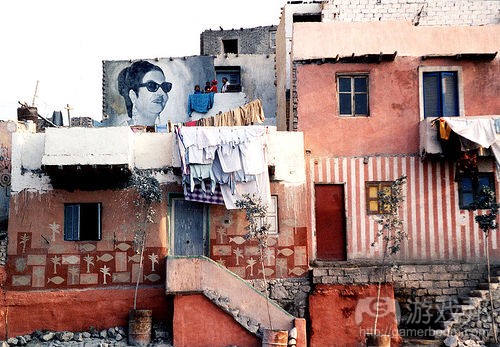
最好是基于现实生活中的一些事物进行设计。例如,从新奥尔良或开罗的建筑获得灵感。
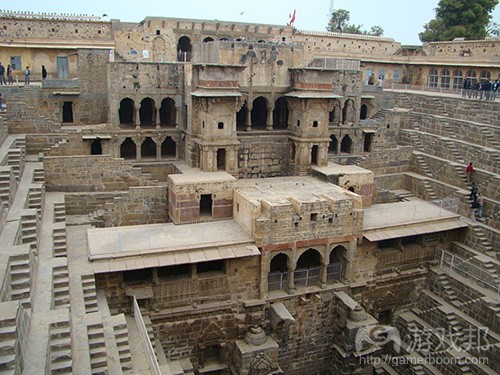
这可以为你的设计赋予更多生机。即使游戏是虚幻主题,也不要完全凭空想象。我最近发现PS2大作《旺达与巨像》从印度建筑中获得了相当多的灵感。看看这张图,是不是觉得似曾相识呢?
在这个阶段,你得获取更多相关照片。这正是我们在自己的项目中所采取的做法,我们从所有可能的渠道收集了米兰、开罗、布拉格等城市的照片。如果你有足够的预算,甚至可以安排一次旅行。
2.制作美术的风格和质量
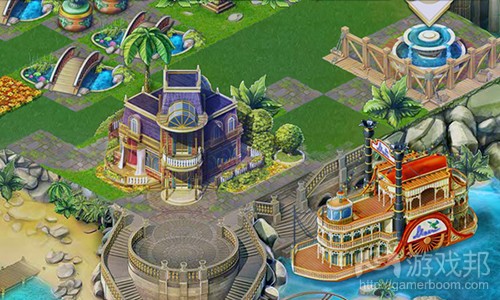
这是你要研究的目标。你可以研究一下市场上具有等角资产的游戏,找到你想要的风格和质量。例如:
如果没有找到你想要的内容,可以要求你的团队进行一些试验性的创造,制作一两个样本,你可以将其作为项目的目标。
3.等角网格设置
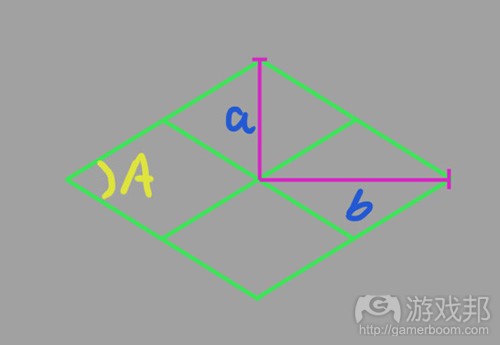
为了对称,在像这样统一的等角设置,你只需要确定A角的值,或者a/b值。
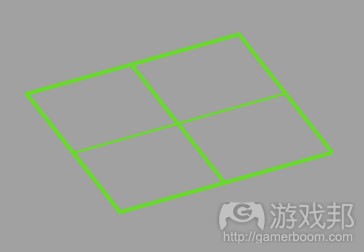
至于类似这种的非对称设置,当然你不能徒手绘制网格。因为这样画出的线段很可能不会遵从特定的视角,如果之后你决定在3D环境中制作建筑,那么它就不可能与摄像机对应了。
(游戏邦注:请参照本文末的附录说明)
更多时候,网格设置是由游戏设计团队或客户提供的,你并不需要担心上图中的问题!所以你接手这项工作时要做的头一件事就是问他们要网格设置。
在设计过程中:
1.确定建筑的维度
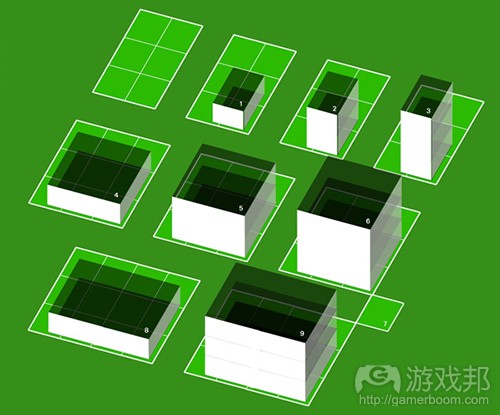
你已经有了单位网格,通常情况下,建筑的维度是由网格来衡量的。例如,电话亭的规格就是1X1,超市则是3X3.
那么建筑的高度是多少呢,1个还是2个单位?
2.匹配细节的大小
当你将所有建筑植入地图中时,要令建筑上的细节大小对应比例。最显著的特征是门窗。如果你发现某个房子的门跟人一样大小,而旁边一座房子的门却很矮小,那就太奇怪了,也不合常理。
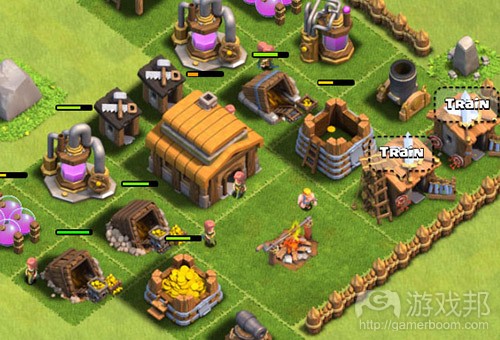
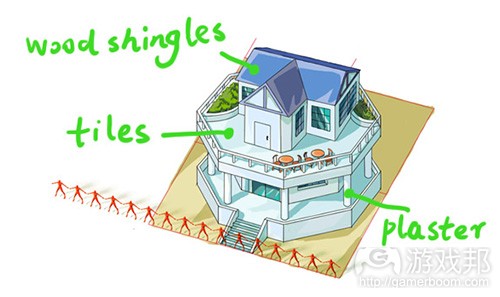
看看这张图,红色的人在房子前面排成队列。我们将他们视为“比例人”。他们与网格对应的大小在所有建筑设计中都不会变化。当进行设计时,我们要将他们想象为真正的人,建筑的所有结构都要匹配他们的大小。
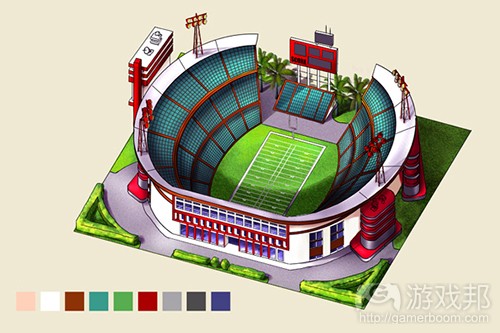
但也有些时候我们会打破这种“比例人”规则。例如,在设计真正大型事物,例如足球场的时候。如果我们仍然遵从这个规则,球场就会大到覆盖整个屏幕,甚至超出屏幕范围,那就太疯狂了!
在真正的游戏中,虚拟人物通常要大于“比例人”,我想你知道其中的原因。
3.调色盘
像这张图所示,运用调色盘使之成为一个小小的彩色块。这可以很好地引导建筑之后进入制作阶段。这对制作需要色彩变化的建筑尤其有效。
4.指定素材
你可能会像这样为建筑的不同部分指定相关素材。
至于那些很明显的东西,例如窗户要用玻璃,椅子要用木头等,就可以直接忽略了。
5.绘图角度
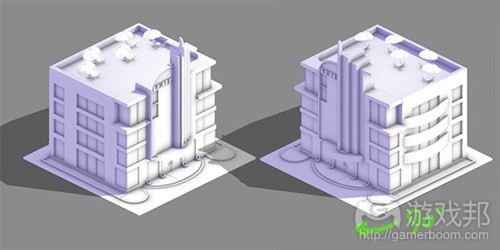
通常来看,绘制符合地图网格的做法很有必要,例如:
这样团队中每个人都可以看到良好的预览效果。除此之外,你还可以绘制像这样更为平面视角的图片:
这有助于制作团队(无论是2D还是3D)理解建筑结构并正确执行。
如果你的网格定义够单调,那你只需要一张图。
另一项需要考虑的事情就是,你的游戏中是否需要旋转建筑?如下所示:
如果需要,那你就得绘制更多角度。
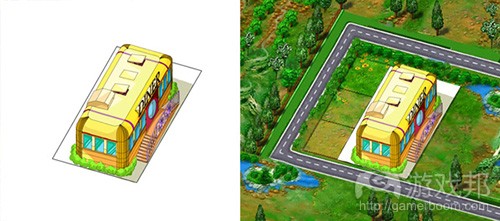
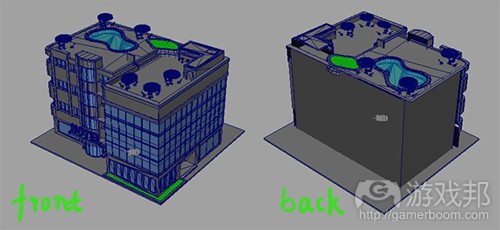
例如下图,该游戏没有旋转建筑,所以其概念美工仅绘制了一张图。你可以看到它的3D资产只画了一个面,背面却是空白的(因为没有必要为人们永远看不到的一面绘图)。
6.研究空间
针对空间和结构进行一些研究,确保你的绘图在空间上具有可行性(游戏邦注:除非你的游戏有意创造像《Monument Valley》一样的视觉假象)。否则人们将你的概念美术投入制作时就会有困难。
7.动画
你可能会考虑建筑的移动问题,这会让建筑更具生命力。例如,旋转的水车,风向标,飘扬的条幅。
等角建筑主要有两种动画类型,固体部分的移妇产科,以及类似闪光和水流的特效。
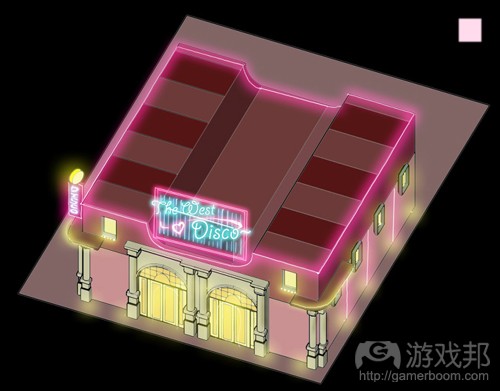
在处理光照问题时,绘制一张将所有灯光都打开的图片。
8.“建设”动画
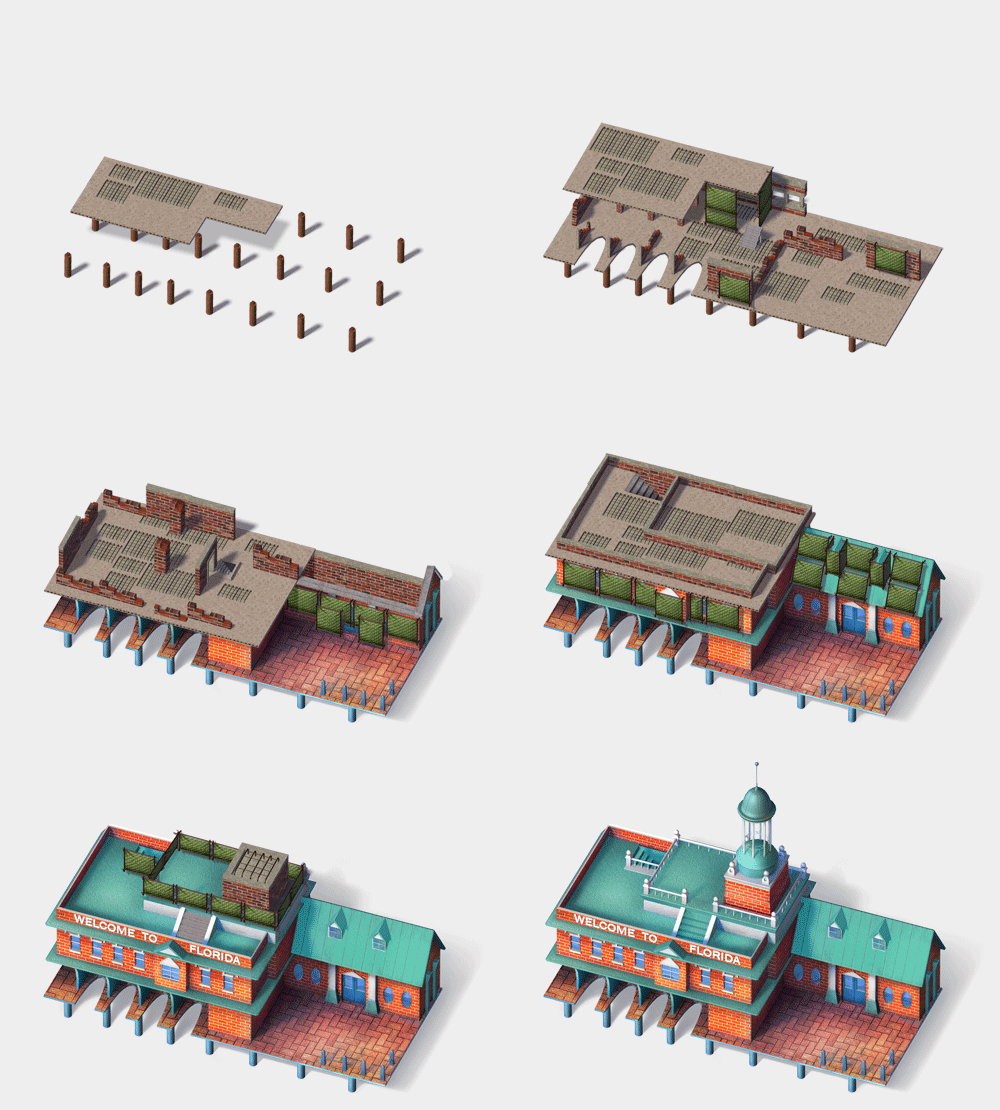
在某些游戏中,你可以看到建筑的建设过程,这一过程的不同进展也有相应的图片。
在建设真正的建筑时,要先确立钢架,之后布置水泥板,然后就是添加外层装饰。
在制作这一过程的概念美术,其顺序却是相反的。首先要制作完工建筑的概念美术,在它获得批准之后,移除完工建筑的部分,绘制暴露在外的片段,根据完工建筑来建设框架。我想你也清楚下一步该怎么做。
9.在设计中整合3D模型
在你的设计中整合3D渲染器会比你自己动手绘图更快。以下就是我们项目的一些例子:
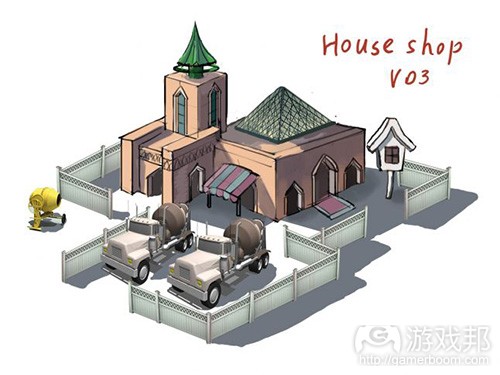
卡车:
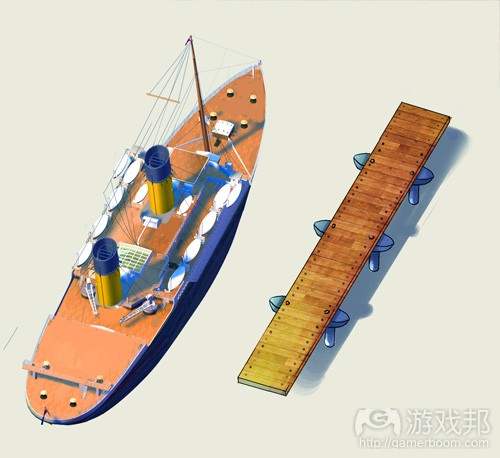
轮船:
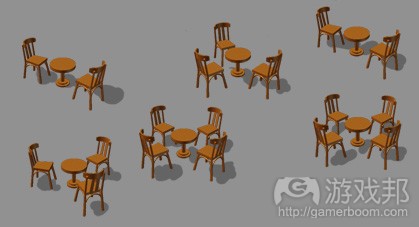
椅子:
10.可重用的绘图
在设计一个项目是,定下会产生许多重复的东西:椅子、雨伞、窗户等。要保存起来,这可以节省你重复绘制相同事物的时间。
附录:如何绘制不统一的网格线
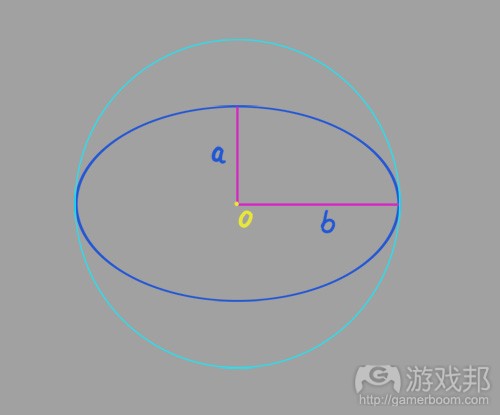
首先,要画一个圆。然后对其进行挤压,在里面设置一个椭圆。假如你在地上画了一个圆,进行等角投射后,它就会成为一个椭圆。至于这个椭圆有多扁平,则要取决于视角的高低。
所以你决定了椭圆的扁平度也就决定了a/b值。
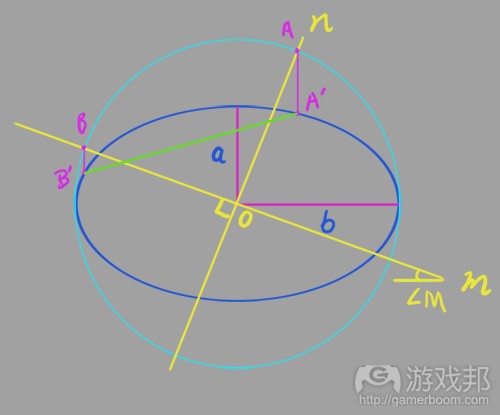
之后在圆的中心绘制一条m。你来指定斜角M的值。之后在圆中间再画一条n线段,令其垂直于m。现在线段m和n于A点和B点在圆内交叉。从A和B点绘制垂直线估,令其投射到椭圆上的A’和B’点。
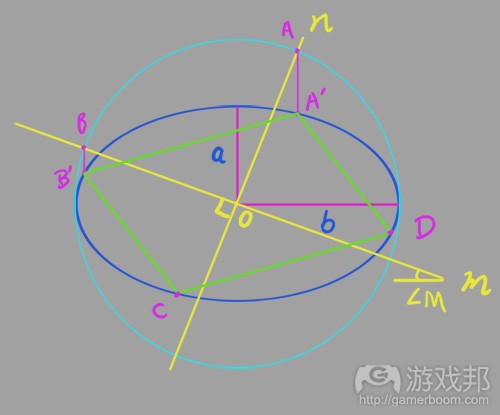
连接A’B',线段A’B'就是你等角网格的首个边缘。复制这条线段,将其置于椭圆的另一面:该线段在两端同时接触椭圆的位置只有一个。之后你可以得到C和D点。连接这些点,现在菱形 A’B’CD就是你游戏的单元网格。其形状取决于你指定的a/b和M角的值。
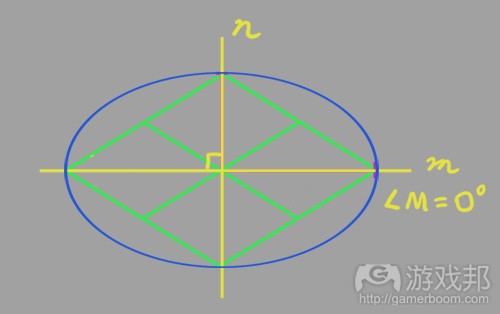
事实上,统一网格设置只是斜角线m等同于0的一个特例。
(本文为游戏邦/gamerboom.com编译,拒绝任何不保留版权的转载,如需转载请联系:游戏邦)
How to design isometric buildings
by Junxue Li
This title is a bit misleading, in fact this article is not about how to design to its essence: how to use colors, forms, how to draw… these are mastered during the long time training in an art school, I will not be able to teach you all these in an article. Instead, this article offers some useful tips in this particular area, they would help you to make your concept art of isometric asset fit better to the production pipe line. Here we go!
Before starting:
You would have three things to decide:
Origin of the inspiration
It’s better to base your design on something real in the world. For example, the design is inspired by buildings in New Orleans, or in Cairo slum.
This can give your design much life. Even if the game is fantasy themed, don’t draw purely out of imagination. I recently found that the art in PS2 blockbuster Shadow of Colossus was pretty much inspired by Indian architectures. See this picture, do you find something familiar?
In this step, gather as much relevant photos as you can. This is what we do in our projects, we have gathered photos of Miami, Cairo, Prague from all the channels available. If you have the budget, you can even arrange a journey to the site ![]()
The style and quality of production art
This is the goal you’re going to. You can study the isometric assets of games in the market, to find out the style and quality you want. For example:
If things out there don’t please you, you can ask your team to do some experimental creation, to make one or two samples, that you can set it as your project target.
Isometric grid setting
For symmetric, uniform isometric setting like this, you only need to decide the value of ; Or the value of .
For non-uniform setting like this, of course you can’t draw the grid free handed. Chances are the lines don’t abide to the law of perspective, that later if you decide to produce the buildings in 3D, it would be impossible to match the camera.
Please see the appendix to see how to draw it right.
And more often than not, the grid setting is offered by the game design team or client, you don’t need to worry about the lousy things above! So the first thing when you take over such a job, is to ask them for the grid setting.
During the design:
Decide the dimension of the building
While you have the unit grid, typically, the dimension of the building is measured by the grid. For example, 1×1 for a telephone booth, 3×3 for a super market.
And how high the building is, 1 unit or 2 unit ?
Match the size of the details
When you put all the buildings on the map, the size of the details on all the buildings should be matched. The most notable features are the doors and windows. If you find a door on one house is human size, and the door on the next house is for goblins, it would be weird and unreasonable.
See this picture, the red guys line up in front of the house. We put them there as “scale men”. Their size in relation to grid is unchanged across all the building designs. And when do the design, we think them as real people, and all the structures on the building should match their size.
And there are occasions we break this “scale men” rule. For example, when designing real big things, like a football stadium. If we still abide to this rule, the stadium would be big enough to cover the whole screen and beyond, that’s crazy!
And you can see in the actual game, the Avatar is much bigger than the “scale men”. I’m sure you know why.
Give color palette
Like this picture, give color palette as small color blocks. This would be a good guide later when the building is moved to production. That would be especially helpful if the production building needs color variations.
Specify materials
You may specify the material of different parts like this:
And for things are apparently what they are, for example glass for windows, wood for chairs, just forget about them.
Angles to draw
Typically, it makes perfect sense to draw to fit the map grid, like this:
That everyone in the team could have a good preview. And in addition to this, you can draw a more flat view like this:
This could help the production team (either 2D or 3D) understand the structure and do things right.
If your grid definition is flat enough, you need only one drawing.
Another thing to consider, is do you need rotated building in the game? Like this example:
If you do, you need to draw more angles.
For the example below, the game needs no rotated buildings, so the concept artist makes only one drawing. And you can see the 3D assets, only the front is built, the back is empty (it doesn’t make sense to build a side which is never seen.)
Study the space
Do some study of the space and structure, make sure your drawing is spatially valid (Unless the game intents to create visual illusion like that in Monument Valley). Otherwise it would create difficulties when people take your concept over to production.
Animations
You may consider some movements for the buildings, these would give much life. For example the turning of the mill wheel, weather cock, fluttering of banners.
There’re mainly two types of animations for isometric buildings, the movement of solid parts, and special effects like flickering of lights and water flow.
When dealing with lights, drawing a picture of the all lights are turned on.
“Build-up” animation
In some games you can see the Build-up process of the buildings, there are graphics at different progress of the building process.
In constructing a real building, first the steel skeleton is setup, then concrete panels are hoisted to place, then the outer side decos are added.
In doing concept art for the progress, you do it in the inversed order. First made the concept of the finished building, get it approved. Then move parts of the finished building away, draw the exposed cross section, construct the skeleton according to the finished building, etc, etc. Ok, you are smart, I ‘m sure you know what to do next!
Incorporate 3D models to the design
It would be faster to merge 3D renders(or stock photos) into your design than to draw them by yourself. Here are some examples in our projects:
Trucks:
Ship:
Chairs:
Re-useable drawings
When designing for a project, it’s bound to be lots of repetitive things: Chairs, umbrellas, windows, etc. Be mindful of them, to save your time of drawing the same things again.
Appendix: How to draw non-uniform grid lines
First, draw a circle. Then squash the circle to get an ellipse inside. Think that you have a circle on floor, after the isometric projection, it becomes an ellipse. How flat the ellipse is, depends on the viewpoint is high or low. So
you decide how flat the ellipse is, and the value of is decided by you.
Then draw a line “m” through the center of the circle. The value of the leaning angle is specified by you. Then draw a line “n” through the center of the circle, perpendicular to “m”. Now line “m” and “n” intersect the circle at point A and B. Draw vertical lines from A and B, project on the ellipse at A’ and B’.
Connect A’B’, line segment A’B’ is the first edge of your isometric grid. Duplicate this segment, place it to the other side of the ellipse: There is only one position for the segment to touch the ellipse on both ends. Then you get point C and D. Connect the points, now rhomboid A’B’CD is an unit grid of your game. It’s shape depends on the values you specify, and .
In fact, the uniform grid setting is just a special case that the leaning angle of line “m” equals to zero.(source:gamasutra)
下一篇:如何促使玩家阅读游戏中的文本


