游戏开发者分享2.5D角色美术制作过程
作者:Matt Hammill
我两周前在Toronto SkillSwap大会上发表了关于我们制作《Lovers in a Dangerous Spacetime》中2.5D角色的动画制作过程,我想是时候发布一些已经探讨过的内容。我对2D和3D之间的模糊界限一直很感兴趣(游戏邦注:作者曾从事一些关于2.5D动画制作工作),对我来说,引进代码使动画呈现生命力正是游戏开发过程中最有趣的环节之一,现在我将分享一些使用3D工具制作2D效果的游戏开发经验。
我们使用Unity创建了《Lovers in a Dangerous Spacetime》,其中一切内容都是由多边形组成,但多数物体只是一些映射到简单位面的透明纹理。游戏中没有光线,我们只是创造了背景光。我们通过一些不同方法处理美术资产,并在熟练使用Unity引擎的过程中不断推进这一过程。
玩家角色
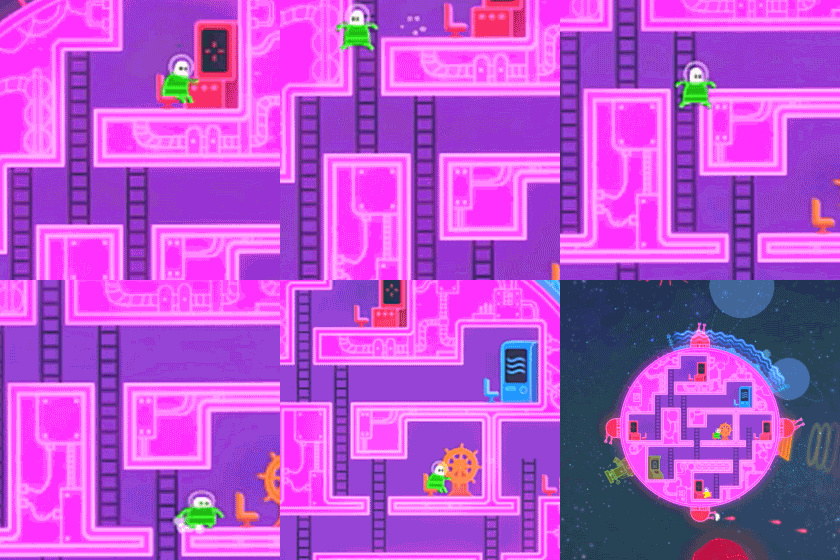
从早期原型开始,创建主角的时间就有点紧迫,那时我们尚未掌握Unity的动画脚本处理方法。这些角色最初是使用After Effects制作而成的2D动画,之后将动画帧渲染成精灵地图集纹理(游戏邦注:即包含所有动画帧的网格)。在Unity引擎中,每个角色都是由单个位面组成,我们会为其分配精灵地图集纹理。这种位面只能展现缩小的纹理,我们可以通过变换所展示的精灵地图集纹理而呈现不同的动画帧。
玩家角色实现脚本动画的地方就在于它们的伸展与挤压过程。当角色着地时,通过略微挤压整个位面,就可以让角色从高处跳并落着地的这一瞬间呈现更多运动感和反应感,并且不会干扰动画帧的播放——你可以看到角色落地奔跑并且步履不乱的挤压状态。这一操作虽然很简单,但却能极大增强视觉效果。我们还在游戏的其他一些地方采用了类似的操作。
Sputnik敌人
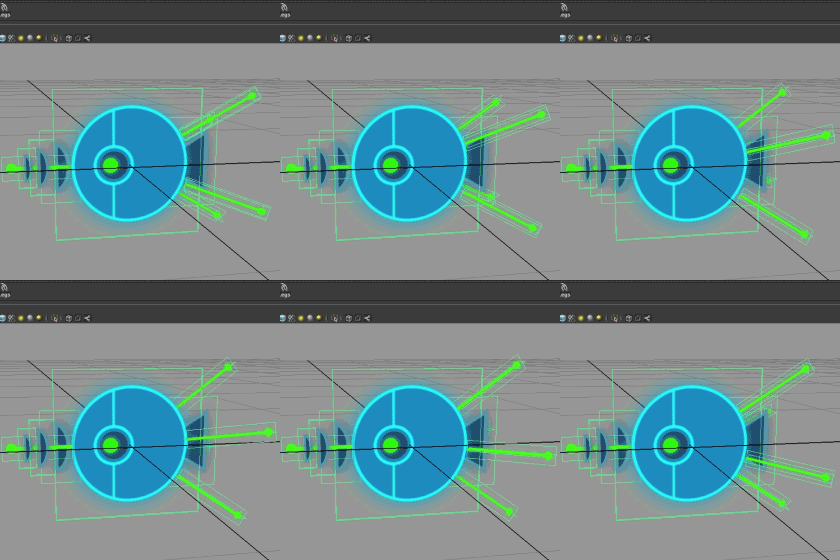
这个简单的坏蛋也是由多个位面组合而成。这是我们创造的第二个角色,我们用Unity制作了所有的关键帧动画,每个移动环节都有各自的动画文件。我将自己从《古墓丽影1》的树中所借鉴的一个技巧运用到了Sputnik敌人腿部的十字式位面——它们可以用3D方式围绕身体而旋转,并且仍可在任意角度呈现。当我们编写敌人的动画播放以便对应其行动时,这个简单的角色就开始显得更加活灵活现。
Jellybomber敌人
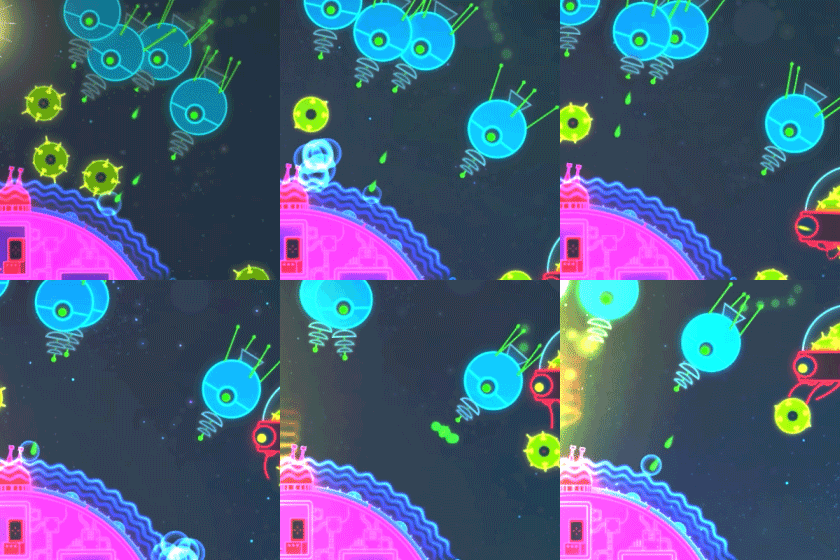
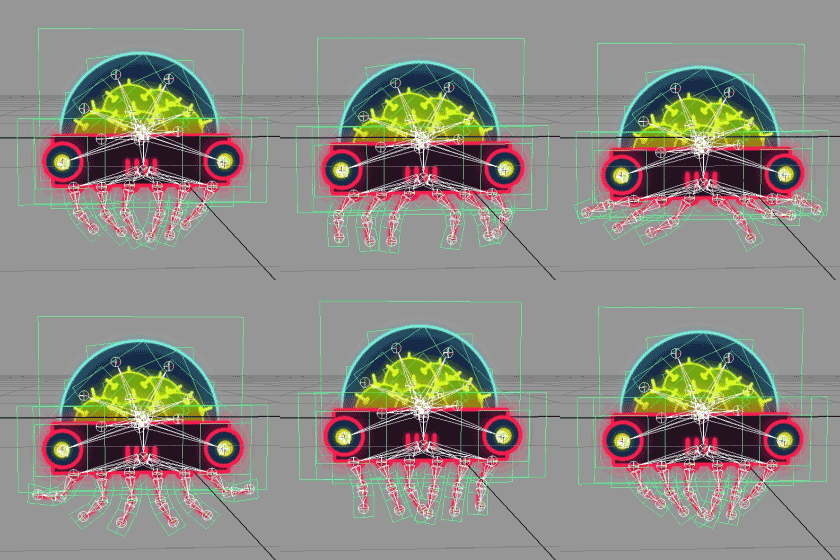
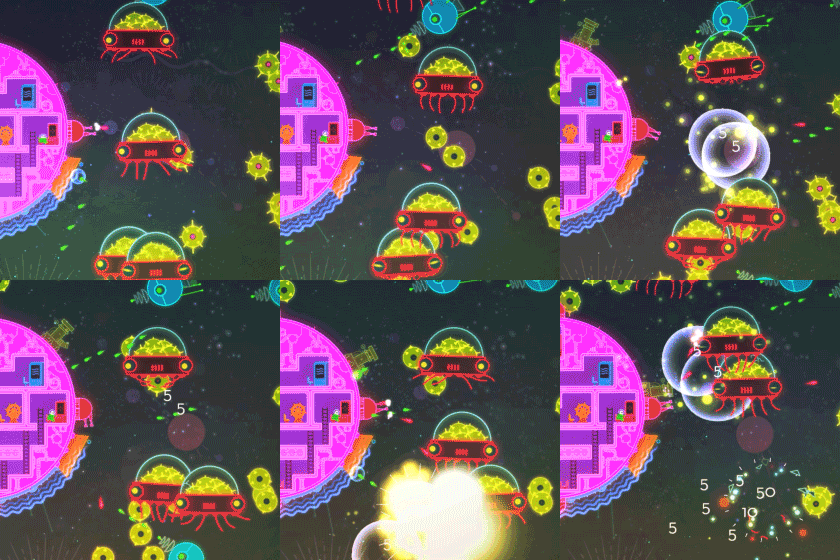
我们针对这个敌人用Maya创建了一个整齐相连的骨架,但这也令该几何体仅能呈现正位面。在制作了四个主要方向的动画移动循环,这些循环就可以动态地在代码中混合并变速以对应角色的位移。这正是使用3D工具制作2D角色的强大之处——你可以控制所有的程序性动画。我们还使用这个方法触发该角色受伤时所呈现的玻璃裂痕(否则受损的位面就会按比例缩小并隐藏到身体之后),我们还让这种水母眨眼睛,并动态追踪玩家的位置。
绿色怪兽
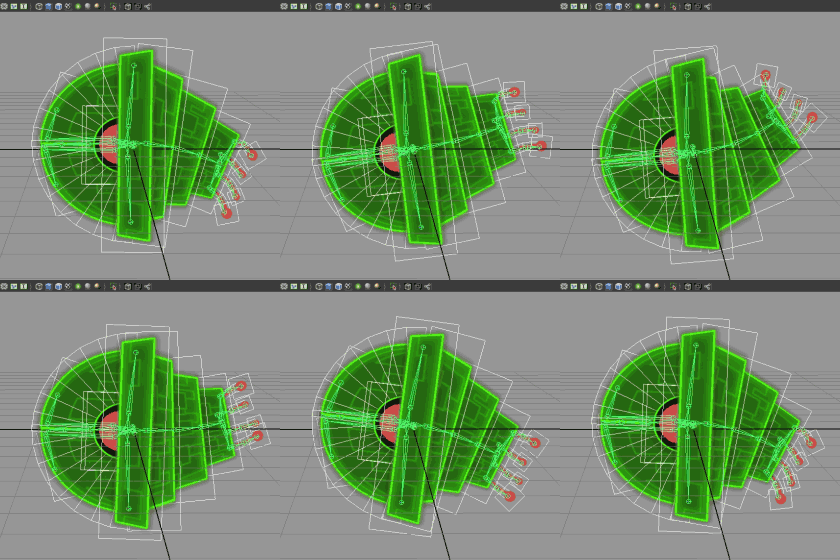
至于这个迷你boss,我们使用Unity将不同剪辑片段划分为多个动画层。头部和身体属于同一个操作层面,但它们是在不同层面进行动画播放。这样我们就能够根据加速和方向结合多个移动动画,同时又让角色头部的闲置、射击动画的触发免受其身体移动的影响。
润色
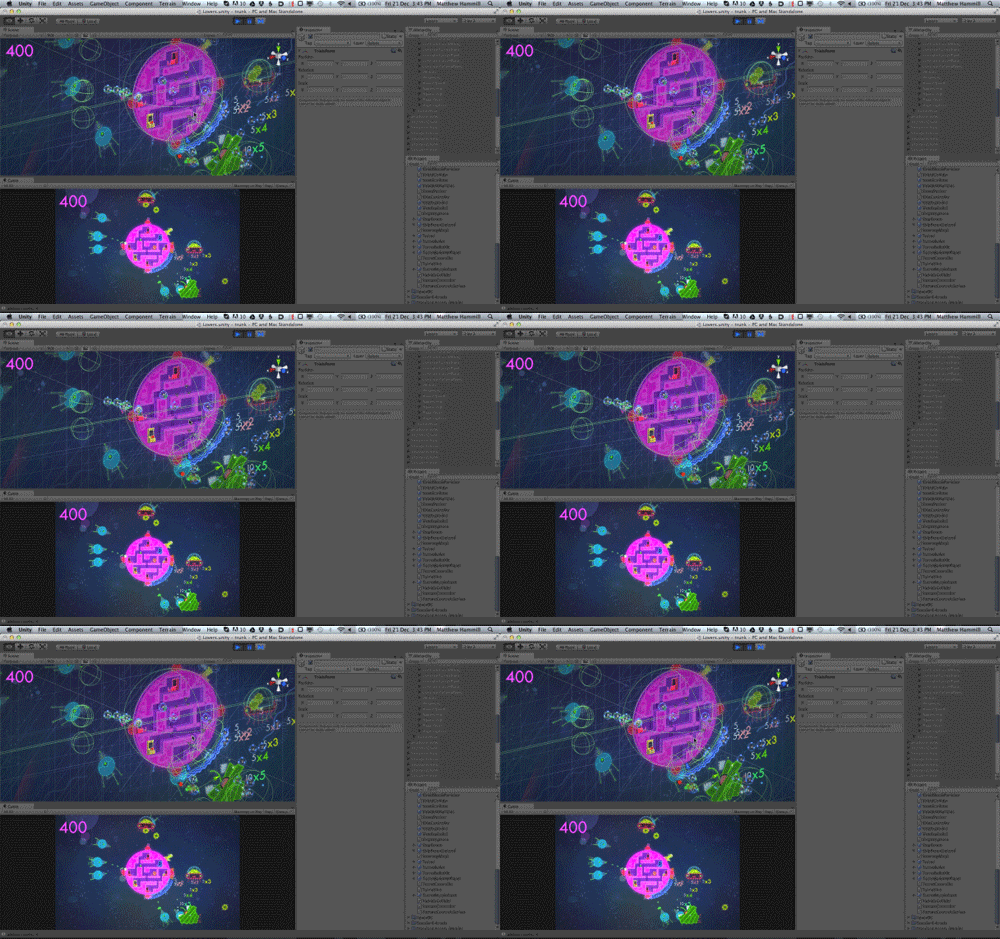
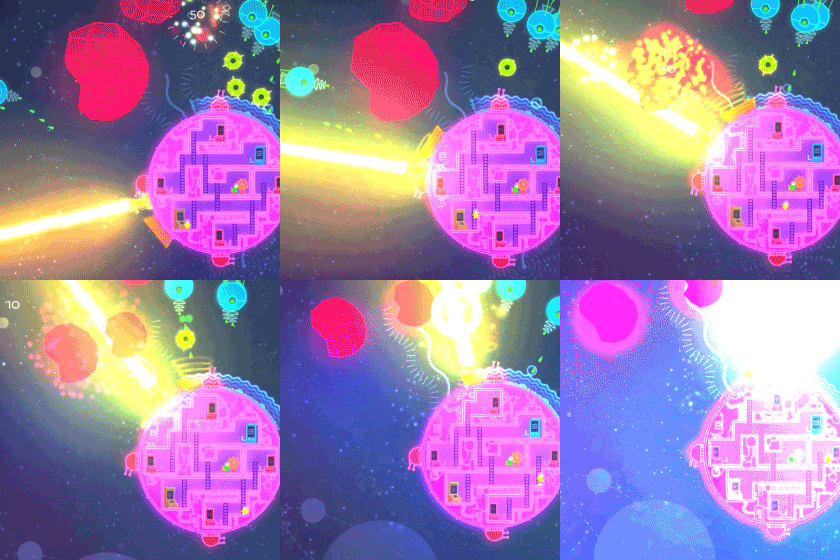
我们追求的是矢量霓虹的视觉效果,而固定2D视图的一大好处就在于我们可以直接将发光和扩散效果整合到纹理中。另外,由于我们的资产较为简单,我们可以轻松运用粒子效果。为将所有元素整合到一起,我们发现在镜头前设置缓慢转移的大型多边形,并且每个多边形都添加一个带点模糊色彩的纹理(会闪光的那种),确实有助于营造一个光线微移的发光太空环境。
(本文为游戏邦/gamerboom.com编译,拒绝任何不保留版权的转载,如需转载请联系:游戏邦)
Making ‘Two and a half D’ art for Lovers in a Dangerous Spacetime
by Matt Hammill
The following blog was, unless otherwise noted, independently written by a member of Gamasutra’s game development community. The thoughts and opinions expressed here are not necessarily those of Gamasutra or its parent company.
Want to write your own blog post on Gamasutra? It’s easy! Click here to get started. Your post could be featured on Gamasutra’s home page, right alongside our award-winning articles and news stories.
A couple weeks ago I gave a talk at Toronto SkillSwap on our process for making and animating the 2.5-D characters in Lovers in a Dangerous Spacetime, and I thought I’d post some of the things I discussed. I’ve always been interested in the mushy space between 2-D and 3-D (when I used to work in animation I got to work on a couple interesting 2.5-D jobs) and for me, finally being able to throw code into the animation mix has been one of the most interesting parts of game dev. (And just a note–”2.5-D” can be used to mean all sorts of things, but here I’m taking it to mean using a 3-D pipeline to create a mainly 2-D game.)
We’re using Unity to build Lovers in a Dangerous Spacetime, so everything is made of polygons–though most objects are just transparent textures mapped onto simple planes that face the camera. There are no lights, we just crank the ambient light all the way up. We’re handling assets in a few different ways, evolving our process as we get more comfortable with the engine.
The Player Characters
The main characters are a bit of a time capsule from our early prototype, before we learned animation scripting in Unity. The characters are first animated in 2-D using After Effects, and then the animation frames get rendered to a sprite atlas texture (a big grid of all the animation frames). In Unity, each character is made of a single plane, to which we assign the sprite atlas texture. The plane only displays a zoomed-in piece of the texture though, and we can show different frames of animation by changing which zoomed-in bit of the sprite atlas texture is displayed.
The one place where the player characters get some scripted animation is with their squash and stretch. By squashing the whole plane a little when a character hits the ground, landing from a jump feels more physical and reactive, and doesn’t interfere with which animation frames are playing–you hit the ground running and squash without breaking stride. Super simple, but it adds a lot to the feel. There are a few other places where we do similar things.
The “Sputnik” Enemy
This simple bad guy is assembled from planes. This was the second character we built, and all the keyframe animations were made in Unity, with separate animation files for each of the moving parts (NOTE: This was very silly; there’s a reason skeleton armatures exist). One of the tricks I borrowed from Tomb Raider 1′s trees is the criss-crossed planes for the legs–they can rotate around the body in 3-D, while still showing form from any angle. And when we script the playback of the enemy’s animations to react to its movement, even this simple guy starts to feel more lively.
The Jellybomber
With this enemy we built and animated a straight-up skeleton rig in Maya, while still limiting the geometry to front-facing planes. After animating movement cycles for the four cardinal directions, the cycles can be dynamically blended and speed-changed in code to react to the creature’s positional movement. This is the real power of using 3-D rigs for 2-D characters–all the procedural animation control. We also use this to trigger cracks appearing in the glass as he takes damage (the crack planes are otherwise scaled down and hidden behind the body), and we have the jelly’s eyes blink and dynamically track the player’s position.
The Green Monster
For this mini-boss we utilized Unity’s ability to separate clips into animation layers. The head and the body are part of the same rig, but their animations play back on separate layers. This gives us the ability to blend together the various movement animations according to acceleration and direction, while at the same time the head’s idle, charge and shooting animations are triggered according to the enemy’s logic independent of how it is moving.
The Polish
Since we’re aiming for a vectory neon look we’re naturally going to be suckers for bloom, and one of the benefits of a fixed 2-D view is that we can just bake glows and bloom right into our textures. Also, because our assets are quite light, we can afford to be be pretty liberal with particle effects. And to help stitch all the elements together, we found that placing a few slowly-shifting large polygons in front of the camera, each with a texture of just some faint blurry colours set to additive blending (“flare”-type) really helps sell a glowy space environment with subtly shifting light.(source:gamasutra)







 闽公网安备35020302001549号