


《塞尔达传说:众神的三角力量》中的敌人设计
作者:Michel Mony
在开始叙述本文之前让我们先澄清一些东西:这并不是关于《塞尔达传说:众神的三角力量》中所有怪物的详尽指南,这也不是关于每种敌人类别设计的综合方法。相反地,这是一篇以《塞尔达传说:众神的三角力量》为例去阐述如何基于功能去设计敌人的文章。
大多数关于这一主题的文章经常会以各种不同游戏为例以更好地呈现这种设计如何适用于不同的环境,但它们却缺少对于游戏机制与功能之间的关系的深刻理解。
而本文的目的便是通过分析《塞尔达传说:众神的三角力量》帮助你们更好地理解这一特定的游戏玩法是如何应对各种不同的障碍以及它们对于游戏流以及玩家的决策制定的影响。
需要注意的是本文将不提及boss,因为它们是一种截然不同的障碍形式。
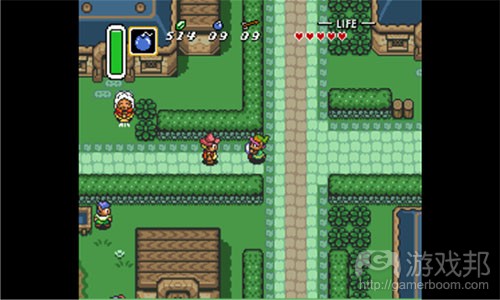
Zelda A Link to the Past(from msn)
《众神的力量》中的游戏机制和资源
关于这一分析的第一部分需要我们深入着眼于游戏的内部运行,如此我们才能更好地理解每个怪兽的设计。这一关于游戏“组件”的分解并不是绝对的,但它却足以用来解释基于功能所设计的怪兽。
生命
Link的主要资源便是他的生命。这是Link能够在挑战中存活下来的原因。“死亡(耗尽生命)”的主要问题在于时间的损耗:尽管游戏的状态得到了有效的储存,但是玩家需要从很远的地方从新开始,并且为了走得更远而需要重新回到死亡前的地方。
死亡总是很让人受挫,玩家会竭尽全力避免死亡。然而在这里没有一种“失败”是与死亡相关的。
造成伤害/死亡的原因:
遇到敌人
遇到陷阱
遭到敌人的导弹攻击
掉进坑里
魔法
魔法是Link使用一些最强大工具(魔法工具)的能力。它能让Link清楚何时以及在哪里使用这样的工具。因为大多数这些工具都需要消耗许多魔法,而魔法又比心更难得到,所以这在游戏中算是一种重要资源。
而耗尽魔法就其本身而言则是不重要的。
炸弹和箭
炸弹是Link能够储存的一种工具,并且只要他拥有至少一个炸弹便能够使用它们(并且不需要其它工具的辅助)。这在发现秘密区域方面是一种有效的工具。而它的“威力”也是无限大。
箭的性能与炸弹相似,除了它们需要依赖于弓才能发射。
炸弹和箭与魔法非常相似,但是却比较普通。
卢比
卢比是游戏中的货币,它们具有各种颜色,并代表不同币值。而卢比只能用来购买两件东西:
Zora的脚蹼(游戏邦注:能够赋予玩家游泳的能力)
药剂(能够补充玩家的生命值或魔法)
此外还有一些随意的用途(如能够增加携带的炸弹/箭的数量)。
时间
在这款游戏中时间并不是一种显著的资源,但因为游戏进程不会因为死亡而终止,所以时间是游戏唯一能够从玩家身上获取的东西。在某种程度上,《塞尔达:众神的力量》中的死亡可以总结为重新回到死亡的地方但却能够避开沿途中的大多数危险。即从根本上来看,死亡便等于时间的消耗。
同样地,如果玩家想要累积更多卢比(能够用来购买炸弹,箭,药剂等等)或恢复生命值和魔法的话,他们可以通过在较不危险的游戏领域花费时间而做到这些。
因此我们可以说大多数资源都可以通过时间消耗而获得,而死亡所消耗的时间本来可以用于获取更多资源。同样地,资源的损失也是一种时间浪费,除非这种影响具有延迟性。当玩家缺少足够的资源去完成一个地下城任务时,这种代价便会变得更明显,因此玩家需要更努力逃出地下城去重新获得丢失的资源。而在其它情况下,如果玩家能够在下一次旅程中自然地获取资源,玩家便不会感受到“失败”。
《塞尔达传说:众神的力量》中的敌人
《塞尔达传说:众神的力量》中的敌人角色能够通过让玩家消耗时间而延长游戏。因为在很多房间里玩家只有杀死所有怪兽才能拿到钥匙开门出去。很明显游戏的目的是创造玩家必须先分析然后制定计划去克服的种种障碍。
每个敌人的角色都将确保玩家会在一些关键位置消耗一些时间。
而这么做的显著方法便是创造拥有越来越多生命并且能够制造更多伤害的怪兽。这么做能够挑战玩家的观察与反应能力,并且比单纯磨练一个人的反应能力需要花费更多时间。
如果游戏中的所有敌人只是具有不同优势的剑兵,那么游戏很快便会变得无聊,并且玩家将能够更轻松且更快速地完成游戏,因为只要他们知道如何击败一个剑兵便能够将该方法应用于其他剑兵身上。
所以游戏该如何创造怪兽去强化玩家的观察与模式识别意识呢?
敌人类型和功能
剑兵
让我们先从剑兵开始:
假设剑兵是游戏中最基本的敌人形式,但它却并非微不足道。剑兵拥有自己的移动模式并且具有游戏中最有趣的一种隐藏功能:潜行。
在剑兵遭遇攻击或看到玩家以前,它并不会主动追逐玩家,如此避开剑兵便变得特别有趣。有许多关卡设计便有效支持了剑兵的这一功能,但几乎所有玩家都会在游戏中遇到与剑兵的战斗,除了在SpeedRunner社区外,因为在那里玩家并没有这么做的动机。
此外,剑兵还有可能掉落卢比或心,而这些东西都带有一定的“时间”价值。从根本上来看,比起避开剑兵,杀死一个剑兵能够帮助玩家获得更多时间。
剑兵的功能=开始掌握战斗机制和潜行功能
弓箭兵
从设计上来看,弓箭兵较为胆小,它们不喜欢直接冲突,但同时它们也是很厉害的侧卫。所以玩家必须学会精通定位与移动。而弓箭兵的优势是与房间里的其它怪兽相关,所以它很独自难移动到其它房间。在Aahnim’s Castle中有一个特定房间要求玩家必须推动砖块,而同时一些弓箭兵则会一直盯着玩家,这便说明了当一个房间是支持弓箭兵时他便会变得更加强大。
当玩家第一次遭遇这种情况时便会对此印象深刻,而这也是一种非常复杂的移动模式,新玩家需要花些时间去做出适当的判断,更重要的是基于妨碍玩家靠近的不同功能,其难度规模也会不同。
万不得已的时候,玩家便可以使用他们自己的资源(如箭)去射击弓箭兵,但是它们通常都不值得玩家浪费资源。虽然对于那些不清楚资源等于时间的玩家来说这一点都不重要,但事实上在同一个地下城中,玩家将在之后的行动中需要使用到箭。
弓箭兵的功能=增强玩家对于移动和定位以及潜在的资源陷阱的了解。
敌人检查点
游戏中的许多敌人是作为秘密之门或检查点。通常他们的目的便是核实你具有行进的齿轮。这里也存在一些分类:
较弱的检查点
这是指那些能够被常规方法消灭并且更容易被特殊玩家击退的敌人。例如Green Eyegore便属于这类型敌人。你可以只使用箭便杀死这一庞大的猛兽,但是你可能会因此失去一些心,与此同时如果你能用剑击中它们的一只眼睛的话便能更轻松地杀死它们。
通常情况下这种较弱的检查点会包含一些资源,而如果玩家不能留住库存中一些必要的资源的话便会遭受一定的惩罚。举个例子来说吧,面对Dark Forest中的Gibdo,玩家可以使用Fire Rod(可以在同个地下城中获得)更轻松地杀死它,但这意味着既需要使用Fire Rod也要使用魔法。在地下城的开始处,玩家必须使用箭去对付这类型敌人,因为那时候他们还没有Fire Rod,而当他们之后再次遇到这些敌人时情况可能会发生变化,即玩家可能会因为未能储存魔法而需要依靠箭的帮助。
较弱的检查点的功能=给予探索“工具vs敌人互动”的玩家奖励并鼓励玩家在何时与何地消耗资源方面做出选择。
较强的检查点
较强的检查点是指那些很难轻易被杀死的敌人,除非是用游戏设计所指定的方式。Terrorpin便属于这类型敌人。除非你拥有斧头,否则你便杀不死它。通常情况下这能够保证你在每个地下城都想要获得Big Chest,而从关卡设计角度看来这也是保险般的存在。
较强的检查点的功能=基于所需要的工具去防卫特定区域的关卡设计工具。
较强的资源检查点
较强的资源检查点是指那些很难轻易被杀死的敌人,除非是用游戏设计所指定的方式,而该方式是属于一种有限资源。
例如Red Eyegore便是一种较强的资源检查点。除了朝它的一只眼睛发射两支箭外你不可能将其杀死。如果你用光了所有的箭,而你又不得不杀死这一敌人,你便会左右为难。当你因为消耗了资源而损失了时间时你便会感受到这一点。为了获得两支箭,你可能需要走出地下城,而在这个过程中你可能会因为死亡而消耗了过多时间。
还有一个例子是Freezor,即你必须使用fire rod去杀死它。该敌人是负责守卫冰宫(直到你完成dark forest这一关卡)。
较强的资源检查点的功能=惩罚消耗了不必要的资源的玩家。
Stalfos骑士
Stalfos骑士是一个很有趣的敌人:因为它会一直一直回来!尽管在之前的房间里有提示,但是玩家却始终不知道它的真正缺陷是什么。这是一种会不断给玩家施压的敌人,并且会迫使他们不断探索各种可能性。
这其实也算是一种较强的资源检查点,因为玩家只有使用炸弹才能将其杀死,但这同时也是一种独特的障碍,因为它属于一种两个阶段的敌人,即需要玩家投入额外的探索过程。
Stalfos骑士的功能=打破常规者:它会让玩家惊讶于一些执行妥当的计划并需要玩家进行进一步的调查/实验。这同时也会惩罚消耗不必要的炸弹的玩家。
Helmasaur/HardHat Beetles
之所以将Helmasaur和HardHat Beetles放在一起是因为它们都改变了交战规则并能够影响玩家的定位。
Helmasaur会攻击玩家的头部,并且通常情况下玩家都不能从前方伤害到它们,如此玩家只能想办法从侧面进攻。这类型敌人并不能创造较为严重的伤害,但是它们却能够将玩家逼近洞穴或其它陷阱中。
HardHat Beetles则扮演着相同的角色,但是它们更具有防御性。它将惩罚陷入混战的玩家们(可能会将他们逼近一个洞穴里)。
Helmasaur和HardHat Beetle的功能=挑战玩家对于混战的理解并验证环境与怪兽(洞穴)之间的协同效应。
秃鹰和Mini-Moldorm
秃鹰并不是一种特别有趣的敌人,实际上它很让人讨厌,但是它也具有存在的目的。因为它的飞翔模式,所以玩家很难判断它会以怎样的角度攻击自己。
同样地,Mini-Moldorm也拥有较为奇特的移动行为,即让玩家根本不可能预测到它会从墙上反弹回来。
这两种敌人都很难被远程武器所击中,通常只有基于反射的近距离战斗或旋转攻击才能够消灭它们。
秃鹰和Mini-Moldorm的功能=奖励带有较好反应能力或使用旋转攻击的玩家
红色Stalfos
红色Stalfos是一种简单的生物,但却具有反转性。与就像不具有“追逐玩家”模式的剑兵的蓝色Stalfos不同的是,红色Stalfos会通过投掷骨头去惩罚未能作出准确进攻的玩家。
红色Stalfos的角色便是教会玩家如何准确使用剑以及更好地理解剑的实际攻击范围。
显然,如果玩家应该消耗具有更高价值的资源,那么红色Stalfos也只能为自己买单了。
红色Stalfos的功能=惩罚玩家的不准确或惩罚消耗不必要资源的玩家。
Hoarder
Hoarder是一个灌木丛般的小小敌人,实际上它不能算是真正的敌人。它就像一个规则执行者将强迫玩家重新考虑对于游戏规则的理解,并且会导致玩家偏离原来的方向而追随着它前进。
Hoarder的功能=玩弄玩家的想法!(说实话它并不会创造许多卢比!)
WallMaster
说实话这是游戏中最让人害怕的怪兽之一,WallMaster是一只来自天空的大手,它将抓住玩家并把他们带离地下城。最早它会出现在Dark Forest,在那里每个地下城部分都相对较小,并且在这里玩家能够较轻松地驱逐它们。
WallMaster的主要功能很简单:它不需要真正杀死你便能够杀死你。
从根本上来看,它会将“我需要将你的生命值降至0以将你带出地下城”变成“我需要攻击你以将你带出地下城。”在这里实际的时间损耗其实很少,但WallMaster却是最致命的怪兽,尽管它并不能带给玩家真正的伤害。
WallMaster同时也有另一个存在目的:它将迫使玩家基于反复的刺激而移动。尽管在大多数环境下它很容易做出闪避,但是它会在某些地方与其它怪兽联合起来对玩家进行区域封锁,从而使这些地方变成极具挑战性的环境。
更重要的是,WallMaster并不会提供给你太多思考时间。当它第一次抓住你时你变需要马上意识到他在做什么,但这也不会阻止你去了解你进入“其余房间”,而它也将剥夺你详细分析房间并制定计划的能力。
WallMaster的真正的功能是确保你能够执行多个任务:使用你所学到的多种移动方式和定位能力而不断移动,并能够躲避大多数威胁,同时你还要思考该在房间里做什么以及你能够做些什么。这应该算是游戏中最棒的时间杀手了吧!
而这一方法也存在一个较弱的变量,即“Thief”倾向于偷取一些普通的资源(如卢比,炸弹之类)而不是创造伤害。比起WallMaster的独特行为,时间损耗显得无足轻重。
WallMaster的功能=让玩家分心并犯错。
使用过程
这一部分是关于如何基于敌人在游戏中的功能进行设计。
步骤1:决定资源
我们做的第一件事便是列出游戏资源。在列出这些内容后我们便能够理解之后的部分,而这同时也是创造与游戏玩法相关的敌人的第一步。
在上述例子中,我们知道所有内容都可以在某种程度上等价于时间。一旦证实了这一点,设计师的角色便是去理解他们如何基于不同方法影响“所有内容”。
上面我们便提到了,资源的消耗与时间的损耗一样具有问题,而一些关键情节则有可能创造出与死亡一样糟糕的情境。
步骤2:识别情节并定义所需功能
一个这样的情节是关于面对一个较强的资源检查点这样的敌人并且在特定时间点上缺少特定资源。为了创造如此情节,设计师必须创造至少两种敌人类型:
一种敌人便是较强的资源检查点(例如Red Eyegore)
另一种敌人既可以是基于同样资源的较弱检查点(Green Eyegore)或陷阱敌人(如Red Stalfos或HardHat Beetle),即不需要同样的资源才能将其消灭,但是它们的作用却会导致玩家不必要地消耗一些资源。
步骤3:基于所需功能设计敌人
第一个敌人较容易设计,因为它的唯一目的便是只受唯一一种攻击方式的影响(例如箭)。然而它也将提供有关其弱点的暗示,从而让玩家不会茫然地横冲直撞。Red Eyegore便非常合适,因为它能够让玩家无需牺牲生命而先体验Green Eyegore,并从中了解箭比剑更厉害。
而第二个人较为棘手,因为它需要更强大并且玩家不需要使用特定资源也能够将其杀死。Green Eyegore便非常适合,因为它并不会害怕远处射来的箭,同时也会迫使玩家与之进行互动并想办法消灭它。
你会注意到在游戏中,Green Eyegore和Red Eyegore在一开始便会出现于同一个地下城中,那里会有一些Green Etegore并引出Red Eyegore。这便是游戏中基于功能的敌人设计部分。在这里设计师的期待是玩家将带着足够的箭到达这个点并继续前进,但因为剩下的箭的数量不多,所以玩家也将意识到箭的重要性以及Red Eyegore的危险性。玩家将从中学习如何储存资源从而避免在之后需要的时候资源耗尽的情况。
步骤4:反复
重复使用步骤2和步骤3能够创造有趣的转折,即情节可以是任何看上去有趣的内容,而敌人设计则需要去支持预期的结果。就像WallMaster便是一种能够在不杀死玩家的情况下杀死玩家的敌人,即能够有效创造出类似的结果(迫使玩家不得不离开地下城)。
我们必须记住所有在步骤2中创造的情节以及它们对于彼此之间的影响。简单地创造全新情节可能会导致一些敌人类型因为某种原因而相互排斥。当然了,关卡设计师拥有工具并且不一定需要使用这些工具。虽然每个地下城都是一个独立的叙述内容并拥有完整的控制系统,但是如果能够创造具有一致功能的怪兽还是会更好。换句话说,如果你采取一种方法去创造资源短缺的情况并且你也想要创造另一种资源,那么你最好采取完全不同的方法或者从机制上看来不一样的方法。
结论
基于功能去创造怪兽是一个很泛的主题,并且也不算是精确的科学内容。我们可以通过一些实用的例子而非通用公式进行更深入的了解。而本文便是通过列举一款游戏的核心怪兽设计去作为参考内容,但这并不是你了解功能性怪兽设计应该掌握的全部内容。
(本文为游戏邦/gamerboom.com编译,拒绝任何不保留版权的转发,如需转载请联系:游戏邦)
The Art of Enemy Design in Zelda: A Link to the Past
By Michel Mony
Let me preface this article by mentioning what this article is not: This is not an exhaustive guide to every monster in Zelda: A Link to the Past, nor is it a comprehensive method on how each enemy class was designed. Rather, this article is really about how to design enemies by their functions using the example of Zelda: A Link to the Past.
Most articles that discuss this topic often pick examples from various different games to give a better outlook on how this applies to different environments, but they lack a hollistic understanding of how gameplay mechanics and functions actually intertwine.
The purpose of this article is to dissect Zelda: A Link to the Past’s monsters to better understand how this specific gameplay can host mechanically different obstacles and what their impact is on flow and player decision-making.
Note that we will not cover Bosses here, as they’re an entirely different form of obstacle!
Game Mechanics & Resources in a Link to the Past
The first part of this analysis requires that we take a deeper look at the inner workings of the game so we can better understand how each monster was designed. This arbitrary breakdown of the game’s ‘pieces’ is not absolute, but it should suffice to explain monster design by their function.
Life
Link’s primary resource is his life. This is a measure of attrition that represents Link’s ability to survive the challenges laid in front of him. The primary issue with ‘dying’ (running out of life) is actually a severe loss of time: though the state of the game is effectively saved, the player must restart progress from a distant location and needs to make his way back to where he was in order to proceed any further.
Death is frustrating, and the player seeks to avoid it by any means possible (potions, faeries and, obviously, not taking damage). There is however no form of ‘loss’ associated with death.
Causes of damage / death:
- Bumping into enemies
- Bumping into traps
- Enemies’ missile attacks (including Bombs)
- Falling into pits
Magic
Magic is Link’s ability to use some of its most powerful tools (magical items). It insures that Link pays careful attention to when and where such tools are used. Because most of these items cost a lot of magic and that magic is harder to come by than hearts, this is a critical resource in the game.
Running out of magic is inconsequential in and of itself.
Bombs & Arrows
Bombs are an expendable tool that Link can stock up on and they can be used as soon as Link has at least 1 of them (no other tool is required). They are effective at uncovering secret areas. Their ‘max’ is limited.
Arrows behave similarly with the exception that they require a bow to be fired (regular or silver).
Bombs and Bows are very similar to magic, except they’re much more specific.
Rupees
Rupees are the currency of the game, they can be found in various colors which are worth different amounts of currency. Rupees are only truly useful for two things:
Zora’s Flippers (a passive tool that grants the player the ability to swim)
Potions (which can replenish life and / or magic) – mandatory for Turtle Rock in a regular playthrough
Every other use is optional (increasing maximum amount of bombs/arrows carried for example).
Time
Time is not an obvious resource in this game, but given that progress is not lost on death, time is the only thing that the game takes from the player. To a degree, dying in Zelda: A Link to the Past can be summarized as having to walk all the way back to where you died but being able to avoid most of the danger on the way. Essentially: dying is a loss of Time.
Similarly, should the player ever need to build-up their rupee count (possibly to buy bombs, arrows, potions, etc.) or regain life, magic, etc., they can simply accomplish all of these by spending some Time in the less dangerous areas of the game.
Thus it can be said that most resources can be acquired by spending time in the game, and that death results in a loss of time that could’ve been spent acquiring resources instead. Equivalently, the loss of resources is also a waste of Time with the exception that the effect is delayed. This toll only trully becomes apparent when the player lacks a specific resource to complete a dungeon, and must therefore go out of the dungeon to seek the missing resources. On most other occasions, that ‘loss’ is hardly felt as the player will come across resources naturally on their next trip through the worldmap.
Enemies in Zelda: A Link to the Past
The role of the enemy in A Link to the Past is to make the game longer by having the player spend Time. This is confirmed by the many rooms where the player is forced to kill all of the monsters to get the key or force the door open. The clear intent is to create an obstacle that the player must first analyse and then devise a plan to overcome.
Each enemy’s role is to insure the player will lose some time at key locations.
The obvious approach to doing this is creating monsters that have progressively more life and deal more damage. Doing so however hardly challenges the player’s ability to observe and react which, in practice, take a lot more time than simply becoming better at honing one’s reflexes.
If all enemies in the game were Sword Soldiers of varying strength, not only would the game become boring quickly, but it would also be much easier and faster to complete as whatever the player has learned to beat the sword soldier would apply to all other soldiers.
So how, exactly, should monsters be created to enforce player observation and pattern recognition?
Enemy Types and Functions
Sword Soldier
Let us begin this breakdown by looking into The Sword Soldier:
One might be led to assume, from the above, that the Sword Soldier is actually the most basic form of enemy in the game, but it isn’t as ‘Vanilla’ as it seems. The Sword soldier has its own movement pattern and boasts one of the most interesting hidden features in the game: Stealth.
Until a Sword soldier has been attacked or has seen the player, it won’t actively pursue the player, which makes it particularly interesting to avoid. A lot of the level design actually supports this to great effect, but arguably, very few people ever went through the game without engaging combat with them apart from the SpeedRunner’s community, simply because there is no incentive to doing this aside from time (which is a limited concern to most).
In addition, the Sword Soldier is likely to drop rupees or hearts, which have some ‘Time’ value. In essence, you might just gain as much time from killing a sword soldier and getting its drop than you might gain by avoiding the fight altogether.
Sword Soldier’s Function = Get acquainted with combat mechanics and stealth.
Bow Soldier
By design, the Bow Soldier is a coward, which will not seek direct confrontation from upclose, but it is a terrific flanker. As a result, it makes positionning and movement all the more important to master, and its strength is relative to the other monsters in the room, and how hard it is to navigate said room. There is a specific room in Agahnim’s Castle where the player must push a block while a few Bow Soldiers are looking at him, and it shows to great effect how much more powerful the Bow Soldier is when the room supports him.
It can be impressive when first encountered, and its very complex movement pattern (moving away between shots when at melee range, taking orthogonal shots, etc.) takes a while to gauge appropriately for a new user, and more importantly, it scales in difficulty organically based on what features are impeding the player from getting up close and personal (tough melee enemies, obstacles).
As a last resort, the player can use their own resources (arrows for example) to shoot them down, but they’re hardly worth that resource investment, and thus pay for themselves. This is largely inconsequential to a player unaware of resources = time, but it is very real if said arrows are required later within the same dungeon.
Bow Soldier’s Function = Reinforce the player’s understanding of movement and positionning. Also potential resource trap.
Enemy Checks
A number of enemies in the game act as secret ‘gates’ or ‘checks’. Their purpose is often to confirm that you have the required gear to proceed. There are a few sub-categories (these are not canon terms, I merely employ them to better explain how they differ from one another):
Soft Checks
A soft check is an enemy that can be killed by conventional means but is much easier to kill by a specific method. The ‘Green Eyegore’, for example, is a great Soft Check. You can try to kill this hulking beast with sword alone but might lose a few hearts doing so, while a single arrow to their one eye will net you an easy kill.
It is possible that this soft check involves resources, which basically punishes the player a bit for not having kept the necessary resources in inventory. For example, the ‘Gibdo’ in the Dark Forest is easier to kill using the Fire Rod (acquired in the same dungeon) but it implies having both the Fire Rod and magic. At the start of the dungeon, the player must deal with this enemy with their sword because they do not have the rod yet, and chances are that when faced again, the player may still need to resort to sword because they haven’t been saving up on their magic.
Soft Check’s Function = Rewards the player for exploring the ‘tool vs enemy interactions’ & encourages the player to choose when and where to spend their resources.
Hard Checks
A hard check is an enemy that cannot be killed by any other means than the one it was designed to be killed with. The Terrorpin is a good example of a Hard Check. You cannot kill them unless you have the hammer. Generally speaking, this simply confirms that you went for the Big Chest in each dungeon and is an insurance policy from a level design standpoint.
Hard Check’s Function = Level Design tool to gate certain areas based on items acquired without having to create a hard lock (such as Titan’s Mitt) & ‘Puzzle’ element where the player needs to experiment with their tools to see how to dispatch of certain enemies.
Hard Resource Checks
A Hard Resource Check is an enemy that cannot be killed by any other means than the one it was designed to be killed with, and that method involves a finite resource.
The ‘Red Eyegore’, for example, is a great Hard Resource Check. You cannot kill it any other way than shooting two arrows to its one eye. If you run out of arrows, and this enemy must be killed (for a key possibly), you’re screwed. THIS is when you feel the loss of time induced by spending/losing resources. To get these 2 arrows, you’ll likely need to go out of the dungeon which may take just as much time as dying.
Other notable examples of Hard Resource Checks include the Freezor which must be killed by using the fire rod (and thus, having sufficient magic left). It is what keeps the ice palace locked (until the dark forest level is completed).
Hard Resource Check’s Function = Punishing player for spending resources unnecessarily.
Stalfos Knight
The Stalfos Knight is an interesting enemy: it keeps coming back! Though hinted at in a previous room, its actual flaw remains hidden to the player. It is an enemy that keeps the pressure on the player and forces them to explore the possibilities.
It is actually a Hard Resource Check in that it requires a bomb to kill, but it is also a very unique obstacle in that it is a two-stage enemy which requires an added level of exploration from the player.
Stalfos Knight’s Function = Rule breaker: it causes surprise to a well-executed plan and requires further investigation / experimentation. Also good to punish players for spending bombs unnecessarily.
Helmasaur / HardHat Beetles
The Helmasaur and HardHat Beetles are related in that they both change the rules of engagement and have an effect on the player’s positionning.
The Helmasaur charges the player headstrong, and typically cannot be harmed from the front which forces the player to find a means to flank it. It is also an enemy that does not deal a particularly high amount of damage, but seeks to push the player into holes or other traps.
The HardHat Beetles have a similar role, but defensively. It punishes the player from engaging in melee combat by having them bounce backwards (possibly into a hole).
Helmasaur & HardHat Beetle’s Function = Challenge the player’s understanding of melee combat (flanking, knockback) and demonstrate synergy between environment and monsters (holes).
Vulture & Mini-Moldorm
The Vulture is not a particularly interesting enemy, it’s actually rather annoying, but it serves a purpose. Because of its flight pattern (circle), it is very hard to determine the angle in which it will try to attack the player.
Similarly, the Mini-Moldorm has a rather erratic movement behavior making it particularly hard to predict how it will bounce off walls.
Both of them are particularly hard to hit with ranged weapons and generally require tough reflex-based close combat or the use of the spin-attack.
Vulture & Mini-Moldorm’s Function = Reward players with good reflexes and / or usage of the charged spin-attack.
Red Stalfos
The Red Stalfos is a simple critter, but with a twist. Unlike the blue Stalfos which behaves essentially like a Sword Soldier minus the ‘chase after the player’ pattern, the Red Stalfos also punishes the player for inaccurate strikes by throwing a bone.
Most enemies don’t give a rat’s eye whether the player hits or miss an attack. The Red Stalfos’ role is to teach the player exactly how their sword behaves and have an understanding of its actual reach.
Obviously, in the event that a player should spend highly valuable resources, the Red Stalfos pays for itself through attrition of player’s resources.
Red Stalfos’ Function = Punish player inaccuracy or punish player for spending resources unnecessarily.
Hoarder
The Hoarder is a small bush-like enemy which isn’t actually an enemy. It is a rule twister that forces the player to reconsider his understanding of the game rules and may lead the player off-course to chase after him.
Hoarder’s Function = Play with the player’s mind! (He doesn’t hand out that many rupees to be honest!).
WallMaster
Assuredly one of the most dreaded monsters in the game, the WallMaster is a giant hand that falls from the sky to capture the player and force them out of the dungeon. Purposely, he first appears in a dungeon (Dark Forest) where each segment of the dungeon is rather small, and being kicked out is less frustrating than a regular dungeon.
It’s primary function is simple: it kills you without killing you.
Essentially, it drops the ‘I need to lower your life points to 0 to force you out of the dungeon’ to, ‘I need to hit you to force you out of the dungeon’. The actual time loss is shorter, but the WallMaster is clearly the deadliest monster despite not actually dealing the player any damage.
The WallMaster also serves a secondary purpose: it forces the player to move based on repeated stimuli (falling sound, and growing shadow spot). Though he is easy to dodge under most circumstances, he does some area denial for the player, which in conjunction with other monsters, can result in very challenging environments.
More importantly, the WallMaster does not give you much time to think. You quickly understand what he does the first time he catches you, but that doesn’t stop you from having to study the ‘rest of the rooms’ you enter, and he denies you the ability to analyze the room in great detail and devise a plan.
The WallMaster’s true function is to insure that you must multi-task: use what you’ve learned in terms of movement and positionning to keep moving about, hoping to dodge most threats, all the while having to think about what the room needs you to do and how you’re likely to do it. It is the greatest time killer in the game!
A much weaker variant of this approach exists as the ‘Thief’ which tends to steal mundane resources (rupees, bombs, etc.) instead of dealing damage. The loss of time is marginal compared to the WallMaster’s unique behavior.
WallMaster’s Function = Force the player to lose focus and make mistakes.
Applied Process
This section suggests a possible approach on how to design enemies by their function in a game such as Zelda: A Link to the Past.
Step 1: Determine Resources
The first thing we did in this article is list out the resources of the game. They were listed so that the following section could be understood, but it is also the first step to creating enemies that are relevant to gameplay.
In the above example, it turns out everything can be equated to Time more or less. Once this is confirmed, the designer’s role is to understand how they can affect ‘everything’ in different ways.
It was listed above that the loss of resources could be as problematic as a loss of time, and key scenarios could potentially lead to situations just as bad as death without actually interacting with life.
Step 2: Identify a Scenario and Define the Required Functions
One such scenario is being faced with a mandatory enemy which is a Hard Resource Check and being short on this specific resource at that given point in time. To create such a scenario, at least 2 enemy types must be created:
An enemy that acts as a Hard Resources Check (say, the Red Eyegore)
An enemy that is either a Soft Check for the same resource (Green Eyegore) or a Trap enemy (Red Stalfos / HardHat Beetle) which does not specifically need the same resource to kill, but whose effect might lead a player to spend their resources unnecessarily.
Step 3: Design Enemies Based on Required Functions
The first enemy is easier to design, as its sole purpose is to be impervious to attacks save for ‘the one’ (in this case, arrows). However, it should somehow hint at its weakness so that the player does not immediately rush in unknowingly. The Red Eyegore is a great fit because it is possible to have the player experiment with the Green Eyegore first and learn the hard way that the arrows are a better bang than the sword without actually dying unable to do a thing.
The second enemy is more tricky because it needs to be tough but not impossible to kill without the use of said resource. The Green Eyegore is a good fit because it is actually impervious to arrows from afar, forcing the player to interact with it and investigate means to kill it (knowing that a swordfight is not desirable).
You’ll notice that, in the game, the Green and Red Eyegores both show up in the same dungeon originally, and there are a few Green Eyegores leading to the mandatory Red one. This is the realization of a function-based enemy design segment within the game. The expectation is that the player will reach this point with enough arrows to successfully proceed, but that the quantity of arrows left will be sufficiently low that the player will have some form of realization of just how important arrows are, and how dangerous Red Eyegores can be. This creates a reference from which players are likely to learn to save up on resources so they don’t end up frustrated later when they need to back out of a level by lack of resources.
Step 4: Rinse / Repeat / Remember
Applying steps 2 through 3 repeatedly can create interesting twists, Scenarios can be anything that looks interesting, and enemies need to be designed to support this desired outcome. The WallMaster, for example, is a single enemy which acts as the realization that it is possible to kill the player without killing them by effectively creating similar consequences (forcing the player out of the dungeon against their own will).
It’s also interesting to bear in mind all of the scenarios created during Step 2, and what effect they might have on one another. Simply creating new scenarios may lead to a clutter of enemy types that may not work well with one another for various reasons. Sure, the level designer has these tools and is not forced to use them, and each dungeon is a separate narrative that they have full control over, but it is still better to have monsters that are functionally coherent and redundant. In other words, if you have one way to create shortage of resource and you want to create another one, it better be a drastically different approach, or a ‘reskin’, not something mechanically similar.
Conclusion
Creating monsters by their function is a wide topic and isn’t an exact science. True experience is acquired in the field with applied examples rather than generic formulae. This article attempts to slice through one game’s core monster designs principles to create a point of reference, but it, by no means, suggests that it covers everything there is to know about functional monster design.(source:gamedev)
上一篇:有效进行游戏软发行的三个步骤
下一篇:如何面向发行商宣传你的游戏

")
")
")
")


 闽公网安备35020302001549号