分享制作Windows 8复古游戏的建议
当人们谈到“复古”游戏时,他们通常是指针对第一至第四代主机制作的多数游戏。这些游戏的一个特点就是使用像素化的视觉设计,容易上手但又极具挑战性的游戏机制。我从小玩这些游戏长大,所以我现在制作的大多数游戏都会模拟这个时代的游戏视觉风格和玩法。我想强调这些游戏的某些功能,并讨论如何针对Windows 8平台重制此类HTML5游戏。canvas是渲染2D图像的绝佳选择,制作复古风格的游戏是一项容易完成的任务,并且适用于多数硬件平台。首先,我们需要谈谈如何挑选美术风格。
挑选美术风格
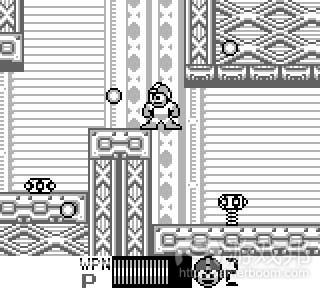
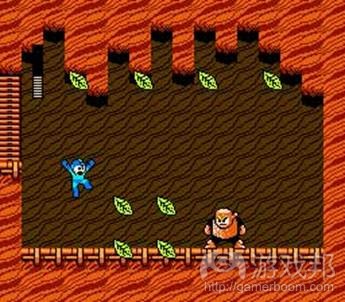
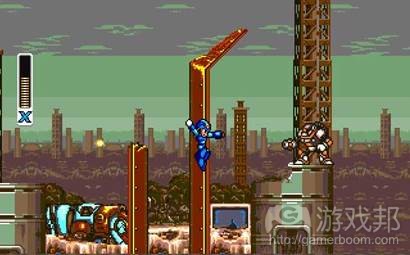
当你开始考虑游戏的美术风格时,你有多种选择,例如8位、16位以及非常棒的2/4位式的游戏。以下是《洛克人》的一些例子,呈现了这款游戏风格在过去数年的演变。
这三种美术风格为我们创造了许多游戏空间。由于多数电脑、平板电脑以及移动设备并不受限于这些早期游戏所运行的硬件设备中的色彩限制,你就必须努力强制执行其中的色彩选择。最好的方法之一就是使用像素编辑器或那些专门生成像素美术的绘图应用。
像素美术编辑器
在过去数年中,我接触了从Photoshop到Fireworks等许多不同的绘图应用,但最近我开始转向制作像素美术的专属应用。我强烈推荐使用Aseprite这款不但是免费的,而且还是开源和支持跨平台的应用。Aseprite不但可用来创造惊人的像素美术,还可以用来控制生成精灵表格,并管理调色盘,而这些正是创造复古外观的关键元素。我将列举一些很棒的Aseprite功能,并说明我的用法。
首先,我可以用它不断创造和测试动画。Aseprite有一个功能允许你输入不同的图片,如果这些图片文件名称是连续性的(例如Sprite_1,Sprite_2等),还可以将其整合为单个动画。
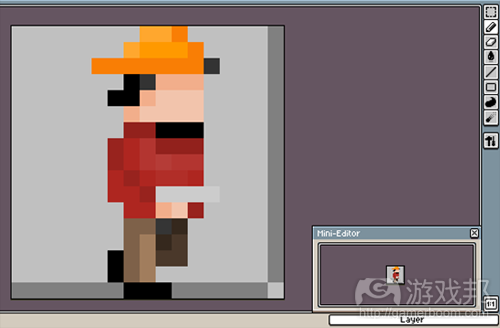
以下是Iñaki Diaz为我的游戏《Super Resident Raver》所创造的精灵。
载入图片或动画后,你就可以在主画布上放大,并在迷你编辑器中查看图片。迷你编辑器会保持1:1的比率,这样你就可以看到精灵所有时间的实际呈现效果。如果你工作的时候不想到它,还可以将其隐藏。
当你开始设置动画时,你就可以在动画窗口中预览整帧动画,以及更改每帧之间的延时。
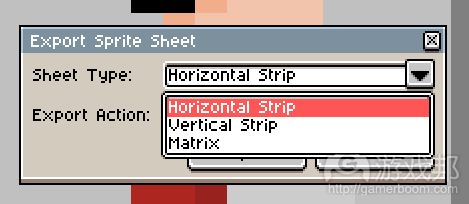
一切准备就绪后,你就可以从Aseprite直接输出精灵表格。你有三种选择:垂直、水平和矩阵(可根据你能够定制的值创造网格)。
这是我为自己的游戏所创造的最终精灵表格之一,使用了所有动画,两边还有一些额外空间,以免我过后要添加更多精灵。
Aseprite还可以从一个精灵表格输入并将其转化成单帧动画。我没有展示的其他功能包括惊人的绘图工具,以及在调色盘上快速置换色彩。Aseprite是一款功能齐全的低像素图像编辑器,它很快就成了我制作像素美术和生成精灵的专用工具。
现在,我要谈谈我制作像素美术所使用的工具。
精灵/贴图尺寸
针对地图制作精灵或贴图时,我通常会让它们定在8*8或者16*16像素的图像中。有时候我会使用20*20 zap贴图,因为我可以轻松在其中进入8*8ak 16*16的精灵,并获得地图的额外细节。我固定使用这些尺寸的部分原因是,在展示游戏的美术内容时,我通常要把它们放大。
放大功能可以让你以更大的像素展示更小的图像。因为我采用像素美术,其效果更加突出了像素风格,所以会产生多数人所熟悉的复古风格。至于应该放大多少,这背后并没有明确的准则,但我通常是将其放大两倍。所以,如果我的精灵是16*16像素,那我就会将比例放大2倍,以24*24像素展示出来。
以下就是其中一个例子:
1倍(实际尺寸16*16)
2倍(新尺寸24*24)
4倍(新尺寸48*48)
如图所示,比例越大,图像就会越具有像素风格。当你的图像是更小的8*8精灵和贴图时,这一效果尤为明显。
在放大美术比例时,你要确保的一件事就是不要设置画布的比例,而是在这个过程中重新对美术进行取样,或者在从图像编辑器中以正确的比例将其输出。Impact是一项强大的JS游戏框架,以及我用于Windows 8游戏的工具,它的构造器中就有一个设置游戏比例的选项,如下所示:
ig.main(‘#canvas’, MyGame, 60, 240, 160, 4);
最后一个参数就是比例,在这个例子中该比例设置为“4”。Impact会对所有图片重新取样,其原理是在一个离屏画布上绘制并引用这些图片,而非展示原来的这些图片。这会令内存翻倍,并降低游戏的加载速度。如果你不想根据不同的分辨率更改游戏比例,那么最好是事先就以正确的比例输出图像。对于速度更缓慢的设备来说,这一点甚是关键。若要让Windows 8游戏呈现高性能,你就要针对最低标准的设备创造游戏。要确保你的游戏可在平板电脑上运行,并且已经得到优化,尤其是在生成放大比例的图像时。
屏幕分辨率
我们已经讨论了放大图像的要点,现在要确保游戏在屏幕上呈现正确的尺寸。Windows 8应用运行时有3个最小分辨率:
*全屏——当游戏以全屏模式运行时,这就是它的默认分辨率。它的分辨率至少是1366*769。
*快照——当游戏停留在屏幕一侧而其他应用正在边上运行的时候。这一分辨率的最小宽度是320。
*填满——这是全屏分辨率减去320的快照分辨率。这一分辨率发生于另一款应用停留在你的游戏处于快照状态的时候。
你可以通过向窗口添加事件侦听器快速检测分辨率变化:
window.addEventListener(“resize”, onViewStateChanged);
这是调整事件大小的例子:
function onViewStateChanged(eventArgs) {
var viewStates = Windows.UI.ViewManagement.ApplicationViewState;var newViewState = Windows.UI.ViewManagement.ApplicationView.value;
if (newViewState === viewStates.snapped) {
// is snapped
}else if (newViewState === viewStates.filled) {
// is filled
} else if (newViewState === viewStates.fullScreenLandscape) {
// is full screen
} else if (newViewState === viewStates.fullScreenPortrait) {
//is portrait
}
}
}
有没注意到我们还可以检测到屏幕旋转的情况?你可以让游戏禁用这一功能,但为了通过应用商店的审核,你还是得妥善处理其他三种视图状态。在计算实际分辨率时,要记住根据你的像素美术比例分割分辨率。所以,如果我要使用4倍的比例,那么我在快照视图中就只有80像素的宽度。至于全屏视力,我所能用的分辨率约为341*192。记住这一分辨率是宽屏的,所以你可能还要考虑根据图像与分辨率视口的贴近情况,在游戏边缘或上下设置黑条。
需要指出的是并非所有游戏都可以在快照视图状态下运行,所以要考虑一下是否该设置暂停屏幕,为玩家呈现游戏不可在该状态下运行的信息。
音效生成器
最后我要简单说明一下如何制作复古游戏的音效问题。我使用的一项工具就是Bfxr,你可以在网上下载,离线时还可以当作AIR应用来使用。下图就是该应用的外观:
一开始你可能会不知所措,但这里有些使用小窍门。在左上角,你将看到可用于游戏的不同音效“模版”。点击其中一者将会在左下角生成一个声音。你在列表中添加更多声音时,你可以逐个点击试听并调整。选中一个声音后,你就可以使用中间的窗口来操控音效。在右下角,你可以逐个保存音效,或者将其保存成bfx文件,过后再载入查看效果。
虽然这款应用不能帮你创造游戏音乐,但却可以为你的音效创造优势 ,令你的游戏更具愉悦性。
总结
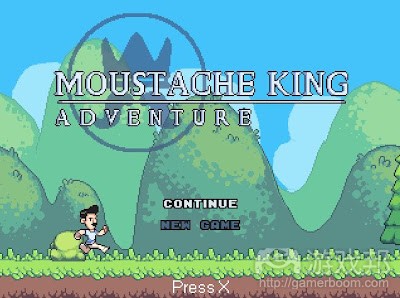
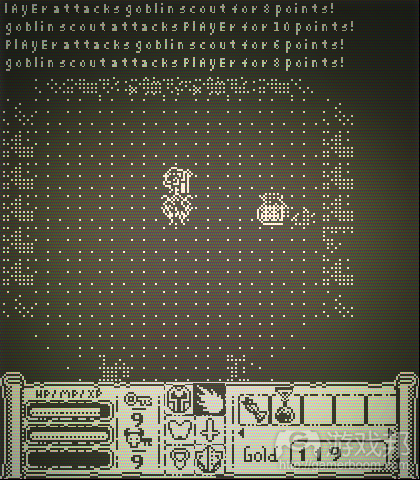
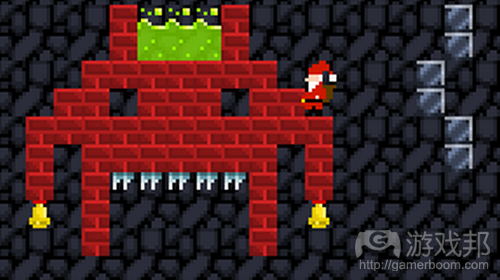
本文所述内容较多,但还有许多方面并未涉及。我希望可以撰写更多贴子分享创造Windows 8复古游戏的技巧。在结束文章之前,我要与各位分享以下几款我所钟爱的复古游戏,希望对你有所启发:
(本文为游戏邦/gamerboom.com编译,拒绝任何不保留版权的转载,如需转载请联系:游戏邦)
Designing Retro Looking Games for Windows 8
When people talk about “retro” games, they usually refer to most games made for the 1st to 4th generation of gaming consoles. The hallmark of these games are their pixelated visuals and approachable yet challenging game mechanics. I was a huge fan of these games growing up, so most of the ones I make today emulate the visual style and gameplay from this era in gaming history. I wanted to highlight some features of these games and talk about how to recreate them when making your own HTML5 games for Windows 8. Since canvas is perfect for rendering 2D graphics, making a retro-looking game is easy to accomplish and works well on almost any hardware. First, we need to talk about picking an art style.
Picking an Art Style
When you start thinking about your game’s art style, you have several options to choose from, such as 8-bit, 16-bit, and even some really cool 2/4-bit style games. Here are some examples from Mega Man over the years, showing off each style as the game evolved over time.
8-bit B&W Example (Mega Man Game Boy)
8-bit Example (Mega Man 2 Nintendo)
16-bit Example (Mega Man X Super Nintendo)
These three art styles give us a lot of room to play with. Since most computers, tablets, and mobile devices are not constrained to the color limitations that defined the hardware these early games ran on, you are going to have to work hard at enforcing the color palettes selection yourself One of the best ways to do this is to use a pixel editor or drawing app that is designed specifically for generating pixel art.
Pixel Art Editors
Over the years, I have gone back and forth between different drawing apps, from Photoshop to Fireworks, but lately I have moved over to specialized apps to do my pixel art. The one I highly suggest checking out is Aseprite. Not only is it free, it is open source and cross-platform. Aseprite not only allows you to create amazing pixel art, but it also handles generating sprite sheets and managing color palettes, which are critical to matching that authentic retro look. I figured I would highlight some of the great features in Aseprite and what I use it for.
First off, I am constantly working on building and testing out animations. Aseprite has a feature that allows you to import separate images and combine them into a single animation if the file names are consecutive, such as sprite_1, sprite_2, etc.
The following sprites were created by Iñaki Diaz for my Super Resident Raver game.
Once an image or animation is loaded, you can zoom in to work on the main canvas and also see the image in the mini-editor. The mini-editor keeps a 1:1 ratio that is incredibly helpful so you can see what the actual sprite looks like all the time. It can also be hidden if you don’t want to see it while you work.
When you are ready to set up the animations, you can preview the entire set of frames in the animation window as well as change the time delay between each frame.
Once you have everything ready, you can export a sprite sheet directly from Aseprite. You have three options to choose from: horizontal, vertical, and matrix, which creates a grid based on values you can customize.
And here is one of the final sprite sheets I created for my game with all of the animations and some extra space on either side in case I needed to add more sprites down the line.
Aseprite will also import from a sprite sheet and turn it back into single frame animations for you. A few other features I didn’t show off are the amazing drawing tools as well as the ability to see the color palette and change it on the fly to quickly swap out one color for another. You can also create layers, and there are some great selection tools to help you manipulate the image. As you can see, Aseprite is a fully featured low resolution image editor and has quickly become my go-to tool for pixel art creation and sprite generation.
So, now that I talked a little bit about the tools I use to work on my pixel art, let’s go over sprite and tile sizes.
Sprite/Tile Sizes
When it comes to making sprites or tiles for maps, I generally tend to make them fit within an 8×8 or 16×16 pixel graphic. Sometimes I use 20×20 zap tiles, since I can easily center an 8×8 or 16×16 sprite within it and get a little extra detail into the map. Part of the reason I keep to these sizes is that, when it comes time to display the artwork in the game, I always upscale them.
Upscaling allows you to show a smaller graphic at a much larger resolution. Since I work with pixel art, the effect tends to accentuate the pixels more, giving it the retro look most people are familiar with. There is no exact science behind how much to scale up, but I tend to do it in multiples of two. So, if I have a 16×16 pixel sprite, I can display it at 24×24 pixels by increasing the scale factor by two.
Here is an example of how this works:
1x (Actual Size 16×16)
2x (New Size 24×24)
4x (New Size 48×48)
As you can see, the higher the scale factor the more pixelated the artwork looks. This is incredibly effective when you have smaller sized art like 8×8 sprites and map tiles.
The one thing you want to make sure of when it comes to upscaling your artwork is that you don’t set the canvas scale but instead resample the artwork on the fly or pre-export everything at the right scale size from the image editor. Impact, which is an incredible JS game framework and the one I use for my Windows 8 games, has an option in its constructor to set the game’s scale. It looks something like this:
ig.main(‘#canvas’, MyGame, 60, 240, 160, 4);
As you can see, the last parameter is the scale, which in this case, is set to “4.” Impact actually resamples all the images by drawing them to an off-screen canvas and referencing that instead of the actual images. This doubles the memory and slows down the load time of your games. If you don’t anticipate changing the scale size of your game based on different resolutions, then it may make more sense to just output everything at the correct scale factor ahead of time. This is especially important on slower devices. When it comes to getting high performance out of Windows 8 games, you have to build towards the lowest common denominator. Make sure your games are tablet ready and are as optimized as possible, especially when it comes to generating upscaled artwork on the fly.
Screen Resolutions
Now that we have talked about upscaling our artwork, we need to make sure that we have the correct screen size for our games. Windows 8 apps run at three minimum resolutions:
Full Screen – This is the default resolution when the game is running in full-screen mode. This can be anywhere from 1366×768 and up.
Snapped – This happens when your game is docked on the side of the screen and another application is running next to it. The minimum width of this resolution is 320.
Filled – This would be the full-screen resolution minus 320 for the snap view. This resolution happens when you have another app docked on the side of your game in snapped view.
You can easily detect resolution changes by adding an event listener to the window like so:
window.addEventListener(“resize”, onViewStateChanged);
And, here is an example handler for the resize event:
function onViewStateChanged(eventArgs) {
var viewStates = Windows.UI.ViewManagement.ApplicationViewState;
var newViewState = Windows.UI.ViewManagement.ApplicationView.value;
if (newViewState === viewStates.snapped) {
// is snapped
}else if (newViewState === viewStates.filled) {
// is filled
} else if (newViewState === viewStates.fullScreenLandscape) {
// is full screen
} else if (newViewState === viewStates.fullScreenPortrait) {
//is portrait
}
}
}
Notice how we can also detect screen rotation? You can disable that for your game, but in order to be approved by the store, you need to handle the other three view states properly. When it comes to figuring out the actual resolution, remember to divide the resolution by the scale factor of your pixel art. So, if I am using a scale factor of four, then I only have 80 pixels wide to work with in snapped view. For full-screen view, I would be working with a resolution of around 341×192. Remember that this resolution is wide screen, so you may need to think about having black bars on the sides or top/bottom of your game depending on how your graphics fit into this resolution viewport.
To see how this would work in an actual game, check out David Isbitski’s Win8GameKit on GitHub and go through the default.js file in order to get a sense of how to handle resolution changes and other important aspects of building an HTML5 game for Windows 8. It’s also important to note that not all games are playable in the snapped view, so think about if you need to pause the screen and show a message telling your players to unsnap the game in order to continue.
Sound Effects Generators
The last thing I wanted to talk about briefly is making sound effects to match your retro-style game. One of the tools I use is Bfxr, which you can use online here or download as an AIR app to use offline. Here is what the app looks like:
You may be overwhelmed at first, but here are a few tips on how to use the application. On the upper left you will see different sound “templates” for effects that you would need in your game.
Simply clicking on one of them will generate a sound on the bottom left. As you add more sounds to the list, you can click on them to preview and modify them. When a sound is selected, you can use the center window to manipulate the sound effects. On the bottom right, you can save the effects out one by one, or save out a .bfx file, which can be loaded up later to see all the sounds you were working on.
While this app won’t help you with creating music for you games, it will give you a head start on all of the sound effects that you would need to make your game more enjoyable and polished.
Wrapping Up
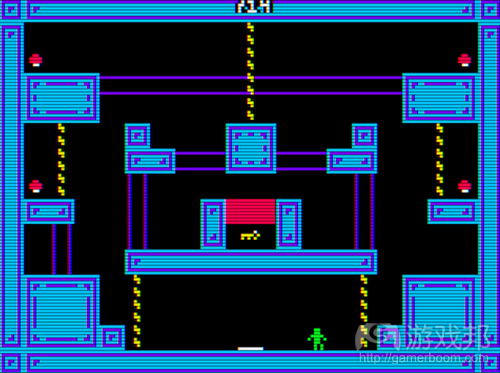
I covered a lot in this article, but there is so much more to go over. I hope to do a few more posts like this that show the techniques I use when creating retro looking Windows 8 games. Before I end this post, I wanted to highlight a few retro games that I love, and hope will come to Win8, to help inspire you:(source:jessefreeman)
下一篇:游戏发布日期还像之前那样重要吗?







 闽公网安备35020302001549号