


如何创造一款太空射击游戏(二)
作者:Daniel Williams
在第一部分教程中,我们学习了如何设置应用,如何使用自定义字体,如何使用故事板以及如何设置我们的主菜单。而在今天的第二部分中,我们将学习如何为应用创造游戏玩法。让我们开始吧!
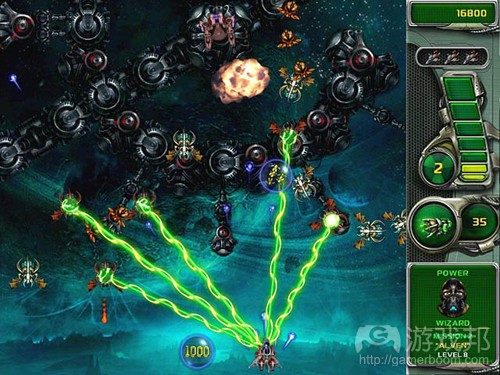
Space Defender(from bigfishgames)
我们的第一步便是创造一个名为game.lua的新文件。创造好该文件后,在你最喜欢的编辑器中打开它。
1.添加程序库
当我们开始创造一个新场景时,我们便需要一些程序库。为了实现碰撞检测,我们将使用物理引擎并将其固定在Corona SDK。
local storyboard = require( “storyboard” )
local scene = storyboard.newScene()
local physics = require(“physics”)
2.配置物理引擎
当我们拥有程序库设置后,我们将配置物理引擎。以下设置将把重力定为0(就像在太空中),而迭代次数定为16。setPositionIterations意味着引擎在每帧将经历16个位置。任何高于16的内容将不利于游戏的执行。
physics.start()
physics.setGravity(0, 0)
physics.setPositionIterations( 16 )
3.使用随机生成器
尽管在本教程中这一步并不重要,但它却是“埋种”随机数生成器的有效实践。我喜欢使用当前时间去埋种生成器。
math.randomseed( os.time() )
4.设置游戏变量
现在我们将为游戏定义一些变量。每个变量的旁边都带有一个注释能够解释变量的目的。
local screenW, screenH, halfW, halfY = display.contentWidth, display.contentHeight, display.contentWidth*0.5, display.contentHeight*0.5
local gameover_returntomenu — forward declard our game over button — Set up game settings
motionx = 0; — Variable used to move character along y axis
speed = 10; — Controls the ship speed
playerScore = 0; — Sets the player score
playerLives = 20; — Sets the number of lives for the player slowEnemySpeed = 2375; — Sets how fast the white ships move across screen
slowEnemySpawn = 2400; — Sets white ship spawn rate
fastEnemySpeed = 1875; — Sets how fast the green ships move across screen
fastEnemySpawn = 1800; — Sets green ship spawn rate
bulletSpeed = 325; — Sets how fast the bullet travels across screen bulletSpawn = 250; — Sets bullet spawn rate
5.创造主要游戏场景
在创造了变量后,我们将在函数scene:createScene中设置场景。如果你还记得第一部分的内容,你便会知道该函数是用于创造视觉元素和游戏逻辑。在之后的函数中,我们将调用这些函数去运行游戏。
在以下代码中,我们创造了scene:createScene函数并添加了背景和上/下墙。这两面墙都是静态物理对象,旨在阻止玩家掉离屏幕。
function scene:createScene( event )
local group = self.view
– Set up visual elements and walls
local bg = display.newImageRect(“images/BKG.png”, 480, 320)
bg.x = halfW
bg.y = halfY
group:insert(bg)
local topwall = display.newRect(0,0,screenW,20)
topwall.y = -5
topwall:setFillColor(0,0,0)
topwall.alpha = 0.01
physics.addBody( topwall, “static” )
group:insert(topwall)
local bottomwall = display.newRect(0,0,screenW,20)
bottomwall.y = 325
bottomwall:setFillColor(0,0,0)
bottomwall.alpha = 0.01
physics.addBody( bottomwall, “static” )
group:insert(bottomwall)
end
6.添加HUD元素
同样在scene:createScene函数中,但却是在bottomwall显示对象后,我们将添加额外的四个显示对象。以下是对于每个对象的目的的解释。
btn_up, btn_down:这些显示对象将作为屏幕左手边的按键,每个对象将能够上下移动舰船。但是只有在我们设置了移动函数时它们才能运行。
enemyHitBar:显示对象是作为传感器,只能反应物理碰撞。当它反应了物理碰撞时,它将删除敌人对象并减去玩家的一个生命值。
local btn_up = display.newRect(0,0,75,160)
btn_up:setReferencePoint(display.TopLeftReferencePoint)
btn_up.x, btn_up.y = 0,0;
btn_up.alpha = 0.01
group:insert(btn_up)
local btn_down = display.newRect(0,0,75,160) btn_down:setReferencePoint(display.BottomLeftReferencePoint) btn_down.x, btn_down.y = 0, screenH;
btn_down.alpha = 0.01
group:insert(btn_down)
local enemyHitBar = display.newRect(-20,0,20,320) enemyHitBar:setFillColor(0,0,0)
enemyHitBar.name = “enemyHitBar”
physics.addBody( enemyHitBar, { isSensor = true } )
group:insert(enemyHitBar)
在enemyHitBar显示对象之后,我们将添加一些GUI元素去呈现玩家的分数和生命值。我们也将在屏幕上呈现文本内容,如“向上移动”和“向下移动”去体现玩家他们需要向上或向下移动舰船。
local gui_score = display.newText(“Score: “..playerScore,0,0,”Kemco Pixel”,16)
gui_score:setReferencePoint(display.TopRightReferencePoint) gui_score.x = screenW
group:insert(gui_score)
local gui_lives = display.newText(“Lives: “..playerLives,0,0,”Kemco Pixel”,16)
gui_lives:setReferencePoint(display.BottomRightReferencePoint) gui_lives.x = screenW
gui_lives.y = screenH
group:insert(gui_lives)
local gui_moveup = display.newText(“Move Up”,0,0,50,100,”Kemco Pixel”,16)
group:insert(gui_moveup)
local gui_movedown = display.newText(“Move Down”,0,0,50,23,”Kemco Pixel”,16)
gui_movedown:setReferencePoint(display.BottomLeftReferencePoint) gui_movedown.y = screenH
group:insert(gui_movedown)
7.添加玩家舰船
接下来我们将添加玩家舰船到屏幕上。舰船将作为动态物理对象,所以它能够反应与其它物理对象间的碰撞。我们将在之后深入分析碰撞。
local ship = display.newImageRect(“images/spaceShip.png”, 29, 19) ship.x, ship.y = 75, 35
ship.name = “ship”
physics.addBody( ship, “dynamic”, { friction=0.5, bounce=0 } ) group:insert(ship)
8.移动玩家舰船
你是否记得我们添加的btn_up和btn_down显示对象?现在我们将添加事件监听器到这些对象中而让玩家能够移动舰船。当触发btn_up时,我们的速度变量将为负数,而当触发btn_down时,我们的速度变量则为正数。通过设置正变量和负变量,我们将能够告诉下个函数向上或向下移动舰船。
– When the up button is touched, set our motion to move the ship up function btn_up:touch()
motionx = -speed;
end
btn_up:addEventListener(“touch”,btn_up)
– When the down button is touched, set our motion to move the ship down function btn_down:touch()
motionx = speed;
end
btn_down:addEventListener(“touch”,btn_down)
9.使之能够移动
在我们添加了事件监听器到btn_up和btn_down显示对象后,我们将创造两个带有各自函数的事件监听器。这些函数将运行每一帧,而在碰到运行时间函数时你必须明确何时停止。我们将在之后讨论这一情况。现在,停止函数将设置变量轴向运动为0(游戏邦注:因为没有一个按键被触发),而moveguy函数将添加变量轴向运动到我们的舰船y位置上。
local function stop (event)
if event.phase ==”ended” then
motionx = 0;
end
end
Runtime:addEventListener(“touch”, stop )
– This function will actually move the ship based on the motion local function moveguy (event)
ship.y = ship.y + motionx;
end
Runtime:addEventListener(“enterFrame”, moveguy)
10.发射子弹
到现在,我们的舰船已经能够移动了,但却还不能发射子弹!为了让舰船准备好发射子弹,我们创造了fireShip()函数。这一函数将创造新的显示对象去反应物理碰撞,并且这一函数将跨越屏幕从左到右移动对象。
为了让游戏更有趣,我们将允许玩家在到达某一特定分数时设计更多子弹。当玩家到达20分时,舰船将设计2枚子弹,当玩家到达40分时,舰船将朝斜下方发射3枚子弹。
function fireShip()
bullet = display.newImageRect(“images/bullet.png”, 13, 8)
bullet.x = ship.x + 9
bullet.y = ship.y + 6
bullet:toFront()
bullet.name = “bullet”
physics.addBody( bullet, { isSensor = true } )
transition.to(bullet, {time = bulletSpeed, x = 500,
onComplete = function (self)
self.parent:remove(self); self = nil;
end; })
if(playerScore >= 20) then
secondBullet = display.newImageRect(“images/bullet.png”, 13, 8) secondBullet.x = ship.x + 9
secondBullet.y = ship.y + 12
secondBullet:toFront()
secondBullet.name = “bullet”
physics.addBody( secondBullet, { isSensor = true } ) transition.to(secondBullet, {time = bulletSpeed, x = 500, onComplete = function (self)
self.parent:remove(self); self = nil;
end; })
end
if(playerScore >= 40) then
thirdBullet = display.newImageRect(“images/bullet.png”, 13, 8) thirdBullet.x = ship.x + 9
thirdBullet.y = ship.y + 12
thirdBullet:toFront()
thirdBullet.name = “bullet”
physics.addBody( thirdBullet, { isSensor = true } ) transition.to(thirdBullet, {time = bulletSpeed, x = 500, y = ship.y + 100,
onComplete = function (self)
self.parent:remove(self); self = nil;
end; })
11.创造敌人
在我们让舰船能够发射子弹之后,我们需要创造一些敌人让玩家射击。我们将创造两个不同的函数—-createSlowEnemy()和createFastEnemy()。这两个函数将创造一个物理显示对象,基于敌人的速度从右边向左边移动。
function createSlowEnemy()
enemy = display.newImageRect(“images/enemy.png”, 32, 26) enemy.rotation = 180
enemy.x = 500
enemy.y = math.random(10,screenH-10)
enemy.name = “enemy”
physics.addBody( enemy, {isSensor = true } )
transition.to(enemy, {time = slowEnemySpeed, x = -20 })
end
function createFastEnemy()
enemy = display.newImageRect(“images/fastEnemy.png”, 32, 26) enemy.rotation = 180
enemy.x = 500
enemy.y = math.random(10,screenH-10)
enemy.name = “enemy”
physics.addBody( enemy, {isSensor = true } )
transition.to(enemy, {time = fastEnemySpeed, x = -20 })
end
12.创造奖励包
接下来我们将在函数createBonus()中为玩家创造奖励包。createBonus()函数将创造一个从右边向左边移动的物理显示对象,每当玩家获取一个奖励包,它们便能够获得5个分数点。
function createBonus()
bonus = display.newImageRect(“images/bonus.png”, 18, 18) bonus.rotation = 180
bonus.x = 500
bonus.y = math.random(10,screenH-10)
bonus.name = “bonus”
physics.addBody( bonus, {isSensor = true } )
transition.to(bonus, {time = 1475, x = -20,
onComplete = function ()
display.remove(bonus)
bonus = nil
end; })
end
13.更新玩家生命值
我们的下一个函数便是updateLives()。这一函数将在敌人通过玩家时被调用,并给予玩家防御的目标。如果玩家的生命值大于0,这一函数将减去一个生命并更新屏幕上的文本。否则将出现游戏接触的页面。
在游戏结束页面中,我们会删除所有的计时器以及所有事件监听器。基于Corona SDK,你必须明确地告知应用何时删除运行时间监听器与计时器(只有当计时器在运行时)。当这些内容被删除后,我们将呈现游戏结束信息并让玩家能够回到菜单页面。
function updateLives()
if(playerLives >= 0) then
playerLives = playerLives – 1
gui_lives.text = “Lives: “..playerLives
gui_lives.x = screenW
else
timer.cancel(tmr_fireShip)
timer.cancel(tmr_sendSlowEnemies)
timer.cancel(tmr_sendSlowEnemies2)
timer.cancel(tmr_sendFastEnemies)
timer.cancel(tmr_sendBonus)
Runtime:removeEventListener( “collision”, onCollision ) Runtime:removeEventListener(“enterFrame”, moveguy) Runtime:removeEventListener(“touch”, stop )
– Display game over screen
local gameover_message = display.newText(“Game Over!”,0,0,”Kemco Pixel”,32)
gameover_message.x = halfW
gameover_message.y = halfY – 15
group:insert(gameover_message)
function returnToMenuTouch(event)
if(event.phase == “began”) then
storyboard.gotoScene(“menu”, “slideRight”, “1000″)
end
end
gameover_returntomenu = display.newText(“Return To Menu”,0,0,”Kemco Pixel”, 28)
gameover_returntomenu.x = halfW
gameover_returntomenu.y = halfY + 35 gameover_returntomenu:addEventListener(“touch”, returnToMenuTouch) group:insert(gameover_returntomenu)
end
end
14.碰撞检测
我们已经准备好在scene:createScene()中运行最后的函数了!该函数将通过比较对象1和对象2的性能而处理所有的碰撞检测。每个对象将在变量名字事件中作为参数通过这一函数。
为了让你能够更轻松地做到这点,我分解了5个碰撞例子。
例子1—-对象1是一颗子弹,对象2是一个敌人
发生了什么:删除敌人并更新分数
例子2—-对象1是一个敌人,对象2是一颗子弹
发生了什么:删除敌人并更新分数
例子3—-对象1是一艘舰船,对象2是一个奖励
发生了什么:删除奖励并更新分数
例子4—-对象1是一个敌人,对象2是一个敌人命值条
发生了什么:删除敌人并更新生命值
例子5—-对象1是一个敌人命值条,对象2是一个敌人
发生了什么:删除敌人并更新生命值
function onCollision( event )
if(event.object1.name == “bullet” and event.object2.name == “enemy”) then
display.remove(event.object2)
playerScore = playerScore + 1
elseif(event.object1.name == “enemy” and event.object2.name == “bullet”) then
display.remove(event.object1)
playerScore = playerScore + 1
elseif(event.object1.name == “ship” and event.object2.name == “bonus”) then
display.remove(event.object2)
playerScore = playerScore + 5
elseif(event.object1.name == “enemy” and event.object2.name == “enemyHitBar”) then
display.remove(event.object1)
updateLives()
elseif(event.object1.name == “enemyHitBar” and event.object2.name == “enemy”) then
display.remove(event.object2)
updateLives()
end
gui_score.text = “Score: ” .. playerScore
gui_score.x = screenW
end
15.同步移动计时器
当我们为游戏设置好一切时,我们只需要让所有内容移动起来便可!在scene:enterScene()函数中(游戏邦注:记得enterScene函数是在createScene函数以外),我们将创造5个计时器和一个运行时间监听器。计时器将发送子弹,敌人和奖励,与此同时运行时间监听器将处理碰撞检测。
function scene:enterScene( event )
local group = self.view
tmr_fireShip = timer.performWithDelay(bulletSpawn, fireShip, 0) tmr_sendSlowEnemies = timer.performWithDelay(slowEnemySpawn, createSlowEnemy, 0)
tmr_sendSlowEnemies2 = timer.performWithDelay(slowEnemySpawn+(slowEnemySpawn*0.5), createSlowEnemy, 0)
tmr_sendFastEnemies = timer.performWithDelay(fastEnemySpawn, createFastEnemy, 0)
tmr_sendBonus = timer.performWithDelay(2500, createBonus, 0)
Runtime:addEventListener( “collision”, onCollision )
end
16.破坏场景
最后要添加的便是scene:destroyScene()函数以及场景事件监听器。破坏场景函数将确保在玩家离开场景时删除物理引擎。场景事件监听器将分别调用createScene,enterScene以及destroyScene。
function scene:destroyScene( event )
local group = self.view
package.loaded[physics] = nil
physics = nil
end
scene:addEventListener( “createScene”, scene ) scene:addEventListener( “enterScene”, scene ) scene:addEventListener( “destroyScene”, scene )
return scene
结论
恭喜你!你已经学会了许多内容,如Corona的故事板功能,物理引擎,碰撞等等。这些都是非常有价值的技能,能够用于任何游戏创造中,如果你想要为自己的设备创造这类型游戏,我强烈建议你使用官方的Corona文件。
(本文为游戏邦/gamerboom.com编译,拒绝任何不保留版权的转载,如需转载请联系:游戏邦)
Create a Space Defender Game – Game Logic
By Daniel Williams
In this tutorial series, we will be learning how to create a space shooter game just like the classic game Space Defender. Read on!
Series Overview
In this version of Space Defender, the player will have to defend his space by shooting enemies. Every time the player successfully destroys an enemy, they will earn points and when the player has reached 20 or 40 points, their gun will receive an upgrade. To mix things up, this game will send out bonus packages that are worth 5 points. To see the game in action, watch the short video above.
Where We Left Off…
In part 1 of this series, we learned how to set up our app, how to use custom fonts, how to use a storyboard, and how to set up our main menu. In Part 2 of this series, we will learn how to create the gameplay of our app. So, let’s get started!
Our first step is to create a new file called game.lua. Once it’s created, open the file in your favorite editor.
1. Adding Libraries
Since we are starting a new scene, we have to require some libraries. We will be using the physics engine built into Corona SDK for collision detection.
local storyboard = require( “storyboard” )
local scene = storyboard.newScene()
local physics = require(“physics”)
2. Configuring Physics
After we have our libraries setup, we will configure the physics engine. The settings below will set the gravity to 0 (just like in space) and set the iterations to 16. The setPositionIterations means the engine will go through 16 positions per frame. Anything higher than 16 can adversely affect game performance.
physics.start()
physics.setGravity(0, 0)
physics.setPositionIterations( 16 )
3. Using A Random Generator
Although this step is not necessary for this tutorial, it’s a good practice to “seed” the random number generator. I like to use the current time to seed the generator.
math.randomseed( os.time() )
4. Setting Up Game Variables
Now we will define some variables for our game. Each variable has a comment next to it explaining the purpose of the variable.
local screenW, screenH, halfW, halfY = display.contentWidth, display.contentHeight, display.contentWidth*0.5, display.contentHeight*0.5
local gameover_returntomenu — forward declard our game over button — Set up game settings
motionx = 0; — Variable used to move character along y axis
speed = 10; — Controls the ship speed
playerScore = 0; — Sets the player score
playerLives = 20; — Sets the number of lives for the player slowEnemySpeed = 2375; — Sets how fast the white ships move across screen
slowEnemySpawn = 2400; — Sets white ship spawn rate
fastEnemySpeed = 1875; — Sets how fast the green ships move across screen
fastEnemySpawn = 1800; — Sets green ship spawn rate
bulletSpeed = 325; — Sets how fast the bullet travels across screen bulletSpawn = 250; — Sets bullet spawn rate
5. Create the Main Game Scene
After creating the variables, we are going setup the scene inside the function scene:createScene. If you remember from Part 1, this function is used to create visual elements and game logic. In a later function, we will call upon these functions to run the game.
In the following code, we are creating the scene:createScene function and adding the background and top/bottom walls. Both walls are set up as static physics objects to prevent the player from going off screen.
function scene:createScene( event )
local group = self.view
– Set up visual elements and walls
local bg = display.newImageRect(“images/BKG.png”, 480, 320)
bg.x = halfW
bg.y = halfY
group:insert(bg)
local topwall = display.newRect(0,0,screenW,20)
topwall.y = -5
topwall:setFillColor(0,0,0)
topwall.alpha = 0.01
physics.addBody( topwall, “static” )
group:insert(topwall)
local bottomwall = display.newRect(0,0,screenW,20)
bottomwall.y = 325
bottomwall:setFillColor(0,0,0)
bottomwall.alpha = 0.01
physics.addBody( bottomwall, “static” )
group:insert(bottomwall)
end
6. Adding HUD Elements
Inside of the same scene:createScene function, but after the bottomwall display object, we are going to add four more display objects. Here’s an explanation of the purpose of each object.
btn_up, btn_down: These display objects will act as buttons on the left hand side of the screen and each object will move the ship up or down respectively. However, they are not operable until we set up the move function.
enemyHitBar: This display object is set up as a sensor and will only react to physic collisions. When it does react to collisions, it will remove the enemy object and subtract one from player lives.
local btn_up = display.newRect(0,0,75,160)
btn_up:setReferencePoint(display.TopLeftReferencePoint)
btn_up.x, btn_up.y = 0,0;
btn_up.alpha = 0.01
group:insert(btn_up)
local btn_down = display.newRect(0,0,75,160) btn_down:setReferencePoint(display.BottomLeftReferencePoint) btn_down.x, btn_down.y = 0, screenH;
btn_down.alpha = 0.01
group:insert(btn_down)
local enemyHitBar = display.newRect(-20,0,20,320) enemyHitBar:setFillColor(0,0,0)
enemyHitBar.name = “enemyHitBar”
physics.addBody( enemyHitBar, { isSensor = true } )
group:insert(enemyHitBar)
Right after the enemyHitBar display object, we are going to add some GUI elements to display the player score and player lives. We will also show text on the screen that says “Move Up” and “Move Down” to notify the player where they need to touch to move the ship up or down.
local gui_score = display.newText(“Score: “..playerScore,0,0,”Kemco Pixel”,16)
gui_score:setReferencePoint(display.TopRightReferencePoint) gui_score.x = screenW
group:insert(gui_score)
local gui_lives = display.newText(“Lives: “..playerLives,0,0,”Kemco Pixel”,16)
gui_lives:setReferencePoint(display.BottomRightReferencePoint) gui_lives.x = screenW
gui_lives.y = screenH
group:insert(gui_lives)
local gui_moveup = display.newText(“Move Up”,0,0,50,100,”Kemco Pixel”,16)
group:insert(gui_moveup)
local gui_movedown = display.newText(“Move Down”,0,0,50,23,”Kemco Pixel”,16)
gui_movedown:setReferencePoint(display.BottomLeftReferencePoint) gui_movedown.y = screenH
group:insert(gui_movedown)
7. Adding the Player Ship
Next, we will be adding the player’s ship to the screen. The ship will be added as a dynamic physics object so it can react to collisions with other physics objects. We will go into further depth on collisions later in this tutorial.
local ship = display.newImageRect(“images/spaceShip.png”, 29, 19) ship.x, ship.y = 75, 35
ship.name = “ship”
physics.addBody( ship, “dynamic”, { friction=0.5, bounce=0 } ) group:insert(ship)
8. Moving the Player Ship
Do you remember the btn_up and btn_down display objects we added? We are now going to add event listeners to these objects to help make the player ship move. When btn_up is touched, we will make our speed variable negative and when btn_down is touched we will make our speed positive. By making this variable positive and negative, we are telling our next function to move the ship up or down.
– When the up button is touched, set our motion to move the ship up function btn_up:touch()
motionx = -speed;
end
btn_up:addEventListener(“touch”,btn_up)
– When the down button is touched, set our motion to move the ship down function btn_down:touch()
motionx = speed;
end
btn_down:addEventListener(“touch”,btn_down)
9. Enabling Movement
After we’ve added event listeners to our btn_up and btn_down display objects, we are going to create two runtime event listeners with their respective functions. These functions will run every frame and the one catch with runtime functions is that you must specify when to stop them. We’ll cover that later. For now, the stop function will set the variable motionx to 0 (because neither button is touched) and the moveguy function will add the variable motionx to our ship’s y position.
local function stop (event)
if event.phase ==”ended” then
motionx = 0;
end
end
Runtime:addEventListener(“touch”, stop )
– This function will actually move the ship based on the motion local function moveguy (event)
ship.y = ship.y + motionx;
end
Runtime:addEventListener(“enterFrame”, moveguy)
10. Firing Bullets
By now, we have our ship moving, but it’s not firing! To get the ship ready to fire bullets, we have to create the fireShip() function. This function will create new display objects that react to physics collisions and this function will also move the object across the screen from left to right.
To make the game more interesting, we will allow the player to shoot more bullets when they reach a certain score. When the player reaches 20, the ship will shoot two bullets and when the player reaches 40, the ship will fire a third bullet that shoots downward diagonally.
function fireShip()
bullet = display.newImageRect(“images/bullet.png”, 13, 8)
bullet.x = ship.x + 9
bullet.y = ship.y + 6
bullet:toFront()
bullet.name = “bullet”
physics.addBody( bullet, { isSensor = true } )
transition.to(bullet, {time = bulletSpeed, x = 500,
onComplete = function (self)
self.parent:remove(self); self = nil;
end; })
if(playerScore >= 20) then
secondBullet = display.newImageRect(“images/bullet.png”, 13, 8) secondBullet.x = ship.x + 9
secondBullet.y = ship.y + 12
secondBullet:toFront()
secondBullet.name = “bullet”
physics.addBody( secondBullet, { isSensor = true } ) transition.to(secondBullet, {time = bulletSpeed, x = 500, onComplete = function (self)
self.parent:remove(self); self = nil;
end; })
end
if(playerScore >= 40) then
thirdBullet = display.newImageRect(“images/bullet.png”, 13, 8) thirdBullet.x = ship.x + 9
thirdBullet.y = ship.y + 12
thirdBullet:toFront()
thirdBullet.name = “bullet”
physics.addBody( thirdBullet, { isSensor = true } ) transition.to(thirdBullet, {time = bulletSpeed, x = 500, y = ship.y + 100,
onComplete = function (self)
self.parent:remove(self); self = nil;
end; })
11. Creating Enemies
After we’ve set up our ship to fire, we need to give the player some enemies to shoot at! We’ll create two different functions – createSlowEnemy() and createFastEnemy(). Both functions will create a physics display object that moves from right to left with the speed of the enemy and the image being the only difference.
function createSlowEnemy()
enemy = display.newImageRect(“images/enemy.png”, 32, 26) enemy.rotation = 180
enemy.x = 500
enemy.y = math.random(10,screenH-10)
enemy.name = “enemy”
physics.addBody( enemy, {isSensor = true } )
transition.to(enemy, {time = slowEnemySpeed, x = -20 })
end
function createFastEnemy()
enemy = display.newImageRect(“images/fastEnemy.png”, 32, 26) enemy.rotation = 180
enemy.x = 500
enemy.y = math.random(10,screenH-10)
enemy.name = “enemy”
physics.addBody( enemy, {isSensor = true } )
transition.to(enemy, {time = fastEnemySpeed, x = -20 })
end
12. Create Bonus Packages
Next, we’ll create bonus packages for our player to grab inside the function createBonus(). The createBonus() function will create a physics display objects that moves right to left and each bonus package the player grabs, they will earn 5 points.
function createBonus()
bonus = display.newImageRect(“images/bonus.png”, 18, 18) bonus.rotation = 180
bonus.x = 500
bonus.y = math.random(10,screenH-10)
bonus.name = “bonus”
physics.addBody( bonus, {isSensor = true } )
transition.to(bonus, {time = 1475, x = -20,
onComplete = function ()
display.remove(bonus)
bonus = nil
end; })
end
13. Updating Player Lives
Our next to last function is the updateLives() function. This function will be called every time an enemy gets past the player to give the player the goal of defending his side of space. If the number of lives is above 0, then this function will subtract one life and update the on screen text. Otherwise, it will result in a game over scene.
In the game over scene, we are canceling all of our timers and remove all of our event listeners. With the Corona SDK, it’s very important to remember that you have to explicitly tell your app when to remove runtime listeners and timers (only when the timer is running). After these have been removed, we will display a game over message and allow the player to return to the menu.
function updateLives()
if(playerLives >= 0) then
playerLives = playerLives – 1
gui_lives.text = “Lives: “..playerLives
gui_lives.x = screenW
else
timer.cancel(tmr_fireShip)
timer.cancel(tmr_sendSlowEnemies)
timer.cancel(tmr_sendSlowEnemies2)
timer.cancel(tmr_sendFastEnemies)
timer.cancel(tmr_sendBonus)
Runtime:removeEventListener( “collision”, onCollision ) Runtime:removeEventListener(“enterFrame”, moveguy) Runtime:removeEventListener(“touch”, stop )
– Display game over screen
local gameover_message = display.newText(“Game Over!”,0,0,”Kemco Pixel”,32)
gameover_message.x = halfW
gameover_message.y = halfY – 15
group:insert(gameover_message)
function returnToMenuTouch(event)
if(event.phase == “began”) then
storyboard.gotoScene(“menu”, “slideRight”, “1000″)
end
end
gameover_returntomenu = display.newText(“Return To Menu”,0,0,”Kemco Pixel”, 28)
gameover_returntomenu.x = halfW
gameover_returntomenu.y = halfY + 35 gameover_returntomenu:addEventListener(“touch”, returnToMenuTouch) group:insert(gameover_returntomenu)
end
end
14. Collision Detection
We are ready for our final function inside of our scene:createScene() function! This function will handle all of our collision detection by comparing the property myName of object1 to that held by object 2. Each object is passed as a parameter to this function under the variable name event.
To make it easier for you, I’ve broken down the five collision cases.
Case 1 – Object 1 is a bullet and Object 2 is an enemy
What’s happening: Remove enemy and update score
Case 2 – Object 1 is an enemy and Object 2 is an bullet
What’s happening: Remove enemy and update score
Case 3 – Object 1 is a ship and Object 2 is an bonus
What’s happening: Remove bonus and update score
Case 4 – Object 1 is a enemy and Object 2 is an enemyHitBar
What’s happening: Remove enemy and update lives
Case 5 – Object 1 is a enemyHitBar and Object 2 is an enemy
What’s happening: Remove enemy and update lives
function onCollision( event )
if(event.object1.name == “bullet” and event.object2.name == “enemy”) then
display.remove(event.object2)
playerScore = playerScore + 1
elseif(event.object1.name == “enemy” and event.object2.name == “bullet”) then
display.remove(event.object1)
playerScore = playerScore + 1
elseif(event.object1.name == “ship” and event.object2.name == “bonus”) then
display.remove(event.object2)
playerScore = playerScore + 5
elseif(event.object1.name == “enemy” and event.object2.name == “enemyHitBar”) then
display.remove(event.object1)
updateLives()
elseif(event.object1.name == “enemyHitBar” and event.object2.name == “enemy”) then
display.remove(event.object2)
updateLives()
end
gui_score.text = “Score: ” .. playerScore
gui_score.x = screenW
end
15. Syncing Movement Timers
Since we have everything set up for our game, we just need to make everything move! Inside of the function scene:enterScene() – remember that the enterScene function is outside of the createScene function – we will create 5 timers and one runtime listener. The timers will send out the bullets, enemies, and bonuses while the runtime listener will handle the collision detection.
function scene:enterScene( event )
local group = self.view
tmr_fireShip = timer.performWithDelay(bulletSpawn, fireShip, 0) tmr_sendSlowEnemies = timer.performWithDelay(slowEnemySpawn, createSlowEnemy, 0)
tmr_sendSlowEnemies2 = timer.performWithDelay(slowEnemySpawn+(slowEnemySpawn*0.5), createSlowEnemy, 0)
tmr_sendFastEnemies = timer.performWithDelay(fastEnemySpawn, createFastEnemy, 0)
tmr_sendBonus = timer.performWithDelay(2500, createBonus, 0)
Runtime:addEventListener( “collision”, onCollision )
end
16. Destroying the Scene
The final addition (I promise!) is the scene:destroyScene() function and the scene event listeners. The destroy scene function will make sure the physics are removed once the player leaves the scene. The scene event listeners will call the createScene, enterScene, and destroyScene respectively.
function scene:destroyScene( event )
local group = self.view
package.loaded[physics] = nil
physics = nil
end
scene:addEventListener( “createScene”, scene ) scene:addEventListener( “enterScene”, scene ) scene:addEventListener( “destroyScene”, scene )
return scene
Conclusion
Congratulations! You have learned about a lot of things such as Corona’s storyboard feature, physics, collisions, and so much more! These are valuable skills that can be applied to almost any game and if you want to build this game for your device, I strongly recommend the official Corona documents on building for the device.
Thank you so much for reading! If you have any questions, please leave them in the comments below.(source:tutsplus)

")
")
")
")


 闽公网安备35020302001549号