分享游戏关卡设计的6个注意事项及建议
作者:Jack Monahan
如果一个现代FPS关卡制作要花费数周乃至数月时间,倒不如放弃它去制作一个新关卡。以下是我对于开始制作新关卡所总结的6个重要经验。
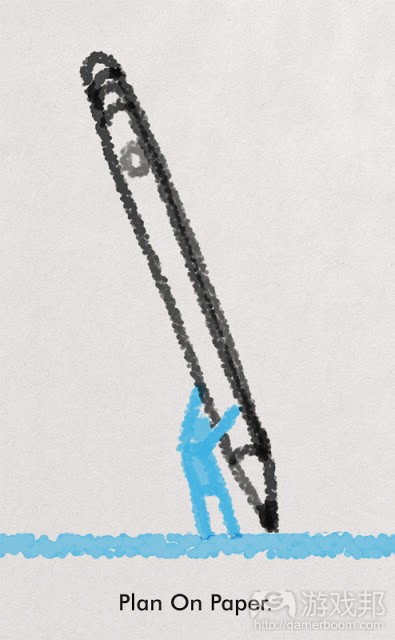
1.在纸上规划
“动手很重要,因为这正是你不同于牛或者电脑操作人员的地方。”——Paul Rand
宫本茂及其团队最初是在很长的纸质卷轴上设计经典的《超级马里奥兄弟》关卡。我发现过早使用技术手段来创建一个像World 1-1一样庄严而形象的场景几乎是不可能的事情,所以不要过早打开编辑器。先从纸上入手。试着给自己(或者请求上司给予)足够的时间进行思考和计划,磨刀不误砍柴功。
虽然这有点像小学美术老师式的说教,但你最重要的工具就是纸张和想象力。尤其是在制作环境中,一些注解和白板,或者简单的图画可能启发惊人的创意。在你最终定稿之前可能会提出和抛弃上百个不同的场景。
选择你感兴趣的理念,不要过于担忧技术局限性。
要适应落在纸上的想法,写下和概述你们的内部对话。不要认为某个主意很棒你就一定会记得住,或者不会把它记错。去买一本笔记本或写生簿吧,另外也不要在这个阶段纠结于绘图质量的问题。人人都可以画出足以传递布局的理念——只要简单的线条和框框就足矣。
针对关卡、你可能要创建的特定序列,以及令关卡体验更为独特的内容而展开头脑风暴。记录下这些内容,然后在你开工时将其放置一旁,这里的要点在于不要死守第一个理念不放。你得经过足够的思考和涂鸦,从诸多理念中取其精华,去其糟粕,而不是被迫从小部分理念中作出选择。
通过与他人讨论你的理念,对这个早期规划阶段进行补充。要找一些你信任其敏感性的好友或同事进行讨论。在所有开发阶段都要获得一些反馈,甚至是那些你不是很赞同的人的反馈。如果只向不愿拂你面子的人需求反馈,你可能会感觉更舒服,但最终这只会破坏整个开发工作。
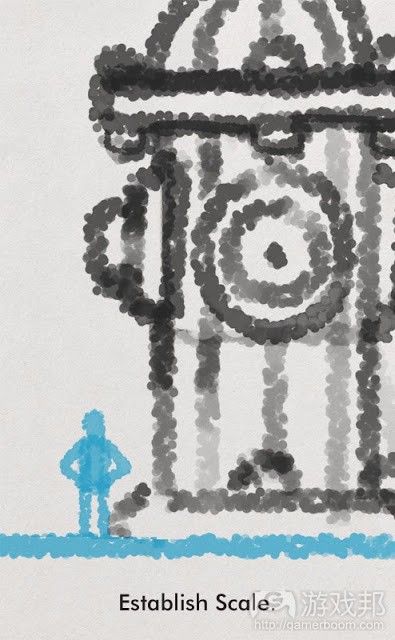
2.确定比例
在你开始在编辑器中草拟关卡布局时,你的首要任务之一就是确定范围。许多游戏的纹理开发要采用现实世界对比测量值的原因在于:你将需要持续的标记和参照点记下你游戏空间的比例。
过去最艰难的岁月中,我曾为一些关卡创建了最初的地形,也做了大量布景工作,但没有制作脚本,这些就是我最失望的关卡,因为它们太大了。关卡的大小和步测从根本上被曲扭了,因为我没有关注比例的问题。
地形/户外场景尤其难以掌握比例。你可能会认为自己能够判断出刚刚提高的山脉比例,但在编辑器的抽象环境中,这可能有20英尺或200英尺的差距。
室内场景在校准上也需要严格的一致性。如果在此操作失误,那最多只能做到让玩家觉得有点失真的关卡,虽然他们可能也说不清楚到底哪里不妥。
当你创建地形网格或铺好平面布置图的面板时,要立即置入物体。使用玩家角色或者接近人物大小的NPC,汽车和卡车等你所熟悉的物体。它们越接近真实世界的物体就越好,这样你就可以对其进行调整,使关卡接近真实世界的比例。
但第一人称视角可能存在欺骗性,如果只是在没有任何参照对比的情况下单独在这个关卡中转转,可能会觉得它的大小还算正常——所以一定要设置NPC。在必要时,甚至是用一个放大到6英寸高的箱子都会有所帮助。
我最近用UDK制作了一些很有趣的作品,因为其教程/样本内容是取材于《虚幻竞技场3》(简称UT3)。当游戏是基于传统多人死亡模式场景时,双跳等一切动作,物体和场景一般都要为动作而腾出空间。
我原先认为只有8英尺高的一个链状栅栏,最后却变成将近20英尺那么高,根本不符合UT3的需要。所以一定要了解游戏内单位和现实世界的比例转换问题,以便更准确地判断其中的大小关系。
要避免搁置明显问题或瑕疵,认为自己可以“过后再解决”。你会后悔的。要知道一些小疏忽最终可能酿成大祸。你越是深入创建关卡,就越难重新校正比例,或者发现只能彻底重建关卡。
3.试玩和步测
不断试玩你的关卡,密切关注其中布局的感觉。即使是在虚拟世界中,地图也不是版图。你在自己的这个产物中遨游时的所见所想,并不见得就能等同于玩家体验,玩家本人的感受才是最重要的。一旦你可以开始在上面行走,就要设置比例参照物,并开始试玩关卡。
步测你整个关卡的可玩区域/目标玩家的路径。不要作弊。无论你的关卡需要多长时间才能玩完,你都要有耐心先于他人以接近于这个数值的时间来步测每个时刻,每场战斗和谜题。
要试玩模拟交战,即使没有一个敌人,只有一个将你与虚无隔开的平台。看看关卡的轮廓并考虑其分枝。思考下这个预备阶段是太长还是太短?玩家是否有足够的时间欣赏你所规划的视觉内容——-说白了就是,它究竟能否映入玩家的眼帘?
随着时间的发展,关卡会越来越固定,其中添加的布景、脚本、声音和AI行为也会趋于平稳,所以要趁早进行调整。
你的开发过程越深入,就越是难以作出重要调整。正如策划一样,不顶害怕做出大幅更改或者重新开始。在这个阶段我们只需要花费一点时间和精力,总好过之后再投入大量时间进行调整。
我创建关卡时会着魔似地反复步测,想象玩家在关卡中穿行的路线,像是用自己的脚去丈量这种车辙一样。我在关卡中反复行走,这种车辙就会加深变宽成为一条路径,呈现梯度和包容性。
当玩家到达关卡时就可以沿这条行走和战斗。通过在每个开发阶段进行这种不知疲倦的步测,我们就可以预测和修改其中的问题,减少测试员发现未知死角的机率。你创建了这个世界,所以你应该比任何人更了解它。
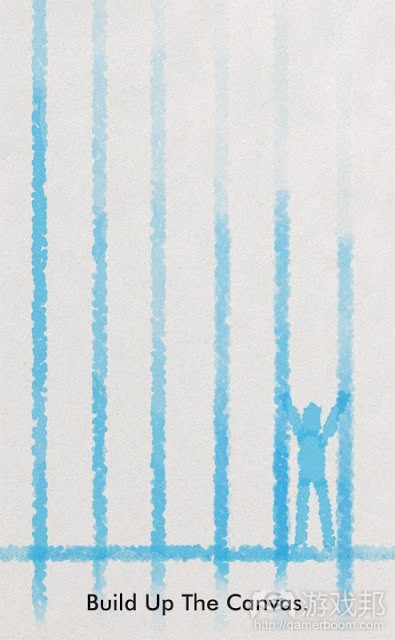
4.创建画布
这个建议也来源于创造美术作品的经验。绘画很容易让人因某个特定的细节而兴奋——例如人物的一个眼睛、一个耳朵,但之后就会发现你自己陷入困境,不知如何完成剩余内容。你现在有一个出色的细节绘图,但却开始担心它与其他部分并不兼容的问题,你不知如何继续,更糟糕的是,你已经被其虏获,希望保留自己所完成的辛勤成果,不想毁掉它。
读到这里,关卡设计师应该能回想起自己精益求精地创建一个房间或特定序列,而后却心怀恐惧地盯着其余未完成关卡,不知如何继续的类似经历。
要克服这种问题,得记得同时“创建画布”。在绘画中,这意味着粗略创建整个图像,在后续步骤中完善细节。
在关卡设计中,这意味着设计师要避免将一个房间布置得十分完善后再着手关卡中其他内容的倾向。要记住,确实会发生一些挨个创建房间的情况,但最好不要这样尝试。如果用连续通路来创建关卡,你的工作会更为顺畅,更为均衡地增加整个设计的分辨率。这不但可让你免于失速,还能够增加制作环境的一致性和实用性,更早进行富有代表性的玩法测试。
对产品设计师来说,这一原则还适用于标记渲染技术。例如,你的上司或客户等不及明天或下周,马上就想看到设计,通过连续通路创造细节的方法,可以让你确保自己虽然没有完成整个关卡,但却能够让客户看到具有一致性和看似“完成”的设计。
使用这一策略可以让关卡总是接近于富有进展的“完成”状态。这有助于让你及时完成关卡,免于因创建关卡速度过慢而陷入困境。
5.分解序列
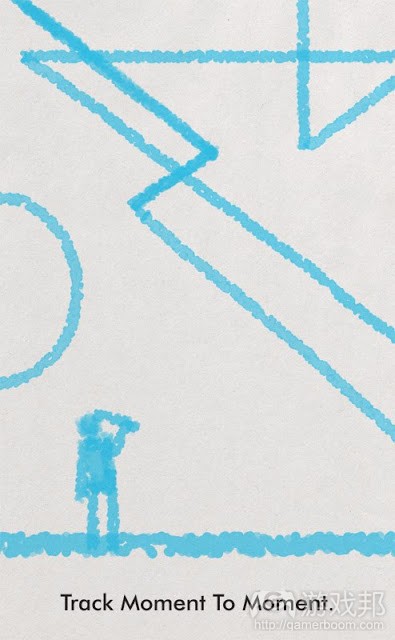
当你拥有适当的关卡步速和节奏时,你就可以更进一步优化和开发细节。人们会因为相关故事而记得一些事情,所以针对你的关卡每时每刻的叙事内容逐个进行完善,不失为一种有效的记忆法。
这里我指的是你应该考虑到玩家会经历到的事情,简单而言,就是关卡中的离散事件。“我狙击了警官,穿过那座桥,点燃了汽油箱,看到一些很酷的喷气机飞过,然后进入机械并炸毁了建筑。”一分钟的游戏玩法是一年,三分钟的任何活动就好比是一生。将你的关卡分解成这些更小的序列可以识别出问题,并有助于启发更多离散时刻和遭遇战,避免乏味或重复。
要明确你希望玩家在关卡中获得哪些特定体验。他们如何躲藏?如果他们需要花时间四处转转,会得到什么奖励?仔细搜索场景会发现什么东西?关卡一般都有对话脚本,但玩家会喜欢什么动作脚本?
看看你的关卡并想想你是否可以从游戏体验中构建一个基本故事。场景是否过多了?让你的下一个测试员简单描述他们看到什么,以及他们有多容易看到这些内容。他们能够回忆的离散时刻或序列越多越好。
6.合理测试
这是关卡设计最重要的层面之一,在整个游戏设计过程中,要迟早测试,经常测试。
要像你评估自己的工作一样,经常让他人测试你的关卡。关卡最终是要让玩家大感意外、快乐和挑战,而不是用来反映你个人的荣耀和天赋。如果不由他人来试玩,你就不会知道自己的关卡有多成功,或者有多失败。优秀和杰出关卡的区别通常在于是否经常进行全面的测试。
需要说明的是,有些观点认为玩法测试员通常会导致出色的关卡和机制“降格”,在主机游戏领域尤其如此。关键事实在于,有些游戏确实曾因为测试不当而被修改得更为不济。
我们必须记住,设计师不是玩家,玩家也不是设计师。我们不应该让玩家反馈颠覆设计师的判断力和直觉。
玩家不是设计师。玩法测试员通常会提出大量有用的建议,但要谨慎考虑是否采纳其意见。观察玩家游戏,监测他们的操作所得出的结果远比他们告诉你的更能说明问题。
当你观察玩法测试时就是在寻找模式,样本越大越多样化,效果就越好。没有哪一个单独的玩法(游戏邦注:除非它极为积极或极为消极)会极大曲扭你的关卡设计理念。
但也不要忘了,设计师并非玩家。没有什么比玩家的意见更能判断关卡质量的标准。如果关卡无法给玩家留下印象,那么我们所做的一切都是徒劳的。所以养成良好的习惯并时刻掌握新关卡的情况,有助于避免长期的痛苦和受挫,甚至是一些令人抓狂的复杂工作。
原文发表于2010年2月11日,所涉事件及数据以当时为准。(本文为游戏邦/gamerboom.com编译,拒绝任何不保留版权的转载,如需转载请联系:游戏邦)
Level Design Primer: Starting A New Level
Jack Monahan
When a modern FPS level takes weeks or months of production time it’s probably a good idea to approach a new one with care. What follows is a summary of the six most important lessons I’ve learned so far about starting new levels.
1. Plan On Paper
“It is important to use your hands, this is what distinguishes you from a cow or a computer operator.”- Paul Rand
Shigeru Miyamoto and his team first designed the classic Super Mario Brothers levels on long paper scrolls. I find little hope of building a space as sublime and iconic as World 1-1 by bringing technology to bear too early–so don’t open up the editor just yet. Start on paper. Try to give yourself (or beg your superiors for) enough time to think and to plan; it will pay off later.
Apologies for sounding like your gradeschool art teacher, but your most important tools are that piece of paper and your imagination. Especially in a production environment, some notes and a whiteboard or a few simple drawings can launch incredible ideas. A hundred different scenarios can be suggested and discarded before a single BSP brush snaps to the grid. Run with the ideas that intrigue you and don’t worry too much about technical constraints just yet.
Get comfortable with thinking on the page; write down and sketch your internal dialogue. Don’t trust that just because an idea is so awesome it means you’ll remember it, or remember it in the same way. Buy a notebook or sketchbook if you don’t already have one. As I point out in my article on character design, there’s no need to get hung up drawing quality. Everybody can draw well enough to help develop layout ideas–simple lines and boxes will do just fine.
Brainstorm your approach to the level, specific sequences you might build around, hooks that make the experience of your level unique. Record them and then set them aside as you work. We’ll cover the discipline of ideation in another update, but the important point is to not get married to the first ideas that crop up. You want to do enough thinking and doodling that you have the pick of the litter of many ideas in layout and encounters, not just being forced to execute on a small handful.
Try to complement this early planning stage with talking through your ideas with others. Kick them around with friends and coworkers whose sensibilities you trust. Try to get some feedback during all stages of development, even (especially) from people who you don’t always agree with. George Lucasing it up with your own troop of yes-men is more comfortable but will ruin the work over time. Ideas get better–or at least the bad ones flushed out faster–once you try them out.
[We'll also leave out talking about research for the time being, but suffice it to say I am a strong proponent of research-driven approach to pre-production.]
2. Establish Scale
As you begin to rough in your level layout in the editor, one of your first priorities will be to establish scale. There’s a reason why development textures for many games will have real-world comparison measurements all over them: you’ll want constant markers and reference points to register the scale of your space.
With Darkest of Days there were several levels I sculpted the initial terrain for or also did a good amount of set-dressing, but did not script, and these are the levels I am most disappointed with because they are simply too large. The size of and therefore pacing of the levels are intrinsically distorted because I did not pay close enough attention to scale.
Terrain/outdoor spaces make it especially difficult to keep a grip on scale. You may think you can judge the scale of that hill you just raised, but in the abstract space of the editor it could be 20 feet or 200 feet.
For their part, indoor spaces also tend to require exacting consistency in calibration. Failure to do so will make for levels that will at best feel slightly “off” to the player, even if they can’t articulate why.
Once you have created a terrain mesh or set laid brushes for your floorplan, immediately place objects in the world that you are intimately familiar with. Use the player character or as close to person-sized NPC as is available, cars and trucks, anything you know well. The closer they are to real-world objects the better, in order that you can fix them and your level in relation to real-world scale.
Here the first person perspective can be deceptive. your level can look normal sized while moving around in it alone because of no comparative cues–so be sure to place NPCs. In a pinch even a box, scaled to 6 foot high or so, will prove useful.
I recently did some work in UDK which was very interesting, because the tutorial/demo content is based off of Unreal Tournament 3. When a game is based on a traditional multiplayer deathmatch environment, double-jumps and all, objects and space are usually blown out a little to make room for the action.
A chainlink fence asset that I assumed to be about 8 feet tall turned out to be nearly 20 feet tall, skewed to the needs of UT3. Get to know your game’s scale conversion between in-game units and the real world, so you can more accurately judge size relationships as you work.
Resist the temptation to leave obvious problems or faults in that “you will fix later.” You will regret it. Small oversights become catastrophes with time. Once you’re farther into building your level, recalibrating scale may become difficult or impossible without completely rebuilding.
3. Play and Pace
Play your level constantly, paying close attention to how the layout feels.
The map is not the territory, even in a virtual world. What you see or think you see while floating around godlike within your creation has little if anything to do with the experience of the player, which is all that matters. As soon as you’ve got anything to walk on, place scale references and start playing it.
Pace through your entire level’s playable area/intended player path in real time. Do not cheat. However long your level should take to play through to completion, you should spend close to that amount of time pacing through every moment, every fight and puzzle, long before they exist to anyone else.
Go so far as to play out mock firefights, even with no enemies and nothing but a platform separating you from the endless void. Look at the outline of your level and consider the ramifications. Is this run-up too long, too short? Does the player have enough time to appreciate the clever visuals you have planned over to the left there–in fact, will it cross their sightline at all?
Changes that come from this initial read of the layout are critical. Over time, a level begins to harden and set like concrete. The accretion of set-dressing, scripting, sounds and AI behavior steadily freeze what at the start is fluid, so take advantage of it while you can.
The further into the process you get, the harder major changes become. As with planning, do not be afraid to make sweeping changes or start over. At this stage it costs a fraction of the time and energy it will to change later on.
When I build levels I pace through them obsessively, over and over; imagining the player’s line of travel through the level as a kind of furrow I dig with my feet. As I walk through the level over and over, the furrow deepens and widens into a path, graded and accommodating.
When the player arrives the level will be “paved” in this way, suitable for him to travel and puzzle and battle in. Problems are anticipated and corrected by tirelessly pacing through the world at every stage of development, reducing the likelihood of playtesters discovering unknown corners, snagging on jagged edges unencountered by the designer. You built this world, you should know it better than anyone else.
4. Build Up The Canvas
This advice is also rooted in experience of making art. When painting it’s very easy to get excited about a particular detail–an eye, an ear of a portrait–but then find yourself stymied, lost for how to finish the rest of the piece. You have a single excellent detail drawn but now you are worried because it doesn’t seem to fit with the rest, you have no idea how to proceed–worse yet you’ve been captured by preciousness, wanting to preserver all the hard work you’ve just done, scared to ruin it.
Level designers reading this may recall similar experiences of building a room or a particular sequence to perfection, and then stare at the rest of the unfinished level with dread, unsure of how to continue.
To combat this, remember to “build up the canvas” equally. In painting, this means to develop the whole picture to roughly the same detail level in successive passes.
In level design, this means resisting the temptation to build, script, light, texture-align and set-dress a single room to finished quality and then move on. To be sure, some successive room-to-room building will occur but try not to. Your work will go more smoothly by building with successive passes, increasing the resolution of the entire design as evenly as possible. Not only will this help keep you from stalling out, but it increases consistency and makes practical sense in a production environment, allowing for more representative playtests sooner.
This principle is also applied to marker rendering techniques taught for product designers. Say your boss or your client suddenly wants the design now, not tomorrow or next week. By building the detail of the piece in successive passes, you can rest assured that if asked for early (or if it takes longer than expected) while it may not be overall to the finish level you wanted, it will be consistent and look equally “done” to the client.
Using this strategy the level always close to progressively higher states of “done”. This will help you from getting caught setting a slower pace for building your level than you’ll be able to complete on time.
5. Track Moment To Moment
Once you have the broader strokes, the pace and rhythm of the level right, you can step in and refine and develop the details. People remember and relate in terms of stories; refining the moment to moment narrative of your level is an excellent way to make it memorable.
By this I mean you should consider how a player would narrate, in simple terms, discrete events in your level. “I sniped the officer, crossed the bridge, set fire to the gas tank and saw some cool jets fly over, then got inside the mech and blew up a building.”
A minute of gameplay is a year, three minutes of any one activity seems a lifetime. Breaking down your level in terms of these smaller sequences will identify problems and help suggest more discrete moments and encounters, avoiding tedium or repetition.
Clarify specific experiences within the level you want the player to have. where do they take cover? if they take time to look around, what details are they rewarded with? What might be found by carefully searching the scenery? Levels will often have a dialogue script, but what is the action script for the player like?
Take a look at your level and see if you can construct a basic narrative from the experience. Does the scenery blend together a bit too much? Ask your next playtester to briefly describe in basic terms what they did/what they saw, and see how easy it is for them. The more discrete moments or sequences they can recall, the better.
6. Factor In Testing
This is one of the most important aspects of level design, of game design as a whole: test early, test often.
Other people playtesting your level needs to happen almost as much as your own in-game appraisal of the work. The level is ultimately to surprise, delight, and challenge the player, not to hold a mirror to your shining glory and genius. You will have no understanding of how successful your level is–or how potentially rotten and recycled–until other people play it. Often the difference between good and great levels are just how much more thoroughly tested the latter are.
I feel the need to qualify this carefully given the rise of a certain perception of playtesters end up “dumbing down” great levels and mechanics, particularly for console games. There is a kernel of truth to this; occasionally games have been altered for the worse by improperly factored testing.
We must remember that the designer is not the player and the player is not the designer.
I could expand this key concept–a variation on what Warren Spector considers the “co-authorship” of games–into an entire article on its own, but the point is that we cannot let player feedback alone override good sense and instinct.
The player is not the designer. Playtesters are usually filled with a lot of worthwhile suggestions, but these should be considered with care. Watching a player play, monitoring their action directly says far more than they will tell you went wrong or right.
When you observe playtests you are looking for patterns, the larger and more varied the sample the better; unless hugely positive or hugely negative, no one single playtest should too strongly skew your perception of your level design.
But there again, the designer is not the player. There is no greater criteria for a level’s quality than how well the player enjoys it. All that we do comes to nothing if it is not done with the player in mind. Developing good habits and remaining acutely aware of how your new level is taking shape can take a lot of the pain and frustration out of a long and sometimes maddeningly complex task.(source:designreboot)





 闽公网安备35020302001549号