从数学、艺术角度解析游戏设计之游戏原型(3)
作者:Brian Powers
在游戏开发过程的每个阶段我们都需要明确自己的短期目标。以下是从零开始创造并完成游戏的过程:(请点击此处阅读本系列第1、2部分)
1.理念:明确游戏是关于什么。
2.游戏设计:玩家将如何玩游戏?游戏规则是什么(游戏组件,游戏目标等)?
3.最初原型:制作一个虽然简单但却具有可玩性的游戏原型。
4.游戏测试:测试游戏并判断哪部分可行哪部分无效,并相应地做出调整(不断重复这一步直到不再需要做出任何改变)。
5.发行:自己发行或与其它发行商合作。
虽然为游戏画图或添加色彩(这针对美学角度而言)非常具有吸引力,但是我们却希望能够量力而行。现在我们需要做的便是创造一个具有可玩性的基本游戏原型。我们希望在花时间为游戏画图并添加色彩之前先明确它是否具有可行性。游戏原型不需要太过华丽;而这时候我们需要进行第一次游戏测试以确认游戏设计是否有趣,是否存在哪些需要改善的内容,以及是否有那些地方描述过于含糊而需要进行修改。除此之外我们还必须面对现实:游戏到底有没有效?
我们可能会遇到一些无用的游戏!并非所有游戏理念都是合理的,所以不要对此感到纠结。而你必须亲自实践才能做出判断。你只有进行反复的测试才能尽早明确结果,并在遇到真正优秀的游戏理念时把握它。
所以让我们开始建造游戏原型!我的游戏非常简单并且也不依赖于任何奇幻的游戏部件,但是如果你想要创造一款带有额外修饰的游戏,那也可以创造一个游戏原型,并且不需要你投入过多的时间和成本。以下是一名游戏开发者在测试时的必需品:
空白卡片
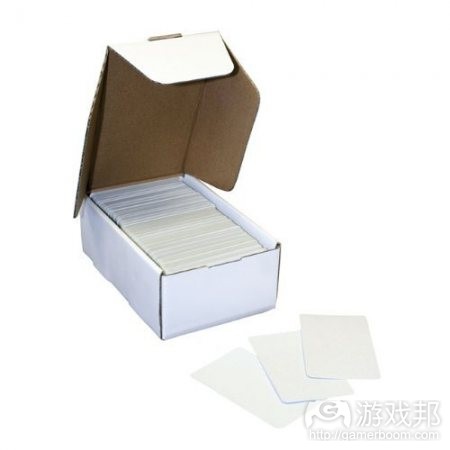
如果你想要确保内容的简单性那就可以使用索引卡。而如果你希望卡片的使用寿命能够长一点且更容易操作与洗牌的话,你便可以购买空白卡片。你可以在亚马逊购买售价7.2美元的空白卡片(一盒500张)。
我认为这对于游戏设计师来说是不可或缺的必需品。索引卡片也行,但是如果你真的想要进行游戏测试,你更需要那些容易操作的卡片。你可以在这些卡片上使用铅笔记下或做出一些永久性的标记,从而帮助你顺利完成工作!
游戏图板
你可以从当地的工艺品店购得一些硬木板,并将其裁剪成合适的大小。如果你不在乎木板的厚度的话就没关系,但是一般制作卡片的纸料或纸张的厚度就可以了。
骰子
你可以使用6面骰子,或者你也可以创造出一款使用4面,8面,10面,12面或20面骰子的游戏。你可以在游戏商店或网上买到便宜的骰子。就像在我们当地的1元店一盒骰子(10个,5个白色5个彩色)就只卖1美元。
计数器,代币,钱,兵卒
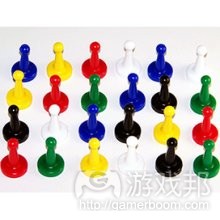
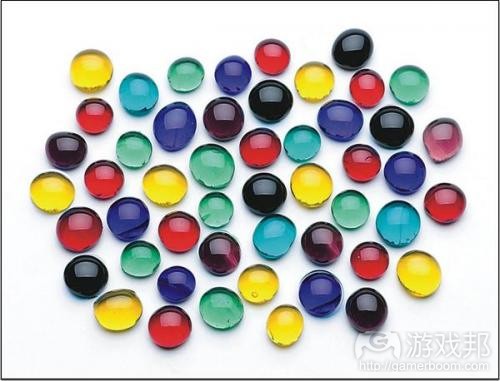
在创建游戏原型时你可以使用各种道具作为游戏部件,而如果你想要创造许多原型你最好拥有一个小小的游戏部件库。你可以在The Game Crafter等商店中购买到它们,并且游戏部件的价格也不会太高!就像如果我需要彩色的代币,我便会到Michael’s Arts and Crafts购买几袋彩虹玻璃宝石(它们正在做促销,即每袋只需要1美元!)
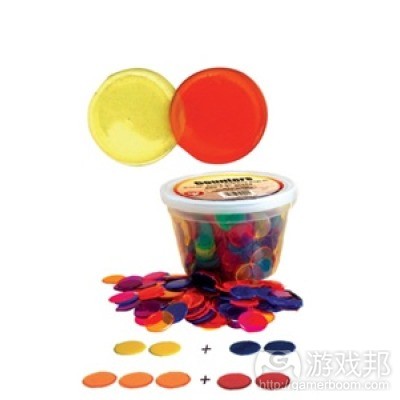
另外一个选择便是购买一大箱的彩色方块。1厘米的彩色方块是教师们的教学材料,但同时它们也是非常棒的游戏计数器,代币等道具。塑料方块也是如此,它们既能作为教师的教学道具同时也可以是游戏中用于记分的计数器或代币。我们可以很容易在网上找到透明或非透明的方块。
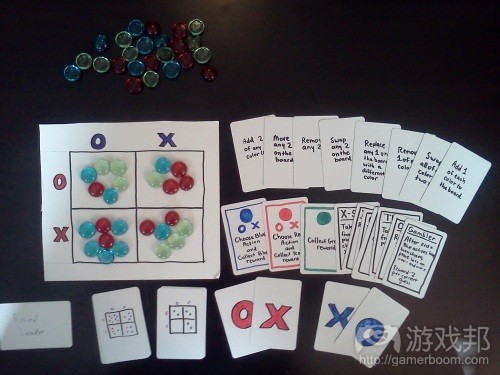
创造游戏原型并不会花费我太长的时间。比起长篇大论地解释我是如何建造原型我更希望以照片呈现出来:
我希望尽可能确保原型的简单。我有2套行动卡片,上面那一套是修改行动,即让玩家能够修改游戏图板中的奖励。而第二套则是奖励行动,主要呈现玩家是如何获得分数。
除此之外还有策略行动卡片,一套是蓝色的X还有一套是红色的O。这些卡片让分别代表红色和蓝色的玩家能够秘密选择行动,并同时展示出来。最后还有两套分别面向红色/蓝色和绿色的游戏图板设置,以及“领导者”卡片——将向每个玩家分发表格从而让不同玩家都拥有优先选择行动的机会。
我只需要使用几根Sharpie钢笔便能将这些游戏部件组合在一起。我并不需要使用任何牌背。你会发现整个过程如此简单。然而我只要完成这些就能邀请好友们帮我测试游戏。(本文为游戏邦/gamerboom.com编译,拒绝任何不保留版权的转载,如需转载请联系:游戏邦)
Math, Art, and Game Design, Part 3: The Playable Prototype
by Brian Powers
During each stage of the game development process it is key to keep perspective of what the short term goal is. Here’s a map of how to get from zero to a finished game:
1.Concept: Figure out what the game is about.
2.Game Design: How is the game played? What are the rules (game components, goal of the game, etc)?
3.Initial Prototype: Make a playable rough draft of the game.
4.Play-testing: Test out the game to see what works and what doesn’t work. Make changes accordingly. (Repeat this step until you don’t need to make changes anymore.)
5.Publish: Either self-publish or get a publisher to buy your game from you!
An elaboration of the process can be found at the Board Game Designer’s Forum (a fantastic resource for board and card game designers!)
As tempting as it may be to start illustrating the game or adding color (in the general aesthetic sense, not in the purely literal sense), we don’t want to get ahead of ourselves. Right now we need to make a very basic playable prototype. We want to make sure that the game works before we invest time into illustrating it and making it pretty. The prototype doesn’t need to look great; we want to get to the first play test and find out what about the game design is fun and what is clunky and needs to be tweaked or fixed—that is, what ambiguities we didn’t foresee and need to delineate. Moreover, we face the truth: does the game work or is it a dud?
Some games will be duds! Not every game idea we have will be brilliant, and that’s OK. But you need to create and get practice. The more you do that, the more easily you’ll be able to visualize the end in the beginning, to identify a great game concept when it comes.
So let’s make a prototype! My game is pretty simple and doesn’t rely on a lot of fancy game parts, but, even if you imagine a game with bells and whistles, making a prototype is quite doable and shouldn’t cost you much time or money. Here are some of the essentials for a game developer:
Blank Cards
You can use index cards if you want to keep things super simple. If you want your cards to be a little more durable and easier to handle and shuffle, you can buy blank playing cards. At the moment, you can get a box of 500 blank playing cards from Amazon for $7.20 (USD).
In my opinion, this is a must-have for a game designer. Index cards are OK, but to really enjoy the play-testing, you will want cards that feel good to manipulate. You can write with pencil or permanent marker on these cards, and they will get the job done!
Game Boards
You can get some stiff whiteboard from your local craft store and cut it down to size. If you don’t care too much about thickness, however, card stock or even paper will do fine.
Dice
You can probably get by with the average 6-sided die, but you may develop a game that uses dice with 4, 8, 10, 12, or 20 sides. You can buy dice for pretty cheap at game stores or from many online shops. At my local dollar store, they sell a pack of 10 dice (5 white and 5 colored) for $1.
Counters, tokens, money, pawns
For the prototype you can use pretty much anything for game parts, but if you’ll be developing a lot of prototypes, it might be worthwhile to have a little library of game parts. You can buy these from a store like The Game Crafter, if you want them to be fancy, but game parts can be found on the cheap, too! I needed colored tokens, so I went down to Michael’s Arts and Crafts for some bags of rainbow glass gems (they were on sale for $1 per bag!).
Another great option is to buy a big container of colored cubes. Colorful, 1cm cubes are are sold as learning resources to teachers, but they are great as game counters, tokens or whatever (you can do a Google shopping search for “centimeter cubes”). Plastic discs are also sold to teachers as learning aids, and they make great counters or coins and can be used to score points. Translucent and opaque are easily found online.
It didn’t take long to make my prototype. Rather than explaining how I did it, I’ll just show you a photo:
I wanted to keep things super simple for the prototype. I have two sets of Action cards; the top set are the modification actions, which allow players to modify the rewards shown on the game board. The second set are the reward actions, which are how players get points.
Then there are the strategy action cards, a set of X and O for both Blue and Red. (You’ll notice that I used O and X rather than “passive” and “aggressive” – terms I used in my last two posts to describe the players’ action options in my game). These cards allow the Red and Blue players to secretly choose an action and then reveal it simultaneously. Lastly there is a deck of game-board setups for Red/Blue and one for Green, and finally a “Round Leader” card, which is passed around the table to each player so that different people have the opportunity to pick their actions first.
I just needed a few Sharpie pens to put this together. I didn’t do anything with the card backs. You can see how simple it is. Yet this is all I needed to get my friends together and test the game out.
Tune in next time to see how the first play test went and what I learned!(source:reallifeartist)




 闽公网安备35020302001549号