使用Corona制作《涂鸦跳跃》类游戏的教程(1)
作者:Jacob Gundersen
在这个分为两部分的教程中,我将以易于使用且可用于iOS和Android的跨平台游戏引擎Corona来制作一款这种游戏。通过本系列教程,你将会学到以下内容:(请点击此处阅读第二部分)
1、如何用Corona来制作游戏
2、Corona与Cocos2D相比的优势和劣势
3、如何用LevelHelper来制作关卡
4、当然,还有如何制作出像《涂鸦跳跃》的游戏
本教程适用于完全未接触过Corona的新手,当然如果你已有些经验也可阅读。
最棒的情况是,你已经有些使用LevelHelper和SpriteHelper的经验。如果你完全未使用过这些工具,那么最好先看看本教程中的内容。如果你没有这些工具或者经验不足,无需为此感到担心,如果愿意的话你可以使用预制的精灵层和关卡。
什么是Corona?
多数人或许对Cocos2D游戏引擎都很熟悉,但是你可能还未接触过Corona游戏引擎。
所以,我们先从Corona的介绍开始!
Corona是个支持iOS和Android的跨平台游戏引擎。该引擎由Ansca公司开发,你可以免费试用该引擎来开发游戏。但发布游戏时需要获得授权,价格从199美元到349美元不等。
Corona中的编程使用Lua语言,这是个轻量级且易于使用的脚本语言。Corona没有可用的IDE(游戏邦注:比如Xcode),你需要用普通的文本编辑器来编程。Corona自带模拟器,你可以在编写代码时用来测试游戏。
Corona含有内置API,提供普通的游戏编程层面(游戏邦注:比如精灵和音效等)和各种来自苹果的API,包括Game Center Leaderboards、In App Purchase和TableViews。
引擎中还有许多第三方开发商API,包括Open Feint(排行榜)、inMobi(广告)和Flurry(分析)。引擎中并不包含苹果的所有API,不包含的API有iAds、Game Center Multiplayer和蓝牙连接。
Corona与Cocos2D
接下来,我们将阐述Corona和Cocos2D间的不同之处。
首先,Corona和Cocos2D有相似点:
1、Corona中精灵的定位很简单,只需要设定精灵的X和Y轴坐标即可。
2、呈现对象时可以使用缩放、旋转和排序。
3、用“transition.to”方法来实现定位、缩放和旋转等动画
4、Corona使用Box2D物理引擎,所以假如你已经使用过带有Cocos2D的Box2D,那么对其方法和资产应当很熟悉。
5、与Cocos2D相同的是,Corona也拥有精灵、文本标签和原始绘画方法,但是名称有所不同。任何出现在屏幕上的对象都统称为“呈现对象”,这类似于Cocos2D中的CCNode。Corona有个呈现组,其功能与Cocos2D中的CCLayer极为相似。
但是,这两个引擎间还存在几个显著的差异:
1、Cocos2D程序使用Objective-C编写,而Corona程序则使用Lua编写。Corona的API受Action Script影响很大。Flash开发者觉得Corona是个很友好的环境。Corona代码可根据OOP模型编写,但是函数编程模型更为常见。
2、Cocos2D是开源的,允许整合以Objective-C编写的第三方库。Corona是专有封闭系统。虽然有些许用Lua编写的第三方库可供Corona使用,但是与前者相比Corona可用的第三方工具要少得多。
3、当然还有一点,Cocos2D是免费的,而Corona需要付费。
看到上述内容或许你会产生疑问:那么谁还会愿意选择这个引擎呢?要回答这个问题,就要先了解使用Corona的优势和劣势:
优势:
1、开发时间缩短。使用Corona来制作游戏往往会比使用Cocos2D更快更简单。由于引擎基于Lua,因而向对象添加变量只需要分配数值即可(游戏邦注:比如Sprite.newvalue = 0)。该引擎整合了Box2d引擎,所以
精灵对象和物理实体是同一个对象。你不需要编写界面文件、确定实例变量和确定变量数据类型。
2、跨平台支持。如果你用Corona来制作游戏,它能够同时兼容iOS和Android平台!
劣势:
1、缺乏API支持。Corona无法使用所有的苹果API,其可用的第三方扩展也少于Cocos2D。而且,Corona在数据持久性上仍有欠缺。需要完全从新编写连网多人模式的代码。苹果发布的新功能无法立即整合到游戏中。
2、呈现速度较慢。因为Corona构建于Lua之上,所以你的代码无法像Objective-C那样快速地运行。
3、引擎不是免费的。尽管你在发布游戏时可能已经凑到了获得授权的钱,但Cocos2D终究是款完全免费的引擎!
无论上述内容是否已经说服你使用Corona,本教程都值得一看,这样你就可以自行判断更适合用哪个引擎!
用Corona开始制作游戏
如果你还未安装Corona,可以先注册Anscamobile,下载Corona试用版。试用版含有该引擎的所有功能,只是你无法将游戏发布到应用商店中。访问Corona订阅页面,注册并下载该引擎。
在以下Corona的使用指导中,我将以Macac为操作平台。但是务必记住,你也可以在PC上使用Corona。但是,你无法使用PC来构建iOS游戏,只能用来制作Android游戏。如果你想要了解更多有关如何在PC上开发Android游戏的内容,请访问anscamobile网站。
安装完成后,你应当可以在“应用程序”文件夹中看到Corona文件夹。文件夹中有许多不同的可执行文件。我推荐通过执行Corona Terminal可执行文件来运行Corona。这样,就会出现带有Corona Simulator的终端窗口。终端窗口会向你呈现所有错误信息或print()声明。
正如我之前提到的那样,Corona不含有专有IDE。我的大部分代码都是通过文本编辑器编写完成。虽然引擎含有命令行调试器,但我不觉得它有多大用处。你可以使用Xcode作为文本编辑器,而且目前有供Corona使用的代码高亮插件,但并非能与所有Xcode版本兼容。
现在,用你喜欢的文本编辑器打开新的文本文件,然后添加下列代码:
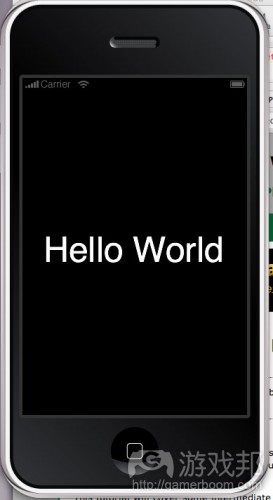
display.newText( “Hello World”, 20, 160, “Helvetica”, 50 )
你或许已经猜到,这会使屏幕上呈现“Hello World”字样,坐标为X=20和Y=30,字体为Helvetica。
保存这个只有1行代码的文本文件。文件名设为“main.lua”,Corona程序编写由此开始。
打开Corona Simulator,可以执行Corona Simulator.app文件,也可以像我上文推荐的那样执行Corona Terminal。选择“文件->打开”,导航至你的文件。文件都放在应用程序文件夹的Corona文件夹中。
恭喜你,现在你已经成了Corona开发者。你不觉得这很简单吗?
要以Corona来为设备构建游戏,你需要苹果开发者账户和一个开发provisioning profile(游戏邦注:不是distribution profile,只有付费订阅用户才需用distribution profile)。如果你在Corona中加载一个程序,然后选择“文件->构建->iOS”,你会看到一个允许你构建.app文件的对话框,你可以使用Xcode组织器或iTunes将.app文件安装到设备上。
制作精灵层
在我们制作《涂鸦跳跃》类游戏前,我们要先构建精灵层。因为我们计划使用LevelHelper来制作游戏关卡,所以我们要用SpriteHelper来制作精灵层。
如果你没有SpriteHelper,不用担心,你可以从这个项目的资源库中直接获取已完成的精灵层,然后继续进行下个部分的学习。
但是,如果你有SpriteHelper,而且想要跟着教程学习,那么请继续阅读下列内容。
你仍然需要先获得这个项目的资源,下载并解压资源。在精灵文件夹中,你可以看到我们要用在这款游戏中的美术资源。
我们需要设置诸多物理属性。我喜欢在SpriteHelper中设置这些属性,但是也可以随后在LevelHelper中设置。在这篇教程中,我要向你展示的是如何在LevelHelper中设置属性。
开启SpriteHelper,将所有精灵拖到窗口中。
选择“文件->保存”,选择main.lua所在的目录,输入“cloudSprites”作为文件名,扩展名会自动添加。它将为你创建出3个文件:cloudSprites-hd.png、cloudSprites.png和cloudSprites.pshs(游戏邦注:此为SpriteHelper项目)。
用LevelHelper制作关卡
接下来,我们要用LevelHelper来为游戏制作关卡。如果你没有LevelHelper的话,仍然可以从本项目的资源中获取我已经制作完成的关卡,然后继续下个部分的学习。
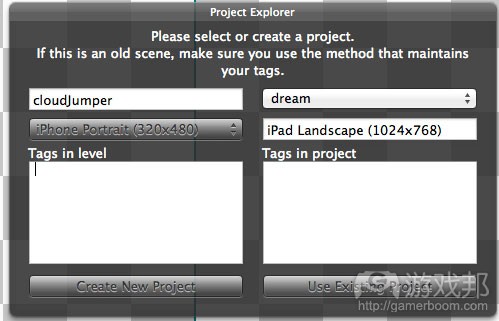
如果你有LevelHelper的话,打开并点击“项目”组中的加号。输入cloudJumper,选择“iPhone Portrait (320×480)”,然后点击“创建新项目”。
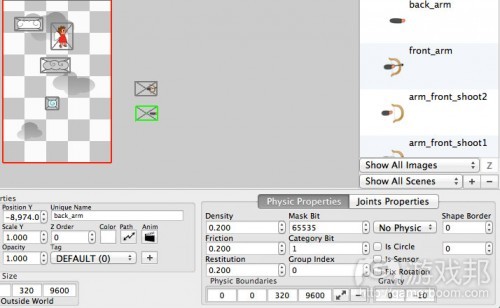
在LevelHelper窗口底部可以看到Game World Size单元,将值变更为0, 0, 320, 9600。同时,也将这些值输入Physic Boundaries单元。将重力设为0, -10。
点击右侧展开的屏幕选择器旁边的加号。选择你刚刚在SpriteHelper中创建的cloudSprites.pshs文件。现在,你应该已经将所有的个体精灵加载到精灵面板中。
你可以在按住Ctrl的同时点击拖拽来拖动关卡。
接下来,我们要做的首件事情是加载所有的背景云彩。将bg_cloud1、bg_cloud2和bg_cloud3这3个云彩拖到底部界面。选择这3个精灵。你可以在GUI或“关卡精灵”面板中实现上述目标。
将云彩的物理类型选为“No Physic”。将Z轴坐标设为-2。我们希望这些云彩保持在背景层次上。
使用复制和粘贴工具,将这3个云彩精灵复制19次左右。你可以将Y轴补偿设为-480,在每个屏幕中放置一套云彩。浏览屏幕放置云彩,丰富云彩的布局多样性。
完成后,全选所有云彩精灵,然后点击锁定按钮。锁定精灵使之无法在布局视图中选取。这使得在云彩上放置其他精灵变得更加容易。如果你需要编辑锁定的精灵,在“关卡精灵”列表中选择,然后点击相同的按钮便可解锁。
现在,将云彩1、云彩2和云彩3精灵拖到关卡底部。为这些精灵添加下列物理属性和标签:
这里需要做些说明,所有云彩的Z轴值都为-1。这使得3种云彩位于背景云彩之前,但是在所有其他精灵之后。白色和灰色的云彩都是感应器,我们跳上云彩时能够反弹。蓝色云彩不是感应器,所以我们需要绕过这些云彩,由此提升游戏难度。
所有云彩都有值为1的类别位元。我们希望箭和怪物可以无碰撞地通过它们,所以我们相应地设定这些对象的屏蔽属性。其他属性的设置是为了确保物理类型、形状边缘和TAG资产。如果你的标签数字与这里所呈现的有所不同,无需对此感到担心,只有文件名才会真正产生影响。
如果你不知道这些资产的用途,可以查看有关SpriteHelper和LevelHelper的教程。
所有资产设置完成后,使用复制工具来制作出足够数量的平台。通过布局不同平台来制作出有趣的关卡。
以下是些许关卡构建技巧:
1、关卡刚开始应当较为简单,让玩家熟悉最基本的内容。
2、永远不出现重复的关卡。
3、玩家最高能够跳跃200像素,必须确保有着落点。
4、灰色云彩在玩家着落后会消失。
5、蓝色云彩属于较高难度,因为玩家无法跳过,而且蓝色云彩较窄。
6、难点应构建于通往关卡终点的关键点。
以下是我所设计关卡的前几个屏幕:
如果你想要使用我设计的关卡,可以从该项目的资源中获取,但是自行制作关卡会有趣,而且还是个不错的练习!
必须注意的是,预制关卡已经全部完成,所以它已经包含所有已设置的精灵(游戏邦注:包括怪物、玩家和TAG),也就是说本教程随后的某些LevelHelper部分内容已经完成。如果你想要跟随教程学习这些内容,但又不想要花费过多的时间,可以考虑制作一个小关卡(游戏邦注:比如高度960像素即可)。
添加玩家
现在,我们已经在游戏中添加了所有的云彩,可以引入玩家了。将char_jump2精灵拖到屏幕底部,放在某朵云彩上。为其添加下列资产:
玩家将同云彩平台、怪物和关底形状发生碰撞,所以他需要值为5的屏蔽位元。
最后,我们要保存关卡并生成代码。选择“文件->保存”,将文件命名为“level1”,扩展名会自动添加。同时,选择“文件->生成代码->Corona”,这样就能够创建LevelHelperLoader.lua文件。我们每次添加新TAG都需要重新生成这个文件。
将所有这些文件放置在与main.lua相同的目录中。
加载关卡
现在,让我们来处理代码问题,过段时间再回到关卡设计中。删除main.lua中的当前代码,将其替换为下列代码:
physics = require(“physics”)
physics.start()display.setStatusBar( display.HiddenStatusBar )
main.lua文件将从上而下执行。当我们开启Corona Simulator时,这前3行代码将首先执行。让我们依次来解释这3行代码:
1、导入物理引擎代码,将引擎分配给调用物理的对象。
2、开启带有默认重力值的物理引擎。Corona使用Box2D物理引擎,如果你之前使用过Box2D,那么对多数物理引擎调用应当较为熟悉。
3、隐藏状态栏。
现在,文件已经开启,我们拥有了运行之前使用LevelHelper制作的关卡的物理引擎。
让我们来尝试一下。使用下列代码添加新函数以加载关卡:
require(“LevelHelperLoader”)
local function loadLevel()
localGroup = display.newGroup()
loader = LevelHelperLoader:initWithContentOfFile(“level1.plhs”)
loader:instantiateObjectsInGroup(physics, localGroup)worldHeight = loader:getWorldBoundariesRect().size.height
localGroup.y = -worldHeight + 480player = newPlayer()
end
首行代码加载LevelHelperLoader类(游戏邦注:早期由LevelHelper生成或存放于资源文件夹中),这类似于Objective-C中的#import。
接下来的代码创建了函数,在Lua中通过函数关键词实现。Lua中的变量和函数默认范围为全局,如果你想要将范围限制在当前函数中,就需要添加本地关键词。
Corona将其视觉对象(游戏邦注:如精灵、绘画对象和层次)称为“呈现对象”。我们制作的每个精灵、背景云彩、玩家和平台云彩等都是呈现对象。
函数中的首行创建新呈现组,其在Corona函数中的功能类似于Cocos2D中的CCLayer。我们将把所有关卡内容添加到这个呈现组中。
第2行代码创建加载器对象,将其放置于关卡内容中。事实上,我们现在还未创建这些对象,但是我们准备通过下一行代码实现。
在Corona中,我们只需要单呼LevelHelper,便可创建所有的呈现对象和相关物理实体。Corona物理实体会自动同它们的精灵连接,这使得制作基于物理的游戏极为简单。
instantiateObjectsInGroup()调用有两个参数:我们的物理引擎对象和加载进所有呈现对象的呈现组。一旦我们将关卡加载进呈现组中,它就能够呈现在我们的设备屏幕上。
Corona会自动添加任何创建至屏幕上的呈现对象。引擎中有个母本呈现组,包含所有实体化的呈现对象。
现在,我们的呈现对象出现在屏幕上,呈现组部分称为“localGroup”。但是,localGroup目前的Y轴坐标为0,Corona的坐标系统原点位于屏幕左上角,数值向底部逐渐增大,这意味着我们将看到的是关卡的最高点或最低点。
我们需要向上移动呈现组,这个步骤通过接下来的两行代码实现。首先,我们获得世界的大小,也就是我们在LevelHelper中的设定值,然后我们向负世界大小设置localgroup.y,减去一个屏幕的高度。
最后,我们创建并初始化玩家,将其分配给带有newPlayer()函数调用的玩家变量。我们还未编写过这些代码,将下列代码添加到loadLevel上方:
local function newPlayer()
local p = loader:spriteWithUniqueName(“char_jump2″)
return p
end
这样就能够获取带有“char_jump2”独有名称的精灵,添加到我们用LevelHelper创建的关卡中。
应当注意的是,这个精灵已经有了与之相关的物理实体。所以随后,我们可以访问那些获得和设置物理资产的指令。
现在,我们已经使这两个函数就位,让我们使用他们!将下列代码添加到函数定义后:
loadLevel()
就是这样!保存main.lua,将其放置在LevelHelperLoader.lua、cloudSprites.png、cloudSprites-hd.png、cloudSprites.pshs和level1.plhs所处的目录中。然后在Corona Simulator中加载main.lua。
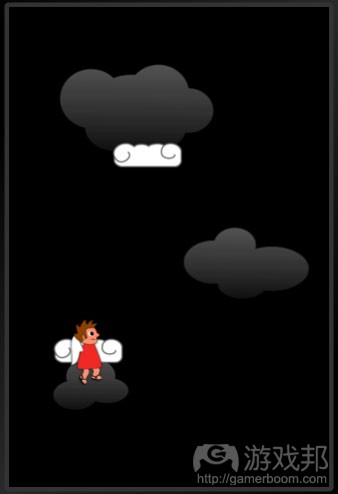
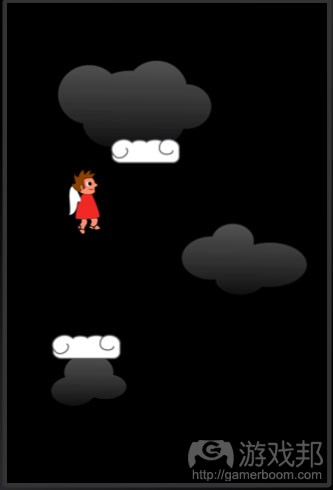
现在,你应当可以看到某些云彩以及在屏幕中下落的角色:
祝贺你,你已经编写了首个拥有角色和平台的Corona程序。
接下来,我们将让角色从云彩上跃起!
添加碰撞和跳跃
要添加跳跃,需要修改newPlayer函数,添加下列碰撞处理器:
local function newPlayer()
local p = loader:spriteWithUniqueName(“char_jump2″)local function pCollision(self, event)
object = event.other
if event.phase == “began” then
vx, vy = self:getLinearVelocity()
if vy > 0 then
if object.tag == LevelHelper_TAG.CLOUD then
self:setLinearVelocity(0, -350)
end
end
end
end
p.collision = pCollision
p:addEventListener(“collision”, p)
return p
end
第2行创建了我们的碰撞回调函数。第2个参数包含了有关碰撞事件的信息。
本体是玩家对象,另一个物体是事件类型。Event.other是与本体碰撞的对象,所以我们将在随后用到,我们将其存储在对象变量中。
接下来,我们还想要让跳跃只发生一次。碰撞可能发生多次,但是我们只想让角色在每次与云彩碰撞时只做出单次跳跃动作,所以我们要从“开始”阶段进行测试。
然后我们测试来看是否应该跳跃。我们获得本体的线性速度,经过测试发现它大于0。
最后,我们将要看看我们与什么发生碰撞。我们想要设置成只在碰撞白色云彩后跳跃,所以我们需要检查与我们发生碰撞的对象的标签资产。
如果所有这些条件都满足,我们会将本体的线性速度设为-350或者将上升速度设为350。这里我们使用setLinearVelocity而不是applyLinearImpulse,因为无论我们获得的下落速度是多少,我们都希望跳跃的高度都相同。
最后,我们将刚刚创建的函数设为新玩家对象的碰撞回叫。接下来的两行代码完成了这个目标。拥有碰撞回叫,我们就必须设置碰撞资产,向对象添加事件监听器。
再次用Corona Simulator打开项目。现在,你的玩家角色应当能够在与白色云彩碰撞后被反弹。
通常情况下,我不在项目构建时关闭Corona Simulator,在保存文件后使用Command-R的按键组合来重载项目。Corona也能够检测到main.lua已被更新,并提醒你重载项目。
Corona中的事件监听器:
现在,是时候概述下Corona中的事件监听器了。
你已经在上文中看到带有碰撞事件监听器的实例,但是接下来我们要探讨的是它们的运作原理。
事件监听器是Corona的回叫方法。触碰和加速计输入、方向改变、GPR系统输入、碰撞以及应用程序的退出或暂停的处理中都会用到事件监听器。
事件监听器分为两种:
1、传播给所有对象的事件。这些就是所谓的运行事件,包括方向改变和GPS输入等。enterFrame监听器也属于此类,这个事件在每次框架绘制时都会被调用。
2、传送给单一对象的事件。这包括触碰或碰撞事件,比如你之前所使用的那个事件。
在我们这款游戏中,我们创建了一个碰撞函数,也就是pCollision函数。我们将事件监听器与玩家绑定,所以当玩家与其他对象发生碰撞时,这个对象就会被调用。函数有两个变量:本体对象(游戏邦注:也就是这里的玩家)和事件对象。创建事件对象后会根据碰撞事件类型填充信息。
不同事件监听器有提供不同信息的不同事件对象。比如,“postCollision”事件类型能够提供碰撞力。通常的碰撞事件对象并不包含这种信息。
其他碰撞
现在,玩家可以在白色云彩上跳跃,接下来要添加灰色和蓝色云彩。事实上,蓝色云彩无需编写额外的代码。它们使用与白色云彩相同的CLOUD标签,而且是静态实体(游戏邦注:玩家只能从边缘跳上蓝色云彩而不能像白色云彩那样跳跃穿过)。
再次进入pCollision函数,添加更多代码,使之如下所示:
if event.phase == “began” then
vx, vy = self:getLinearVelocity()
if vy > 0 then
if object.tag == LevelHelper_TAG.CLOUD then
self:setLinearVelocity(0, -350)
elseif object.tag == LevelHelper_TAG.BCLOUD then
loader:removeSpriteWithUniqueName(object.uniqueName)
end
end
end
如果标签是BCLOUD,那么我们希望灰色云彩消失,所以我们调用了加载器removeSpriteWithUniqueName,输入我们碰撞的对象名称。记住,在我们的代码中,“对象”是可变的。
创建射击动画
接下来,我们要在LevelHelper中制作出射击动画。
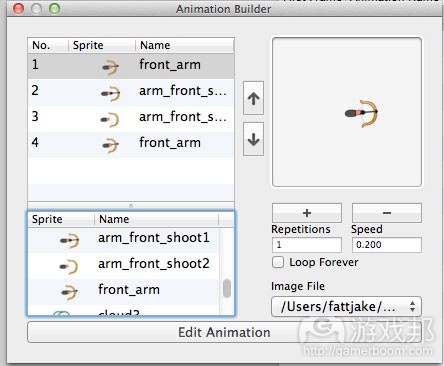
切换回LevelHelper,选择右侧的动画标签,点击“新建”按钮来创建新动画。点击后会出现动画创建对话框。选择front_arm、arm_front_shoot1、arm_front_shoot2和front_arm并点击加号,将这些精灵添加到列表中。将循环选项的打钩点去。属性使用默认值即可。
点击“创建动画”来保存。双击文件,将动画重命名为“射击”。
将动画对象推动到关卡外的灰色区域,任何地方都可以。我们希望这些成为代码可用的内容,但是我们计划在代码中将手臂放置在玩家身旁,所以我们此刻还不需要将其放置在关卡中。但是如果我们不将他们拖到关卡中,我们就不能使用levelHelper加载器对象来获得指向它们的指针。
将它拖动到关卡中之后,选择动画对象,将物理类型设置为“No Physic”,以避免出现奇怪的物理行为。
添加手臂
点击精灵按钮返回精灵列表。将“back_arm”精灵拖入,也将其放在关卡之外。设置新动画(游戏邦注:名称为“front_arm”,因为这是首个精灵),将“back_arm”物理类型设置为“No Physic”。
修改newPlayer函数中的代码,结果如下:
local backarm = loader:spriteWithUniqueName(“back_arm”)
local p = loader:spriteWithUniqueName(“char_jump2″)
local frontarm = loader:spriteWithUniqueName(“front_arm”)
loader:pauseAnimationOnSprite(frontarm)
这样,我们获得了每个玩家部件的变量。在LevelHelper中,调用这些方法能够让我们获得用来查阅这些对象的变量。对象由levelHelper自动创建并添加到关卡外,但是我们需要变量来查阅。
加载器pauseAnimationOnSprite行确保我们在开启游戏后不运行动画。尽管我们将在射击时通过调用来运行动画,但是动画的默认行为是在游戏开始时就自动运行。
玩家将出现在视图中,但他的手臂将在视图外。要修正这个问题,我们要创建enterFrame函数。
enterFrame事件函数会重新定位手臂的位置,并随玩家在每帧中弯曲。这会使得玩家看到他目前的移动方向。
将下列代码添加到newPlayer()函数末端,位于“return p”行之前:
function p:enterFrame(event)
backarm.x = player.x
backarm.y = player.y
frontarm.x = player.x
frontarm.y = player.yif self.x < 0 then
self.x = 320
end
if self.x > 320 then
self.x = 0
endpx, py = player:getLinearVelocity()
if px < 0 then
frontarm.xScale = -1
backarm.xScale = -1
self.xScale = -1
elseif px > 0 then
frontarm.xScale = 1
backarm.xScale = 1
self.xScale = 1
endend
上述代码中多数部分都很容易理解。
我们使用p: prefix来声明函数。functionName声明让我们可以访问“本体”变量,这涉及到我们声明函数的对象。当我们在专有对象上创建enterFrame监听器时,它必须被命名为“enterFrame”。
最后的部分是记录玩家在px和py变量中的线性速度。随后我们将使用这个信息来设定三者的xScale资产。
接下来,我们需要向Runtime对象添加enterFrame事件监听器:
Runtime:addEventListener(“enterFrame”, p)
Runtime是个由Corona创建的系统对象。我们通过将他们与这个对象连接起来来创建全局监听器。
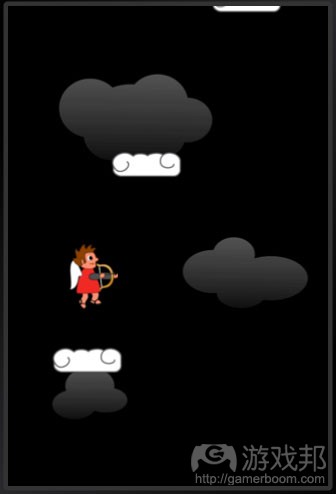
现在,如果你保存并运行,你的玩家就会拥有手臂。
在本教程的第2部分中,我们将阐述箭支的射击、屏幕移动和怪物的创建。
游戏邦注:本文发稿于2011年9月22日,所涉时间、事件和数据均以此为准。(本文为游戏邦/gamerboom.com编译,拒绝任何不保留版权的转载,如需转载请联系:游戏邦)
How To Make a Game Like Doodle Jump with Corona Tutorial Part 1
Jacob Gundersen
I’m willing to bet that when you woke this morning your first thought was “I wish there was a way to create a doodle jump game in 300 lines of code.”
“Oh, and I want it to run on both iOS and Android, and I want the code to be really simple. And I want a cherry on top!”
Well, you’re rather greedy, but you’re in luck. Wish granted!
In this 2-part tutorial series, we’ll make this game with a popular and easy-to-use game engine for iOS and Android called Corona. By going through this tutorial series you’ll learn the following:
How to make a game with Corona
The pros/cons of Corona vs Cocos2D
How to make levels with LevelHelper
And of course, how to make a game like Doodle Jump!
This tutorial is for complete beginners to Corona, although it’s OK if you have some prior experience.
It’s also best if you have prior experience with LevelHelper and SpriteHelper – if you are new to these tools, check out this tutorial first. But don’t worry if you don’t have these tools or don’t have much experience – you can use the premade sprite sheets and levels if you’d like.
OK, so grab a Corona (or two) and let’s begin!
What is Corona?
Although most of you on this site are probably familiar with the Cocos2D game engine (or the Corona beer), you might not be familiar with the Corona game engine yet.
So let’s start with what Corona is!
Corona is cross platform game engine that supports Android and iOS. It’s developed by a company named Ansca, and you can use a free trial to try out Corona and develop your game. When you are ready to publish you are required to buy a license, prices range from $199 to $349.
You program in Corona with a programming called Lua, which is a lightweight and easy to use scripting language. There is no IDE for Corona (such as Xcode), instead you often program with a normal text editor. Corona comes with a simulator you can use to test your game as you’re coding it.
Corona has built-in APIs for the normal game programming aspects (sprites, sounds, etc.) as well as various APIs from the Apple including Game Center Leaderboards (new), In App Purchase, and TableViews (new).
There are also a number of third party developer APIs including Open Feint (leaderboards), inMobi (ads) and Flurry (analytics). It does not have access to all of Apple’s APIs. Some of the notable APIs not included in Corona include iAds, Game Center Multiplayer, and access to bluetooth connectivity.
Corona vs Cocos2D
Next let’s cover the differences between Corona and Cocos2D so you guys can understand the differences between each engine.
First of all, Corona and Cocos2D have many similarities:
Positioning a sprite in Corona is easy, just set the .x/.y properties of the sprite.
There are scale, rotation, and alpha properties associated display objects.
There’s a ‘transition.to’ method that animates position, scale, rotation, etc.
Corona uses the Box2D physics engine, so the methods and properties should be familiar to you if you’ve used Box2D with Cocos2D.
Like Cocos2D, Corona has sprites, text labels, and primitive drawing methods, but they’re called by different names. Any object that appears on screen is called collectively a ‘display object’, which is similar to a CCNode in Cocos2D. Corona has a display group, which is functionally very similar to a CCLayer in Cocos2D.
There are some significant differences between the two engines:
A Cocos2D program is written using Objective-C, while a Corona program is written using Lua. The Corona API is heavily influenced by Action Script. Flash developers find Corona a very welcome environment. Corona code can be written according to an OOP model, but the functional programming model is more common.
Cocos2D is open source allowing the integration of 3rd party libraries written in Objective-C. Corona is a proprietary, closed system. While some 3rd party libraries have been written in Lua for use with Corona, there are currently far fewer 3rd party tools available for Corona.
And of course, Cocos2D is free while Corona is paid.
So I know what you’re all wondering – which one should you choose when? The best way to answer this is to list the pros and cons of using Corona instead of Cocos2D:
Pros:
Rapid development time. Making a game with Corona can often be faster and easier than making a game with Cocos2D. Since it’s based on Lua, adding a variable to an object doesn’t require any more than the assignment (ex: Sprite.newvalue = 0). The Box2d engine is integrated so that a sprite object and a physics body are one object. You don’t have to write interface files, declare instance variables, or even declare variable data types (there are a few exceptions to this).
Cross platform support. If you make a game with Corona, it works on both iOS and Android out of the box!
Cons:
Lack of API support. Corona doesn’t have access to all of Apple’s APIs, or as many 3rd party extensions as Cocos2D. Some of the areas where Corona is still lacking is easy data persistence (there are methods to write/read files, and Sqlite integration, but nothing as slick as reading a plist into a dictionary). Network multiplayer code has to be written from scratch. The coolest new stuff from Apple takes time before it’s integrated, if at all.
Slower performance. Since Corona is built on top of Lua, your code will not run as fast as it would if it was straight Objective-C.
It’s not free. Yep, you gotta cough up money to use Corona when you want to ship your game, whereas Cocos2D is gloriously free!
Whether or not you’re convinced Corona is for you, going through this tutorial is still a good idea so you can judge for yourself which you like better!
Getting Started with Corona
If you don’t have Corona installed already, start by registering with Anscamobile and downloading a trial of Corona. The trial is fully functional, the only thing you are unable to do is publish to the app store. Visit the Corona subscription page to register/download (click the “download trial” at the bottom).
I’ll be doing all my instructions based on using Corona on a mac. But keep in mind you can also use Corona on a PC. However, you cannot build iOS builds from a PC, only Android builds. If you’d like to know more about how to develop for Android on a PC, you can refer to anscamobile here.
When your finished installing, you should have a Corona folder in your Applications folder. Inside that folder are a number of different executables. I recommend always running Corona by executing the Corona Terminal executable. This will open a terminal window along with the Corona Simulator. The terminal window will give you a log of any error messages or print() statements.
As I mentioned earlier, Corona doesn’t have a dedicated IDE. I write most of my code in a simple text editor. While there is a command line debugger, I haven’t found that very helpful.
You can use Xcode as a text editor and there are code highlighting plugins for Corona, but they don’t work in all versions of Xcode.
Open up a new text file in your preferred text editor now and add the following code:
As you can probably guess, this displays a line of text saying “Hello World” to the screen, at X=20 and Y=30, in a 50-point Helvetica font.
Save your one line text file. The file name should be ‘main.lua’, this is the entry point for any Corona program.
Open up the Corona Simulator, either by executing the Corona Simulator.app itself, or as I recommended by executing the Corona Terminal. Go to File->Open, navigate to your file. Both of these files are in the Corona folder in your applications folder.
Congratulations, you are now a Corona developer. Can it get any easier than this?!
FYI, in order to build for the device in Corona, you will need an Apple Developer account and a development provisioning profile (not a distribution profile, you can only build with a distribution profile if you’re a paid subscriber). If you load a program in Corona, and go to File->Build->iOS you will get a dialogue box to allow you to build a .app file that you can install on your device through Xcode organizer or iTunes.
Creating the Sprite Sheet
Before we proceed with our Doodle Jump game, we have to build a sprite sheet. Since we’re going to use LevelHelper to create the levels for the game, we’ll use SpriteHelper to create the sprite sheet.
If you don’t have SpriteHelper, don’t worry – you can grab the finished Sprite Sheet from the resources for this project and continue on to the next section.
But if you do have SpriteHelper and want to follow along, keep reading.
You’ll also need the resources for this project, so go ahead and download and unzip it. Inside the sprites folder you’ll see the art we’re going to use for this game – a free art pack made by Ray’s wife Vicki.
We are going to need to set up a number of physics attributes. I like to set up these attributes in SpriteHelper, but all the properties are available and can be set in LevelHelper later on. In this tutorial, I’ll show you how to set the attributes in LevelHelper.
I’m not going to go into great detail explaining how to use the basic features of SpriteHelper/LevelHelper as those topics were covered in the SpriteHelper/LevelHelper tutorial.
Start up SpriteHelper, and drag all of the sprites into the window. Uncheck crop and hit pack sprites.
Choose File->Save, choose the directory your main.lua is in, and enter ‘cloudSprites’ for the name – the necessary extensions will be automatically added. It will create three files for you – cloudSprites-hd.png, cloudSprites.png, and cloudSprites.pshs (the SpriteHelper project).
Creating the Level with LevelHelper
Next we’ll use LevelHelper to create the level for the game. Again, don’t worry if you don’t have LevelHelper – you can grab the level I made from the resources for this project and continue on to the next section.
If you do have LevelHelper, open it up and click the plus in the Project group. Type in cloudJumper, choose ‘iPhone Portrait (320×480)’ and click ‘Create New Project’.
At the bottom of the LevelHelper window find the Game World Size boxes and change the values to 0, 0, 320, 9600. Also, put these values in the Physic Boundaries boxes as well. Set the gravity to 0, -10.
Click the plus next to the scene chooser drop down on the far right side. Choose the cloudSprites.pshs file you just created in SpriteHelper. You should now have all your individual
sprites loaded in the sprite pane.
You can drag the level around by holding the control key down while clicking a dragging. Go to the very bottom of the level.
The first thing we’re going to do is load all the background clouds. Drag the three clouds, bg_cloud1, bg_cloud2, and bg_cloud3 into the bottom section. Select all three sprites. You can do this in the GUI or in the ‘Sprites in Level’ pane.
Set the physics type of the clouds to ‘No Physic.’ Set the Z order property to -2. We want these clouds to always be in the far background.
Using the clone and align tool, make 19 or so clones of all three cloud sprites. You can set the Y offset to -480 to place one set of clouds for each screen. Go through the screens and lay out the clouds, add some variety, make it look good.
When you’re finished, select all the cloud sprites and click the lock button. When a sprite is locked, it cannot be selected from the layout view. This makes it easier to position other sprites on top of it. If you need to edit a locked sprite, select it in the ‘Sprites in Level’ list and click the same button to unlock it.
Now drag the cloud1, cloud2, and cloud3 sprites into the bottom of the level. Give these sprites the following physic attributes and tags:
Cloud1
Cloud2
Cloud3
A few things to note here, all the clouds have a z order of -1. That puts them in front of our background clouds, but behind everything else. The white and grey clouds are both sensors, this is how we’ll jump up through them, and bounce off only on our way back down. The blue cloud isn’t a sensor, so we’ll actually have to jump around it, making it more difficult.
All the clouds have a category bit of 1. We want arrows and monsters to move through them without colliding, so we’ll set our mask attributes on those objects accordingly. The other attributes to make sure to set are physics type, shape border, and the TAG property. Don’t worry if your tag numbers are different than what is shown here, only the name matters.
If you have questions about what these properties are for, check the SpriteHelper/LevelHelper tutorial.
Once all the properties are set, use the clone tool to create as many of each kind of platform as you need. Lay out the different platforms to create a level that’s fun and interesting.
Here are a few level building tips:
The level should start easy so the player can get used to the basics.
The level should never repeat itself.
The player jumps about 200 pixels max, so make sure that he has something to jump from at least that often.
The grey clouds are red herrings, they will dissappear when landed on.
The blue clouds are difficult because the player cannot jump through them, and they are narrow.
Difficulty should build to a critical point towards the end of the level.
Here are the first several screens of my level:
If you’d like to use my level, it’s in the resources for this project, although you might find it more fun and good practice to make your own!
Also keep in mind the premade level is fully completed so it will already have all the sprites (monsters, player, TAGs) already set, so some of the LevelHelper sections later on in this tutorial will be already completed. If you’d like to follow along, but don’t want to spend a ton of time, just make a small level (maybe 960 pixels tall).
Adding the Player
Now that we have all the clouds included, we can introduce our player. Drag the char_jump2 sprite onto the bottom screen above one of the clouds. Give him the following properties:
The player is going to collide with cloud platforms, monsters, and with the level ending shape, so he needs a mask bit value of 5 (1 and 4).
Finally, we need to save our level and generate the code. Choose File->Save and name the file ‘level1’, the necessary extension will be added automatically. Also, choose File->Generate Code->Corona and that will create the LevelHelperLoader.lua file. This file needs to be regenerated every time we add a new TAG.
Place all these files in the same directory as your main.lua.
Loading the Level
Let’s get started with the code and we’ll return to the level design in a minute. Delete your current line of code in main.lua and replace it with the following:
The main.lua file will execute from top to bottom. These first three lines will be executed first when we start the Corona Simulator. Let’s go over these line by line:
Imports the physics engine code and assigns the engine to the object called physics.
Starts the physics engine with the default gravity values. Corona uses the Box2D physics engine, so if you’ve used Box2D before most of the calls to physics will be familiar to you.
Hides the status bar.
Now that are file is started and we have the physics running we are going to load the level we created with LevelHelper.
Let’s try this out. Add a new function to load the level as follows:
The first line loads the LevelHelperLoader class (generated earlier from LevelHelper or in your resources folder), which is similar to #import in Objective-C.
The next line creates a function, which in Lua is done with the function keyword. Variables and functions in Lua are global in scope by default, if we want to limit the scope to the current function we would include the local keyword.
Corona calls its visual objects (sprites, drawn objects, layers) ‘display objects.’ Each of our sprites, background clouds, player, our platform clouds, etc, are display objects.
Our first line in the function creates a new display group, which in Corona functions much like a CCLayer in Cocos2D. We’re going to add all our level contents to this display group.
The second line creates the loader object and populates it with the contents of our level. We haven’t yet actually created the these objects yet, but we are ready to in the next line.
In Corona we only need a single call to LevelHelper that will create all our display objects and create the associated physics bodies. Corona physics bodies are automatically combined with the their sprites, this makes creating physics based games really easy.
The instantiateObjectsInGroup() call takes two parameters, our physics engine object and the display group to load all the display objects into. Once we’ve loaded the level into the display group, it will be visible on our screen.
Corona automatically adds any display object created to the screen. There is a parent display group that contains any instantiated display object.
Our display objects are now on screen and part of the display group called localGroup. However, localGroup is currently at y position 0, Corona’s coordinate system starts at the top left of the screen and increments towards the bottom, which means we’ll see the very top section of our level, or very end of the level.
We need to move the display group upwards, which we do in the next two lines. First we get the world size, which we set up in LevelHelper, then we set the localgroup.y to the negative
world size, sliding it all the way up, minus one screen height.
Finally we create and initialize the player, and assign it to the player variable with the newPlayer() function call. We haven’t written this yet, so add this right above loadLevel:
This just gets the sprite with the unique name “char_jump2” that we added to the level we created with LevelHelper, similar to how we did this in the How To Use SpriteHelper and
LevelHelper Tutorial with Cocos2D.
One thing to note is that this sprite already has a physics body associated with it. So later on, we’ll have access to those calls that get and set physics properties.
Now that we have these two functions in place, let’s use them! Add the following line of code right after the function definition:
And that’s it! Save main.lua, and place it a directory along with LevelHelperLoader.lua, cloudSprites.png, cloudSprites-hd.png, cloudSprites.pshs, and level1.plhs. Then load main.lua in the Corona Simulator.
You should then see some clouds and your character fall down off the screen:
Congratulations, you have written your first Corona program complete with character and platforms!
Lets move on and make the character jump off the clouds!
Adding Collisions and Jumping
To add jumping, modify the newPlayer function to add a collision handler like so:
The second line creates our collision callback function. The second parameter contains information about the collision event (full details here).
Self is the player object, and other is an event type. Event.other is the object that the self collided with, and so we’ll want to use that later, we store it in the object variable.
Next, we also want the jump to fire only once. Collisions can be noisy and fire multiple times, we only want a single jump action per cloud collision, so we are only going to be testing for this on the ‘began’ phase.
Then we test to see if we should jump. We get the linear velocity of the self, or player, and we test that it’s greater than 0, because we only want to jump on our way back down, not as we float up through the cloud.
Finally, we are going to look at what we collided with. We want to jump only off white clouds, so we need to check the tag property of the object we collided with.
If all these conditions are met, we will set linear velocity of the self to -350 or up with a speed of 350. We use setLinearVelocity (instead of applyLinearImpulse) here because no matter how much momentum we have gained falling down, we want the jump to be the same height back up.
Finally, we are going to set the function we just created to be the collision callback for our new p, or player, object. The next two lines accomplish this. With collision callbacks, we have to set the .collision property and add an event listener to the object.
Go ahead and open the project once again in the Corona Simulator. Your player should now be boucing off the white clouds!
I generally keep the Corona Simulator open between builds, and use the key binding Command-R to reload the project after saving the file. Corona will also detect that the main.lua has been updated and prompt you for a relaunch.
Event Listeners in Corona
This might be a good time to give a general explanation of event listeners in Corona.
You’ve actually already seen an example above with the collision event listener, but let’s talk about exactly how they work.
Event listeners are Corona’s callback methods. There are event listeners that handle touch and accelerometer input, changes in orientation, input from the GPS system, collisions, exiting or suspending the application, etc.
There are two kinds of event listeners:
Events that are broadcast to all objects. These are known as runtime events, and include things like orientation changes or input from the GPS. Another example is the enterFrame listener, which is an event that is called every time a frame is drawn.
Events that are sent to a single object. These include touch or collision events (like the one you used earlier).
In our case, we created a collision function, the pCollision function. We registered the event listener with the player, so when the player collides with another object, this object will be called. The function has two arguments, the self object, which is the player in this case, and the event object. The event object is created and populated with information by the collision event type.
Different event listeners have different event objects that provide different information. For example, there is also a ‘postCollision’ event type that provides collision forces. The regular collision event object doesn’t have this information.
For more information about Corona’s event types, go here.
Additional Collisions
Now that are player is jumping off white clouds, lets add the grey and blue clouds. Blue clouds actually require no additional code. They share the CLOUD tag with the white clouds and are static bodies (meaning that you must jump around them rather than through them like the white clouds).
Go into the pCollision function once again and add extra code so it looks like this:
If the tag is BCLOUD, then we want the grey cloud to disappear, so we call loader: removeSpriteWithUniqueName and we pass in the name of the object that we’ve collided with. Remember that here in our code, “object” is a variable where we stored event.other.
Creating a Shooting Animation
Love is in the air – and soon to be arrows as well!
But first things first – let’s create an animation for the shooting in LevelHelper.
Switch back to LevelHelper, select the animation tab on the right, and click the ‘New’ button to create a new animation. It will bring up the animation builder dialogue. Add the sprites called front_arm, arm_front_shoot1, arm_front_shoot2, and an additional front_arm to the list by selecting them and clicking the plus button. Untick the loop option. The default values are fine on the remaining attributes.
Click ‘Create Animation’ to save. Rename the animation to ‘shoot’ by double clicking on it.
Drag the animation object onto the grey area, outside of the level. Anywhere is fine. We need this available to our code, but we are going to position the arms around the player in code, so we don’t need then inside the level here. If we don’t drag them into our level, we can’t get a pointer to them using the levelHelper loader object.
Once you’ve dragged it into the level, select the animation object and set the Physics type to ‘No Physic’ to avoid strange physics behavior when we attach it to the hero.
Adding the Arms
Click on the sprite button to go back to the list of sprites. Drag in the ‘back_arm’ sprite outside of the level as well. Set the new animation (which is called ‘front_arm’ because that’s the first sprite in the set) and ‘back_arm’ to ‘No Physic.’
Change the code in the newPlayer function so that it looks like this:
Here we just get variables for each of the player pieces. In LevelHelper these method calls will get us a variable we can use to refer to these objects. The objects are created
automatically and added outside the level by levelHelper, but we need a variable to refer to them.
The loader: pauseAnimationOnSprite (frontarm) line keeps the animation from running when we start the game. We will call for that animation to run each time we shoot, but the default behavior is for the animation to run automatically on startup.
The player will be inside the view but his arms will be outside. To fix that we’ll create an enterFrame function.
An enterFrame event type fires every time the screen is drawn. This function will reposition the arms and bow with our player each frame. It will also cause the player to face the direction he’s moving and wrap around the screen if he falls off the edge.
Add the following code inside the newPlayer() function at the end before the line ‘return p’:
Most of this code should be easy to follow.
We declare the function with the p: prefix. A function declared with an object: functionName declaration gives us access to a ‘self’ variable which refers to the object we declared the function on. When we create an enterFrame listener on a specific object, it must be called ‘enterFrame’ and is case sensitive.
The last section is recording the linear velocity of the player in the px and py variables. We then use this information to set the xScale property of all three. Like most other engines, a negative value in the scale property flips the sprite.
Next we need to add the enterFrame event listener to the Runtime object:
Runtime is a system object created by Corona. We create global listeners by registering them with this object.
If you save and run now, your player will have arms. Armed and Dangerous . . . Yay!
Where To Go From Here?
Here is the example project with all of the code from the tutorial so far.
Check out part two of the tutorial, where we’ll be shooting arrows, moving the screen, and creating monsters in no time! (Source: Ray Wenderlich)
上一篇:分析在线课程可借鉴的游戏设计理论
下一篇:新生代游戏不应忽视神秘感的重要性






 闽公网安备35020302001549号