分享使用Unity制作游戏关卡的教程(3)
作者:Matthias Zarzecki
本文是“使用Unity制作《The Fork Of Truth》的关卡”系列的第三部分。前两部分分别是:
1、了解Unity Terrain的工作(第一部分)
2、了解场景对象的设置和管理 (第二部分)
在这最后一部分,我将介绍一些组合关卡的小技巧。
视角
游戏的视角是必须认真考虑的,一点儿变化都会影响我们看游戏的方式。比如,镜头“越肩”,游戏看起来就像第三人称格斗游戏;镜头高悬静止,游戏似乎是RTS;镜头跟随着角色移动,游戏又像动作RPG了。
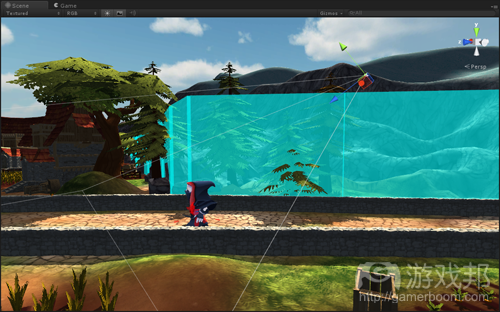
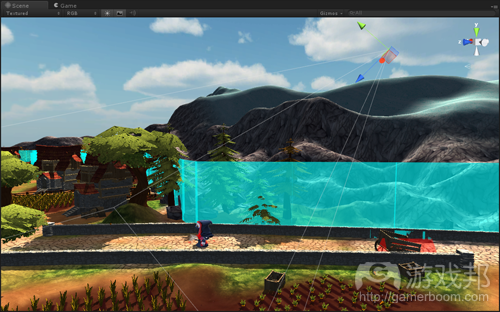
(《The Fork Of Truth》的镜头的近距离位置和远距离位置——注意角度的区别。)
我们调整了很长时间的视角,最终决定采用动作RPG的摄像位置的变体,也就是以固定的角度、从上到下观察角色。摄像相的高度会根据缩放程序轻微地改变:当镜头接近地面时,角度倾向于水平;当镜头位于高空时,角度倾向于垂直。
阻塞点
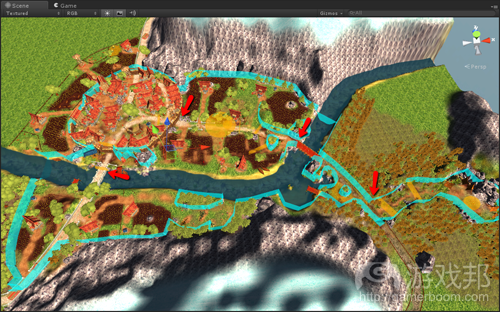
从小通道到开阔区域,关卡坡度会变化。通过添加“阻塞点”,玩家被迫进入关卡的狭窄传送口,这样就避免他们在开阔空间中闲逛或迷路。路径基本上是线性的,但有足够的探索空间。自然缩窄的通道会把玩家带回路径。
这个关卡给予玩家一定的探索和发现物品的空间,但也把他们引向达到最终目标的路径。
细节
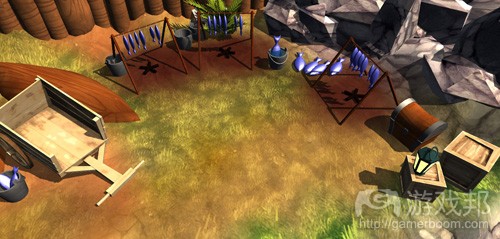
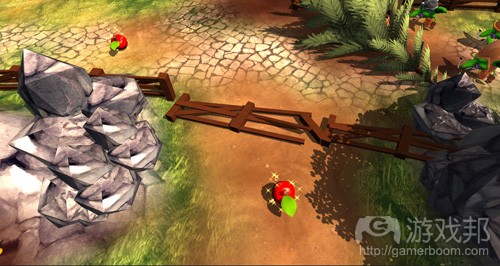
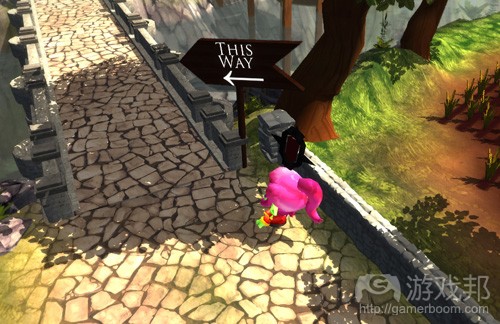
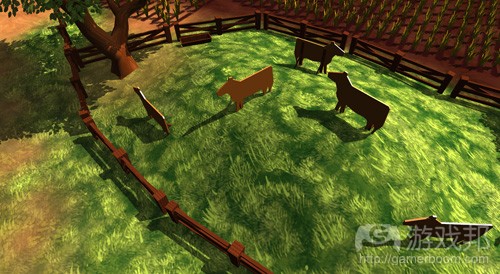
只要可以,我们就会尽量给场景添加有趣的细节,使场景更具故事性、更生动。
这些小细节可以传达丰富的场景信息。比如,谁居住在这里?这里发生了什么事?是否危险?接下来会遇到什么?
光照
我们使用简单的、具有即时阴影的平行光源。分享一个光照的小技巧:太阳光的颜色应该有一点儿黄,阴影应该有一点儿蓝。这是模拟晴朗的天空(四处都是蓝色)中挂着一轮“黄”日(平行光)。
雾
距离玩家较远的地方会产生雾。这么做,可以模糊远处的物品、节省渲染工作量,如果雾比较浓密的话,还可能营造出一种恐怖的氛围。
(稀疏的雾可以强化场景的氛围——但不要做过头了。)
改变氛围
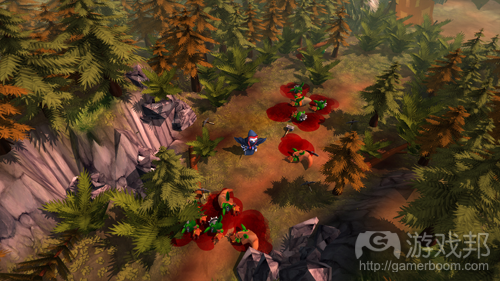
当角色进入森林时,场景氛围会发生微妙的变化。光更暗了,雾更浓了。远处的物品显得更简略,色彩更柔和。下图是新设置后的场景。注意它与其他截图的区别:
声音
场景中有若干种声源。添加微妙的音效可以显著影响关卡。听到鸟鸣和水流让人觉得身临其境,佛仿游戏中的世界是真实存在的。
反应性场景
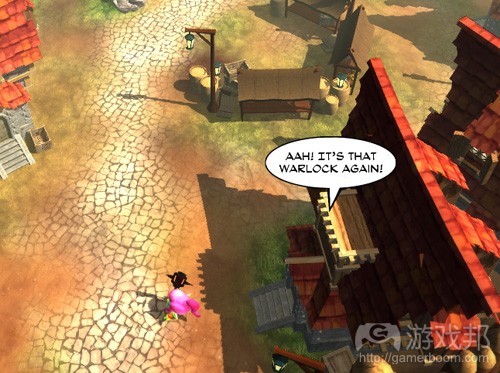
场景不一定是静态的。即使我们添加NPC的预算,除了杀气腾腾的敌人,我们仍然在场景中添加了其他交互活动。比如,当角色进入村庄时,每当他们靠近某些房子,房子的窗户就会被关上,并传出喊声“藏起小孩,藏起老婆!”这使游戏世界显得更有人情味,即使并没有真正的角色存在。
要达到这种效果,还有许多办法,你只要想到场景必须对角色的行为或出现做出反应就行了。比如,当角色出现时,鸭子飞奔、小鹿奔跑、孩子跑来。可能性是无限的。
宝盒
谁不爱宝物?无论是宝盒还是简单的隐藏物品,发现实用的/漂亮的/珍贵的东西总是让玩家觉得惊喜,这也是宝盒之类的东西的存在意义。如下图,打开宝盒,发现一个青苹果!
给地面添加纹理
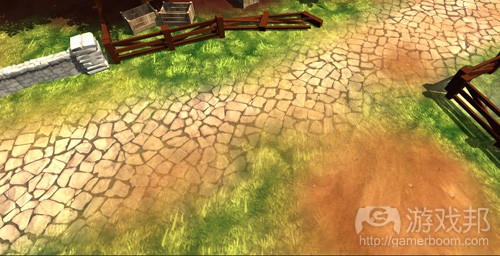
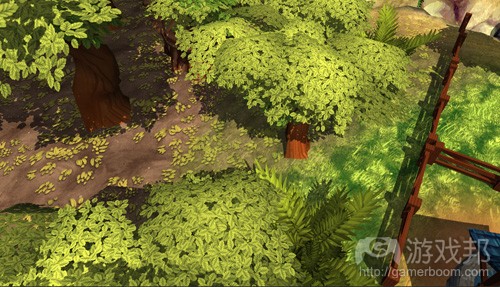
在本系列的第一部分,我已经介绍过如何制作场景地形了。我们还可以让若干种材质之间发生叠加渐变,产生一种更加自然的过渡效果。
保存资源
Unity有内置资源商店,你可以从中得到各种材料。
我们的时间非常有限,所以我们决定先专心做好角色。
很遗憾,这意味着我们不得不放弃一些场景对象。为了缓和这种处境,我们对少数高出现频率的物品使用外部资源。
房子是一个好选择,因为制作它们通常是很费时间的。我们发现一些不错的中世纪建筑素材。我们就使用它们组合建筑,然后重制纹理,这样做出来的房子就能与游戏的美术风格和美学相融合了。
注意,有些资源需要特殊的、个性化的处理方法,有些比较普遍,或以直接购买。总是保持游戏风格的一致性——这一条也适用于声音、画面、动画和一切你购买或制作的资源。
背景故事
如果有可能,在制作前请为场景写一点背景故事。谁居住在那里?是什么样的人?他们以什么为生?他们的敌人是谁?敌人来自哪里?我们虽然为村庄和它的周边环境写了故事,但你不可能看到。这些故事使场景中的一切物品都显得有意义,从而使场景更加令人信服。
总结
1、调整镜头角度,使之与场景相匹配
2、使用“开放”区域和阻塞点来平衡探索和进程
3、光照和氛围不一定是静止的——改变它们可以改变氛围
4、添加环境声音,以增加真实感
5、场景可以与玩家产生交互作用
6、隐藏物品可以让玩家惊喜
7、使用资源商店,以快速增加关卡的内容(但要谨慎地使用)
8、写背景故事,便于丰富关卡细节
构建关卡的方法有很多。我希望我们的方法可以给大家一点启发!(本文为游戏邦/gamerboom.com编译,拒绝任何不保留版权的转载,如需转载请联系:游戏邦)
Building Levels in Unity – Part 3 of 3
by Matthias Zarzecki
Hi!
It’s me again, Matthias of Paladin Studios. This is part 3 in a series about the level design of The Fork Of Truth. The first two parts are here:
Part 1 – A look at how the terrain in Unity works
Part 2 – The logistics of managing a vast library of environmental objects
In this final post of the series, I’ll go into all the smaller and ancillary tricks that make the entire level come together.
Point of View
The view of the game has to be carefully considered, and a slight variation influences the way we see the game. Make the camera “over the shoulder”, and it feels like a 3rd-person brawler. Keep it high in the air and static, and it becomes a real-time strategy game. If you have it hovering above the player, moving with her, suddenly it feels like an Action RPG.
(The near and far positions of the Fork of Truth camera – note the angle difference)
We tweaked the camera settings for a long time. Ultimately we decided on variation of the Action RPG camera, angled to look down on the player in a fixed orientation. The pitch of the camera
changes slightly, depending on the zoom level: When the camera is closer to the ground, it will tilt towards the horizon. If it’s up in the air, it will lean towards looking down vertically.
Choke points
The level shape changes from small corridors to open areas. By adding “choke points”, players are forced into the funnel of the level, which prevents them from wandering and getting lost in open space. The path is ultimately linear, but there is enough room to go off and explore for a while. Natural bottlenecks lead players back onto the path again.
(The level for the Fork of Truth demo, with red arrows pointing at the choke points)
The level gives the player the possibility to explore and find goodies, but also a clear path towards the end goal.
Details
Wherever feasible we try to add fun details into the environment which tell their own story and give “life” to the world.
Fishing-equipment near docks:
Trampled fences, the aftermath of a goblin-raid:
Signposts to show you’re on the right track:
Fake cows, because we didn’t have time to model actual ones ![]()
It’s these little details that tell the story of the environment: Who lives here? What has happened? Is it dangerous? What can we expect next?
Lighting
We use a simple directional light with realtime shadows. A little tip for lighting: The sunlight color should typically be a little bit yellow, and the shadows should be a little bit blue-ish. This simulates a clear blue sky (blue coming from all directions) with a “yellow” sun (the directional light).
Fog
At a certain distance from the player fog is generated. This obscures far away objects, saves rendering-power, and adds to the atmosphere. The level can be also made more “spooky” by increasing its density.
A subtle fog (as seen above) can enhance the atmosphere of the scene – but don’t overdo it.
Changing the Atmosphere
When the heroes enter the forest, the atmospheric theme switches subtly. The lighting gets darker, and the fog creeps closer. Objects placed beyond that point are more dilapidated and have more muted colors. Here you can see the new settings. Note the differences to the other screenshots:
Sounds
Several sound sources are placed throughout the scene. Adding subtle sound effects can have a huge impact on the level. Hearing birds chirp and water rush help you to fully immerse yourself into the game, as it it were a real place.
Reactive Environment
The environment does not have to be static. Even though we did not have the budget to add NPCs, we still wanted to add some interaction with the environment other than just bashing enemies. When the gang enters the village, each time they walk near a house the villagers close the shutters, saying things like “Hide yo kids! Hide yo wife!”. This makes the world feel populated, even though there aren’t any actual characters around.
There are many ways to achieve these kinds of effects, just think of things that the environment could “do” to respond to your actions or presence. Ducks could fly away, a deer could chase off in the distance, a child may come up to play with you. The possibilities are endless.
Treasure Chests
Who doesn’t love goodies? Whether it’s treasure chests or simple hidden loot drops, it’s a great thing to discover something edible/sharp/pretty/valuable. The beauty of a chest is that it’s always a little surprise what they might yield. They spring open, uncovering the treasure – yummy, apples!
Texturing on the ground
As mentioned in part 1 of this series, you can paint on the terrain in the scene. What is also possible are gradients between several textures, and the creation of mash-ups between those two.
We use this to put dirt on cobblestoned roads:
And leaves on the ground in forests:
Asset Store
Unity comes with its build-in Asset-Store, where you can get all kinds of stuff for your game
Our time was very limited, so we decided on concentrating on the characters first.
Sadly this meant we wouldn’t be able to give the same amount of care to environmental objects. The compromise to solve this situation was to use external assets for a few selected high-intensity items, which are used throughout the entire environment.
Houses were a good choice, as those are usually expensive in terms of time to invest. We found a nice pack of medieval building-elements. From those we assembled the buildings. We then re-did the textures, so they would fit our art style and aesthetics better.
Be careful with what you use – some assets need a unique, custom-built approach, while others are more generic and can be bought. Always try to keep the game consistent – this goes for sound, visuals, animations and any other assets you purchase and/or create.
Backstory
If at all possible, start with a little backstory on the environment. Who lives here? What kind of people are they? How do they make a living? Where do they walk? Are there any enemies? What are they up to? Where do they come from? We actually wrote a backstory for the village and its surrounding environment, even though you can’t see it. This hidden lore is the basis of everything in the region, and adds to the believability of the place.
Conclusion
Fine-tune the camera angle, and adjust the environment to make it fit
Use “open” areas and choke points to balance exploration and progression
Lighting and atmospherics do not have to be static – change them to change the mood
Add ambient sounds to increase believability
Can you let the environment react to the player?
Where are the goodies? Treasure chests? Little easter eggs?
Use the Unity Asset Store to quickly fill the level with content (but use it wisely!)
Write a backstory so it’s easier to fill in the details of the level
There are many, many ways to build a level. I hope this gave you some new insights into creating levels in Unity, and maybe help you with your own!(source:matthewongmedesign)
上一篇:独立开发者与美术工作室的合作建议






 闽公网安备35020302001549号