


分步解析HTML5画布游戏的制作过程
作者:Matt Hackett
自从发布《Onslaught! Arena》后,许多人要求我分享制作简单画布游戏的基础教程。所以,我决定利用这篇博文介绍自己认为最简单的画布游戏制作方法,并逐步进行解析。
以下便是游戏的制作过程!让我们跳过game.js,直接进入游戏制作过程。
screenshot from lostdecadegames.com
1、创建画布
// Create the canvas
var canvas = document.createElement(“canvas”);
var ctx = canvas.getContext(“2d”);
canvas.width = 512;
canvas.height = 480;
document.body.appendChild(canvas);
我们首先要做的是创建画布元素。我使用JavaScript而不是HTML来实现这个目标,以此来展示这个步骤的简易性。获得这个元素后,我们就可以进行设置,设定其尺寸,将其添加到主体文件。
2、添加图片
// Background image
var bgReady = false;
var bgImage = new Image();
bgImage.onload = function () {
bgReady = true;
};
bgImage.src = “images/background.png”;
游戏需要图像元素!因此,让我们来加载些许图片。我想要以尽可能简单的方式来介绍这个教程,所以只添加1个图片。bgReady旨在让画布明白何时开始绘制,因为在加载完成前尝试渲染会产生DOM错误。
对于我们需要的背景、英雄和怪物这3个图像,我们都采取这种做法。
3、游戏对象
// Game objects
var hero = {
speed: 256, // movement in pixels per second
x: 0,
y: 0
};
var monster = {
x: 0,
y: 0
};
var monstersCaught = 0;
现在,我们定义某些随后需要用到的变量。英雄有速度设置,以每秒移动的帧数来表示。怪物不会移动,所以它只含有坐标。最后,monstersCaught存储玩家捕获的怪物数量。
4、玩家输入内容
// Handle keyboard controls
var keysDown = {};
addEventListener(“keydown”, function (e) {
keysDown[e.keyCode] = true;
}, false);
addEventListener(“keyup”, function (e) {
delete keysDown[e.keyCode];
}, false);
现在,处理玩家的输入问题。这或许是首个会让此前从事网页开发的开发者感到棘手的部分。重要的是要记住,我们并不一定要在输入事件发生时马上做出回应。在网页背景中,当用户初始化输入内容时马上播放动画或请求数据或许是个恰当的做法。但是在这种游戏中,我们将游戏逻辑和输入分割开来。出于这个原因,我们才会存储用户输入内容,留待后面使用。
要实现这个目标,我们需要使用keysDown变量,这是可以存储任意事件的keyCode。如果按键代码位于对象中,就表明用户正在按动该按键。
5、新游戏
// Reset the game when the player catches a monster
var reset = function () {
hero.x = canvas.width / 2;
hero.y = canvas.height / 2;// Throw the monster somewhere on the screen randomly
monster.x = 32 + (Math.random() * (canvas.width – 64));
monster.y = 32 + (Math.random() * (canvas.height – 64));
};
调用重置功能来开始新游戏或关卡等其他内容。它会将英雄(游戏邦注:也就是玩家)放置在屏幕中央,怪物在屏幕中随机分布。
6、更新对象
// Update game objects
var update = function (modifier) {
if (38 in keysDown) { // Player holding up
hero.y -= hero.speed * modifier;
}
if (40 in keysDown) { // Player holding down
hero.y += hero.speed * modifier;
}
if (37 in keysDown) { // Player holding left
hero.x -= hero.speed * modifier;
}
if (39 in keysDown) { // Player holding right
hero.x += hero.speed * modifier;
}// Are they touching?
if (
hero.x <= (monster.x + 32)
&& monster.x <= (hero.x + 32)
&& hero.y <= (monster.y + 32)
&& monster.y <= (hero.y + 32)
) {
++monstersCaught;
reset();
}
};
这是更新函数,每次间歇执行时都会调用。首先,它检查上、下、左和右方向键,看看用户是否已经按动。如果用户确实已按动,英雄就会朝相应的方向移动。
更新中的修改器或许会让你感觉很奇怪。将来你会看到它在主函数中的作用,但我想先在这里做下解释。修改器是个以1为基数的基于时间的数字。如果经过了1秒钟时间,数值就会是1,英雄的速度就将乘以1,也就是说他在这1秒内将移动256像素。如果经过的时间是0.5秒,那么数值就是0.5,英雄在该时间内移动的距离就是速度值的一半。这个函数的调用速度很快,所以修改器数值通常都比较小,但是使用这种方法可以确保英雄的速度保持不变。
现在,我们已经可以根据玩家的输入来移动英雄,我们可以查看移动会产生何种结果。如果英雄和怪物之间能够发生碰撞,我们的目标就实现了!这才是游戏。我们得到分数(游戏邦注:monstersCaught中的数值加1),游戏重置。
7、渲染对象
// Draw everything
var render = function () {
if (bgReady) {
ctx.drawImage(bgImage, 0, 0);
}if (heroReady) {
ctx.drawImage(heroImage, hero.x, hero.y);
}if (monsterReady) {
ctx.drawImage(monsterImage, monster.x, monster.y);
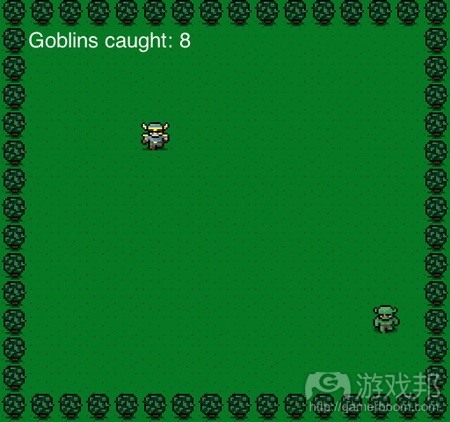
}// Score
ctx.fillStyle = “rgb(250, 250, 250)”;
ctx.font = “24px Helvetica”;
ctx.textAlign = “left”;
ctx.textBaseline = “top”;
ctx.fillText(“Goblins caught: ” + monstersCaught, 32, 32);
};
如果你能够看到发生的动作,游戏会显得更加有趣,所以让我们来绘制场景中的其他内容。首先,我们将背景图片绘制到画布上。在英雄和怪物图片上重复这个步骤。请注意,顺序很重要,因为任何放置在表面的图片都会覆盖其下方的像素。
接下来,我们修改部分背景上的资产,比如字体,我们调用fillText来呈现玩家的分数。因为我们没有任何复杂的动画或移动操作,所以我们只需使用绘图即可。
8、主游戏循环
// The main game loop
var main = function () {
var now = Date.now();
var delta = now – then;
update(delta / 1000);
render();
then = now;
};
主游戏循环控制游戏的流程。首先,我们要获得当前时间戳,这样我们才能够计算距离上次间歇过去了多少毫秒。我们以毫秒为单位来更新修改器。然后,我们调用渲染并记录时间戳。
9、开始游戏
// Let’s play this game!
reset();
var then = Date.now();
setInterval(main, 1); // Execute as fast as possible
这是最后一个代码。首先,我们调用重置来开启新游戏和关卡。记住,这样做会使得英雄出现在屏幕中心,怪物在场景中随机分布。然后,我们开启时间戳。
现在,你已经理解了在JavaScript中使用画布元素进行游戏开发的基本过程。你可以尝试开发自己的游戏!
游戏邦注:本文发稿于2011年8月29日,所涉时间、事件和数据均以此为准。(本文为游戏邦/gamerboom.com编译,拒绝任何不保留版权的转载,如需转载请联系:游戏邦)
How to make a simple HTML5 Canvas game
Matt Hackett
Since releasing Onslaught! Arena, I’ve had many requests for a very basic tutorial on how to make a simple game in canvas. After pondering for some time how to best approach this complex subject, I decided just to put together the very simplest game I can imagine and walk through it practically line-by-line.
So here it is! Let’s jump right in by walking through game.js. You can also play the game right here.
Create the canvas
The first thing we need to do is create a canvas element. I did this in JavaScript instead of HTML to demonstrate how easily it is accomplished. Once we have the element we get a reference to its context, set its dimensions and append it to the document’s body.
Include images
A game needs graphics! So let’s load up some images. I wanted to do this as simply as possible so it’s just an Image instead of being wrapped up in a nice Class or something. bgReady is used to let the canvas know when it’s safe to draw it, as trying to render it before it’s loaded will throw a DOM error.
We do this for each of the three graphics we need: background, hero and monster.
Game objects
Now we define some variables we’ll need to use later. hero gets setup with speed which is how fast it’ll move in pixels per second. monster won’t move so it just has coordinates. Lastly, monstersCaught stores the number of monsters the player has caught.
Player input
Now for input handling. This is probably the first part that will trip up developers who come from a web development background. The important thing to remember is that we don’t necessarily want to react to an input event right when it happens. In the web stack, it may be appropriate to begin animating or requesting data right when the user initiates input. But in this flow, we want our game’s logic to live solely in once place to retain tight control over when and if things happen. For that reason we just want to store the user input for later.
To accomplish this we simply have a variable keysDown which stores any event’s keyCode. If a key code is in the object, the user is currently depressing that key. Simple!
New game
The reset function is called to begin a new game, or level, or whatever you’d like to call it. It places the hero (the player) in the center of the screen and the monster somewhere randomly.
Update objects
This is the update function and is called every single interval execution. The first thing it does is checks the up, down, left and right arrow keys to see if the user has pressed them. If so, the hero is moved in the corresponding direction.
What may seem odd is the modifier argument passed into update. You’ll see how this is referenced in the main function, but let me first explain it here. modifier is a time-based number based on 1. If exactly one second has passed, the value will be 1 and the hero’s speed will be multiplied by 1, meaning he will have moved 256 pixels in that second. If one half of a second has passed, the value will be 0.5 and the hero will have moved half of his speed in that amount of time. And so forth. This function gets called so rapidly that the modifier value will typically be very low, but using this pattern will ensure that the hero will move the same speed no matter how fast (or slowly) the script is running.
Now that we’ve moved the hero according to the player’s input, we can check to see what happened with that movement. If there was a collision with the hero and monster, that’s it! That’s pretty much the game. We tally the score (+1 to monstersCaught) and reset the game.
Render objects
Games are more fun when you get to see the action going down, so let’s draw everything to the screen. First we take the background image and draw it to the canvas. Repeat for the hero and monster. Note that the order is important, as any image drawn to the surface will be drawn over the pixels under it.
Next we change some properties on the context related to how to draw the font, and we make a call to fillText to display the player’s score. As we don’t have any complicated animations or movement, we’re done drawing.
The main game loop
The main game loop is what controls the flow of the game. First we want to get the current timestamp so we can calculate the delta (how many milliseconds have passed since the last interval). We get the modifier to send to update by dividing by 1000 (the number of milliseconds in one second). Then we call render and record the timestamp.
See also the Onslaught! Arena Case Study for more on game loops.
Start the game!
Almost there, this is the last code snippet! First we call reset to start a new game/level. (Remember that this centers the hero and places the monster randomly for the player to find.) Then we seed our timestemp (with the variable then) and start the interval.
Congraulations! You now (hopefully!) understand the basic fundamentals of game development using the canvas element in JavaScript. Try it out on your own! Play the game or fork the code on GitHub and get started hacking.
Got feedback?
What did you think of this tutorial? Was it helpful? Too slow, too fast, too technical, not technical enough? Please let me know and I’ll try to improve the next tutorial! Be sure to follow us on Twitter to know right when the next tutorial is available. (Source: Lost Decade Games)

")
")
")
")


 闽公网安备35020302001549号