使用Corona制作《涂鸦跳跃》类游戏的教程(2)
作者:Jacob Gundersen
在之前的教程中,我们学习了如何使用LevelHelper,并且创造了一个跳跃的游戏角色,不同样式的云彩,并为角色添加了手臂。而在这最后一部分内容中,我们将学习:
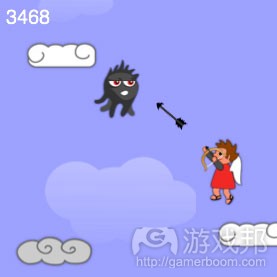
1.赋予游戏角色射箭的能力
2.创造怪物并设置它们的路径
3.让游戏关卡随着角色的跳跃而移动
4.创造胜利结果
打开工具
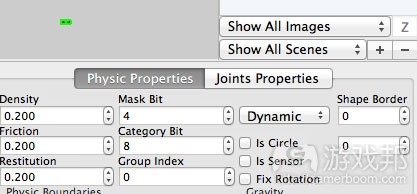
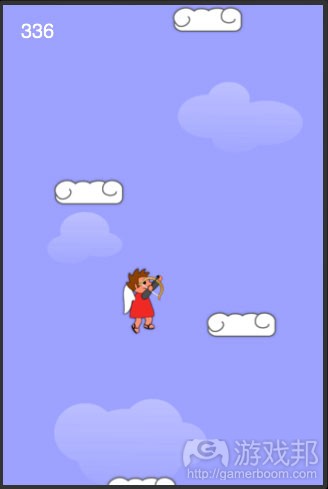
如果你已使用LevelHelper创造属于自己的关卡,那么马上打开原文件,将箭头精灵拖到关卡以外的灰色区域。并按以下属性设置“箭头”精灵。
我们将为玩家对象添加一个新的函数,让他能够射箭。让我们进入newPlayer() 函数,并在p:addEventListener(“collision”, p) 行后面添加以下代码:
function p:shootArrow(x, y)
local target = {}
target.x = x
target.y = -localGroup.y + yarrow = loader:newObjectWithUniqueName(“arrow”, physics)
loader:startAnimationWithUniqueNameOnSprite(“shoot”,frontarm)
localGroup:insert(arrow)arrow.x = self.x
arrow.y = self.ydistanceY = target.y – self.y
distanceX = target.x – self.x
arrow:setLinearVelocity(distanceX * 6, distanceY * 6)local firedAngle = angleBetween(self, target)
arrow:rotate(firedAngle)
self:rotateArms(firedAngle)end
我们将再一次在p对象中审视置shootArrow函数。我们在第一行创造了一个名为“目标”的table。在Lua中,数据容器就称为table。table是混合式数组/字典对象的组合体。我们可以为table添加密钥或索引。我们创造目标table是为了最终能够创造出精确的目标(即碰触)。
当我们在调用这种函数时将打开碰触坐标轴。x轴保持不变,而y轴则需要转变成localGroup轴,从而才能根据玩家的位置去计算武器的旋转角度以及用于掌控箭的力度的物理调用。
接下来我们需要调用newObjectWithUniqueName函数创造一个新的箭目标复制体。在LevelHelper中的个体箭已经安置在关卡中了(在游戏世界的边界之外),但是我们现在需要做的是创造这把箭的复制品。这种调用并不会在我们的localGroup显示组中自动添加箭,所以我们需要亲自动手。
如果我们未能在localGroup中添加箭,那么关于箭的所有定位代码将只是关于屏幕或“阶段”(即corona中的“master parent显示组”,即包含所有自动添加的实体化对象)的内容。如此我们便难以为箭定位。
startAnimationWithUniqueNameOnSprite是我们在最后使用基于LevelHelper所创造出的动画时所进行的调用。这一函数将循环通过四个弓的画面,就好像我们真的在绘制并释放弓弦一样。
然后我们将箭放在玩家的中间位置,而这也是箭的起始位置。
接下来的三行是计算玩家的x轴和y轴之间的距离以及箭的碰触。我们将通过减少这些数值而设定箭的线性速度。这就意味着比起远距离的碰触,近距离的碰触冲力更小。
angleBetween函数能够有效地帮助我们计算游戏中两个点之间的角度。你应该将以下代码添加到文件的尾端:
function angleBetween ( srcObj, dstObj )
local xDist = dstObj.x-srcObj.x ; local yDist = dstObj.y-srcObj.y
local angleBetween = math.deg( math.atan( yDist/xDist ) )
if ( srcObj.x < dstObj.x ) then angleBetween = angleBetween+90 else angleBetween = angleBetween-90 end
return angleBetween – 90
end
旋转弓进行射击
箭的旋转是根据能够设置精灵旋转的函数而完成的。而接下来我们需要定义弓的旋转。我们需要旋转手臂和弓而让他们能够匹配射击角度。在p:shootArrow function函数前添加以下代码:
function p:rotateArms(angle)
if angle < -90 then
frontarm.xScale = -1
backarm.xScale = -1
self.xScale = -1
backarm.rotation = angle + 180
frontarm.rotation = angle + 180
else
frontarm.xScale = 1
backarm.xScale = 1
self.xScale = 1
backarm.rotation = angle
frontarm.rotation = angle
end
end
我们必须确保这一功能浅显易懂。我们将翻转角色,他的前臂,后臂并旋转其手臂让他能够瞄准射击方向。
最后,我们还需要为箭创造一个碰撞函数。即在shootArrow函数中添加以下代码:
local function arrowCollision(self, event)
object = event.other
loader:removeSpriteWithUniqueName(object.uniqueName)
endarrow.collision = arrowCollision
arrow:addEventListener(“collision”, arrow)
你可能会觉得这些代码看起来很眼熟。加载对象的removeSpriteWithUniqueName调用即LevelHelper代码,将在箭碰触到任何对象时删除或清理这些对象。所以我们将箭在LevelHelper中的屏蔽位设置为4,使它只能与怪物发生碰撞。
当我们在最初调用instantiateObjectsInGroup时便能够在任何实体化精灵身上使用LevelHelper的删除函数。如果我们删除了在最初调用时创造的精灵(注:使用removeSelf()),我们可能会在游戏最后关卡清理所有对象时遇到一些问题。
最后我们需要做的是,当箭飞离屏幕时删除它。我们需要基于箭这一对象使用enterFrame函数。同样在shootArrow函数中添加以下代码:
function arrow:enterFrame(event)
if localGroup ~= nil then
yStart = -localGroup.y
if self.y > yStart + 480 or
self.y < yStart or
self.x < 0 or
self.x > 320 then
Runtime:removeEventListener(“enterFrame”, self)
self:removeSelf()
end
end
endRuntime:addEventListener(“enterFrame”, arrow)
第一行是用来检查localGroup是否还存在。即如果玩家死了或失败时,箭仍然存在,但是localGroup已经消失了,那我们的设置就存在着问题。而第一个if语句能够帮助我们避免这一问题。
接下来我们将yStar设置localGroup的y轴为负值。之所以设置为负值是因为箭的位置与localGroup联系在一起。所以localGroup的y轴能够帮助我们明确屏幕的位置,而负值则能够告知我们箭离最高关卡还差多远距离。
如果你还不理解这些定位代码,你可以亲自实践看看。一个最好的方法便是使用print()函数。如果你在enterFrame函数中添加了以下代码,你便能够呈现出关卡(localGroup)的y轴位置以及箭的位置:
print(localGroup.y, self.y)
当箭开始射击时在Corona Terminal窗口观看这些数值,你将会清楚地看到,随着箭在不同关卡的移动,y轴坐标值也会跟着发生变化。
现在你们便了解了射箭时所需要的所有代码;但是我们却仍然缺少一个触发点。所以我们需要设置碰触处理代码。
添加碰触处理代码
我们将开始设置碰触处理函数。我们可以使用两种方法处理碰触事件,即根据Runtime对象记录事件或将碰触事件直接瞄准特定对象。因为我们是使用屏幕设置玩家的射击和移动,所以我们可以选择Runtime对象这一方法。
我们将把碰触代码函数作为程序的基础内容,所以我们可以在任何地方添加这一代码,只要不是在其它函数之中。我们的碰触代码函数如下:
function touchListener(event)
if event.phase == “began” then
player:shootArrow(event.x, event.y)local vx, vy = player:getLinearVelocity()
if event.x > player.x then
player:setLinearVelocity(70, vy)
elseif event.x < player.x then
player:setLinearVelocity(-70, vy)
end
endif event.phase == “moved” then
local vx, vy = player:getLinearVelocity()
if event.x > player.x then
player:setLinearVelocity(70, vy)
elseif event.x < player.x then
player:setLinearVelocity(-70, vy)
end
endif event.phase == “ended” then
local vx, vy = player:getLinearVelocity()
player:setLinearVelocity(0, vy)
end
end
虽然这一代码看起来很长,但实际上也就是一些多次重复的相同逻辑。碰触函数拥有一个参数,也就是我们所说的事件。而事件拥有不同性质,包括阶段性质。阶段其实就是Cocos2d中的touchBegan, touchMoved以及touchEnded事件或者UIKit的碰触处理。
我们希望在每次碰触屏幕时便能够发射一把箭,所以便在代码的“起始”阶段设置了这一代码。
这一函数中的事件对象也拥有自己的x和y属性,并且联系着屏幕中的碰触位置。我们在玩家属性中调用shootArrow方法,并呈现在碰触坐标轴上。现在就可以射箭了。
我们同样也使用碰触代码让玩家能够隔着屏幕操纵角色,对于那些希望用模拟器玩游戏的玩家来说这是一种好方法,而在这里也不需要使用加速器。
首先我们需要明确玩家在y轴的线性速度,从而才能保持他们在垂直距离的匀速。使用getLinearVelocity调用能够帮助我们得到一些数值,所以我们需要设置一对变量——即使我们并不需要使用当前的x速度。
当我们拥有了vy变量,我们便能够测试是否能够碰触到玩家的左边或右边,从而设置当前y轴速度(vy)的线性速度并将朝着碰触面的x轴冲力设置为70。
我们将同时在开始时的碰触以及移动时的碰触中使用这种方法,从而让我们能够移动碰触事件并改变玩家的方向。我们希望在释放碰触事件后,玩家可以不再朝之前的碰触移动,即event.phase == “ended”,所以我们将x速度设置为0。
接下来便是设置碰触监听器。我们只需要将其添加到Runtime对象中即可。在碰触监听器代码下方添加以下代码:
Runtime:addEventListener(“touch”, touchListener)
让我们解析addEventListener调用。这一调用经常用于对象中,即object:addEventListener。第一个涉及的参数是事件类型。事件类型能够判断函数能够采用何种参数。
而第二个参数则是对象或者函数名称。在监听器中添加一个特定对象,除了Runtime,这个参数便是对象的名称。如果调用是关于Runtime对象,那么第二个参数便是不包含 () 的函数名称。
你可能会好奇,监听器是如何知道该调用何种函数(如果我们并未采用这一函数)。比如在碰撞监听器中,我们必须在调用addEventListener方法之前设置碰撞属性。而在enterFrame函数中,函数名称必须是“enterFrame”。
保存并立刻运行。你可以通过碰触(或点击模拟器)屏幕射箭并控制角色的移动。
音乐和音效
让我们稍做休息并尝试一些简单的内容,即添加音频。音频调用是始于一种音频对象的方法调用,而这种对象将固定于Corona引擎中,并且未要求我们输入任何特别内容才能使用它。
首先从该项目的资源中复制所有的音效文件,并放在一个相同的文件夹main.lua 中。
让后回到文件的最上方,并在‘require(“LevelHelperLoader”)’行后面添加以下内容:
bgMusic = audio.loadStream(“Enchanted Journey.mp3″)
backgroundMusicChannel = audio.play( bgMusic, { channel=2, loops=-1, fadein=5000 })
audio.setMaxVolume(0.5, {channel = 2})
shoot = audio.loadSound(“shoot.wav”)
explode = audio.loadSound(“explode.wav”)
jump = audio.loadSound(“jump3.wav”)
monsterKill = audio.loadSound(“monsterkill.wav”)
添加音频非常直接。第一行内容将在储存器中预先加载Enchanted Journey.mp3文件,并准备播放。而第二行将调用游戏方法。这次调用需要两个参数,第一个便是我们在预先加载音乐文件时所创造的对象。
而第二个则是table(就像在Lua中的字典和排列组合)。table也有属于自己的一些参数,但是并非所有参数都包含于这次的调用中。我们将设置一个channel,让它能够保持永远循环,并在速度超过5000毫秒时越来越明显。我们将channel设置为2,即为了能够在下一行中减少它的音量。
接下来四行将预先加载4种音效,即我们将用于代码中的不同事件。我们将在不同变量中调用audio.play() 以播放音频事件。
设置以下代码从而为这些事件添加音效:
–pCollision function – inside newPlayer function
if vy > 0 then
if object.tag == LevelHelper_TAG.CLOUD then
self:setLinearVelocity(0, -350)
audio.play(jump)
elseif object.tag == LevelHelper_TAG.BCLOUD then
loader:removeSpriteWithUniqueName(object.uniqueName)
audio.play(explode)
end
end–p:shootArrow function – inside newPlayer function
arrow = loader:newObjectWithUniqueName(“arrow”, physics)
loader:startAnimationWithUniqueNameOnSprite(“shoot”,frontarm)
localGroup:insert(arrow)
audio.play(shoot)–arrowCollision function – inside shootArrow function
object = event.other
loader:removeSpriteWithUniqueName(object.uniqueName)
audio.play(monsterKill)
除此之外我们还想添加一个蓝天背景。在音频文件装载后将以下代码添加到文件最上方:
blueSky = display.newRect(0, 0, 320, 480)
blueSky:setFillColor(160, 160, 255)
score = display.newText(“0″, 30, 10, “Helvetica”, 20)
前面2行内容能够创造出一个矩形的屏幕。这里包含一些能够绘制原基,加载游戏界面或创造群组的显示函数。newRect函数随宽度和高度参数而明确了x和y轴位置。
第二行的调用将为屏幕上色,即r=160,g=160而b=255。
最后,我们将创造一个新的显示对象,即一个显示newText调用的文本标签。而这一函数将把字符串,x和y轴位置,字型名以及字体大小都当成参数。
调用中既能够使用设备中所自带的字体也能够将额外的字体包含在文件夹中。而额外的字体必须添加在build.settings文件(能够反映 info.plist)中。但是关于这一内容的讨论并不属于该教程的范围,我们不需要多说。
此时当你运行游戏时,便会发现游戏角色能够在天空中跳上跳下,并且分数是呈现在屏幕左上方。我们将随着角色的上升而不断改变背景,设置越来越少的云彩,并慢慢添加星星,让玩家认为自己好像是来到外太空一样。
滚动图层
我们希望随着玩家的跳跃而不断滚动游戏图层。并且不管何时玩家上方总是会留有一半的屏幕空间。我们通过添加了总体的enterFrame函数而做到了这一点。
在touchListener参数后,以及‘Runtime:addEventListener(“touch”, touchListener)调用前添加以下代码:
function runtimeListener(e)
score.text = string.format(‘%d’, worldHeight – 480 + localGroup.y)if player.y < -localGroup.y + 240 then
localGroup.y = -(player.y – 240)
elseif player.y > -localGroup.y + 480 then
–gameOver()
endbackGroundValue = (localGroup.y + (worldHeight – 480)) / (worldHeight – 480)
blueSky.alpha = math.max(1 – backGroundValue, 0)–flipMonsters()
end
这一函数将能够帮助我们实现一些内容。首先将基于玩家在任何关卡的上升范围更新分数。
而接下来的if语句将判断玩家是否超过半个屏幕的高度。如果超过了,localGroup.y的位置将基于玩家的位置进行更新。
而如果玩家未超过半个屏幕的高度,那么if语句将判断玩家是否低于屏幕的最低点。倘若这样,便需要调用gameOver()函数。因为我们还未创建这个函数,所以便为其添加了注释。而双破折号便是Lua中的单行注释。
接下来两行内容将计算我们在关卡中的上升范围,并将蓝天的阿尔法系数设置为完整的矩形比例。如此便能让玩家具有进入了外太空般的感觉。而这时候我们需要回到LevelHelper,删除云彩背景并在最后两个或三个图层中添加星星。
在调用addEventListener函数后添加以下代码而在每个画面上调用runtimeListener函数:
Runtime:addEventListener(“enterFrame”, runtimeListener)
保存并运行,你将能够向不同关卡攀升。
怪物和路径
完成了射箭和穿越不同关卡的设置,我们也即将完成游戏创作。而这时候我们还需要添加一些敌人,为我们的游戏加点“调味料”。
LevelHelper的一大优势便是能够添加敌人并让它们遵循一定的路径——而且不需要设置任何代码!
让我们重新回到LevelHelper并打开动画窗口。创造一个新的动画并添加怪物1和怪物2。在循环选项中打勾。而标准属性也符合其余的选项。然后点击完成动画。
双击将动画重命名为“monster”。从动画窗口中将这个文件拖到关卡文件中,并将其置于最上方。打上“MONSTER”标签,并确保它能遵循下图的物理属性。
点击“clone and align”按钮进行复制。我将创造出11个复制品,以及480个分开排列的y轴像素点。
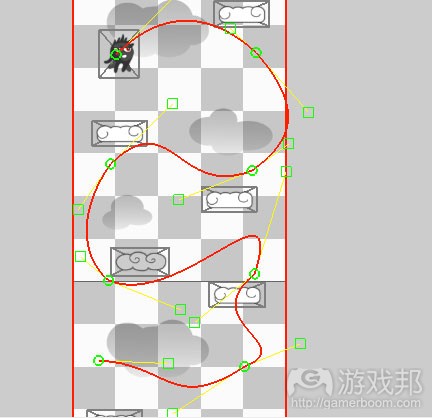
明确了合适的怪物数量,我们便可以开始创造这些怪物的路径。点击路径窗口。点击“New”以创造新的路径。开始在关卡上进行点击,并且每次点击将创造一个新的路径点。
当你设置了一个直线型路径时,你便可以点击“finish”。着重突出第一个路径并做个标记。你必须确保这一路径能够用于分布怪物、而如果你对直线型路径感到满意,你便可以确定下来。
但是如果你想要创造一个更灵活的曲线型路径,你可以点击“Edit”按钮,而这时候在你的路径上便会出现控制点和路径点。你可以拖曳这些点而创造出弯曲的路径效果。而如果你想要添加更多点或者删除某些点,
那就点击“plus”/“minus”按钮。每一次点击都会呈现一个新模式,所以在添加/删减模式下你不能移动任何点。当你创造出最满意的路径后,点击“finish”即可。
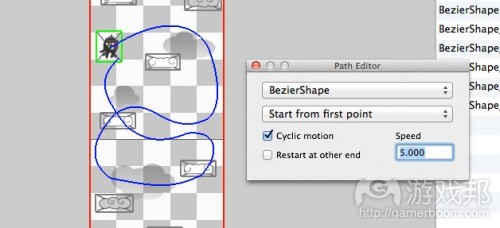
接下来我们开始为怪物分配路径。点击你想要遵循的路径的怪物。点击精灵属性窗口中的路径按钮。选择路径名称,而系统默认值是BezierShape。
速度的判断标准是怪物通过整个路径所需要花费的时间(按秒钟计算)。我们将在所有的路径点中均匀地分配时间,如果你让怪物必须在5秒钟穿过5个分段路径,那么你就必须确保它们每秒钟能够通过一个分段(而不管每个分段的长短),从而让怪物能够在自己的路径上灵活地加速与减速。
“Is cyclical”的选择将决定精灵是否能够沿着路径一直前进。如果你未选择循环移动,你便只能创造一次旅程。“Restart at the end”选项能够让精灵在路径结束后重新开始每一次的循环。如果你未在这个选项中打勾,你的循环周期将只停留在开始到结束并从结束到开始而已。
你可以选择精灵是否从开始的路径走到最后或者反过来走。路径的设置完全基于LevelHelper。所以不论你在关卡的哪里设置了路径,那里便是精灵/怪物的所在,不管你之前在LevelHelper设置的精灵位置在哪里。
如果你在相同的路径上分配了多个怪物,它们将一起行走,除非你能够为它们设置不同属性,如一个怪物先朝前走并绕回来而另一个怪物则先朝后走,或者一个怪物比其它怪物的移动速度更快等。为每个怪物设置路径。
任何具有路径的精灵都必须是“静态”的物理类型,所以如果一只怪物并未设置路径,那么它将只能在LevelHelper的初始位置上空漂浮着。
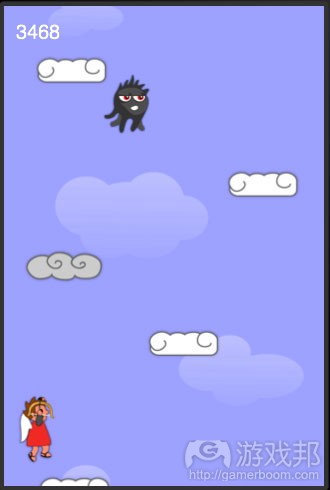
当你明确了怪物的路径后,保存并运行。你将会发现你的怪物能够到处走动,而你的角色可以用箭射击它们并消灭它们。
我们必须明确玩家与怪物之间发生碰撞的逻辑。将以下代码放置在云彩碰撞内容之后。即整体的pCollision函数如下:
function pCollision(self, event)
object = event.other
if event.phase == “began” then
vx, vy = self:getLinearVelocity()
if vy > 0 then
if object.tag == LevelHelper_TAG.CLOUD then
self:setLinearVelocity(0, -350)
audio.play(jump)
endif object.tag == LevelHelper_TAG.BCLOUD then
loader:removeSpriteWithUniqueName(object.uniqueName)
audio.play(explode)
end
endif object.tag == LevelHelper_TAG.MONSTER then
gameOver()
end
end
end
如果碰撞对象带有“MONSTER”标签,我们将调用游戏结束函数。
游戏结束
在runtimeListener函数后插入游戏结束代码:
function gameOver()
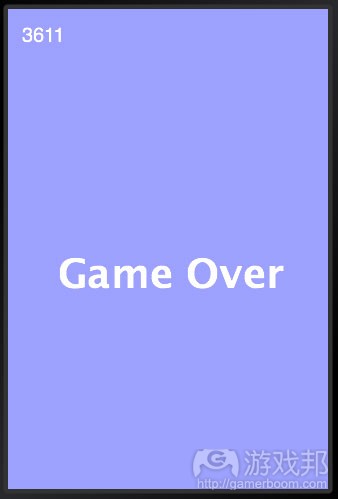
gameOverText = display.newText(“Game Over”, 50, 240, native.systemFontBold, 40)local function removeGOText()
gameOverText:removeSelf()
endtimer.performWithDelay(2000, removeGOText)
player:removePlayer()
Runtime:removeEventListener(“enterFrame”, runtimeListener)
Runtime:removeEventListener(“accelerometer”, accelerometerCall)
Runtime:removeEventListener(“touch”, touchListener)loader:removeAllSprites()
localGroup = nil
timer.performWithDelay(2000, startOver)
end
第一行内容与本教程最初的内容相类似,即我们使用display.newText函数在屏幕上呈现出“游戏结束”的文本内容。
接下来我们创造了一个函数以删除这一文本,并且为了让玩家能够重新开始游戏,我们让该该函数在文本内容出现后的2000毫秒开始运行。
然后我们便开始清除所有之前创造的对象。首先是玩家,我们需要创造removePlayer函数移除玩家。接下来是所有的Runtime监听器。并且不需要担加速监听器,我们马上会再次添加进来。
其次我们将使用LevelHelper中的“removeAllSprites”函数,它能够帮助我们有效地移除LevelHelper所创造的所有对象。如果我们不能好好利用这一函数删除所有内容,便很容易遇到一些难以预料到的问题。
我们将localGroup设置为零,从而让垃圾回收器能够派上用场。不管是否有效,这对于我们来说都是一次有益的实践。最后我们将调用一个新函数,即starOver。这一函数将召回loadLevel函数而重新开启游戏,并创造出新的玩家角色等。
让我们创造删除玩家的代码。以下代码将设置在newPlay()函数中的回归p内容之前:
function p:removePlayer()
Runtime:removeEventListener(“enterFrame”, self)
loader:removeSpriteWithUniqueName(self.uniqueName)
loader:removeSpriteWithUniqueName(backarm.uniqueName)
loader:removeSpriteWithUniqueName(frontarm.uniqueName)
end
很多回调函数在删除精灵的同时也会删除其本身的内容。但是enterFrame函数却是个例外。在我们从储存器中删除精灵后,该函数仍然会继续制造出更多错误。所以我们必须最先删除它。
然后我们可以继续删除关卡中的其它精灵。
以下是starOver函数,你可以将其安置在gameOver()函数之前或之后:
function startOver()
loadLevel()
Runtime:addEventListener(“enterFrame”, runtimeListener)
Runtime:addEventListener(“accelerometer”, accelerometerCall)
Runtime:addEventListener(“touch”, touchListener)
end
我们必须确保这么做是有意义的。即我们只是在调用相同的方法去加载游戏关卡,就像我们一开始做的那样。然后我们将再次在Runtime对象中添加监听器。
而有一件事是我们还未尝试的,也就是创造加速代码让我们能够倾斜地移动角色,就像《涂鸦跳跃》(游戏邦注:采取独特的倾斜控制方法)那样。我们可以通过碰触或点击去移动角色,但是如果能够使用倾斜控制方法,玩家可能会觉得更加有趣。而我们只需要稍作修改便可。以下代码便能够帮助我们创造加速器函数:
function accelerometerCall(e)
px, py = player:getLinearVelocity()
player:setLinearVelocity(e.xGravity * 700, py)
endRuntime:addEventListener(“accelerometer”, accelerometerCall)
加速器事件拥有xGravity和yGravity两大属性。我们将在此简单地明确y轴的速度,并且不会影响垂直方向的冲力,然后将e.xGravity的值设置为700。这个数值是我们随机设定的。现在玩家便可以在自己的设备上倾斜控制游戏角色了。
为了在corona上针对苹果设备制作游戏,你必须先获得苹果游戏开发者帐号。如果你正在使用Corona的试用版本,你可以使用开发证书而针对苹果设备制作应用。并最终通过itunes或Xcode将.app文件安装于设备中。
现在我们应该再次回到runtime监听器中,并删除gameOver()调用前的注释破折号。保存并在模拟器中运行。现在的角色能够在遭遇怪物或掉出屏幕而死去后再次开始游戏了。
收尾工作
现在,我们几乎完成了所有的创作工作,但是还有一些零碎的内容需要调整。我们希望怪物们能够均衡地分布,而现在它们却集中分布于左边。我们可以通过在runtimeListener函数中添加flipMonsters函数而解决这一问题。然后取消runtimeListener函数调用的注释,并在文件开头的newPlayer函数之前添加如下代码:
function flipMonsters()
local myMonsters = loader:spritesWithTag(LevelHelper_TAG.MONSTER)
for n = 1, #myMonsters do
if myMonsters[n].prevX == nil then
myMonsters[n].prevX = myMonsters[n].x
elseif myMonsters[n].prevX – myMonsters[n].x > 0 then
myMonsters[n].xScale = -1
else
myMonsters[n].xScale = 1
end
myMonsters[n].prevX = myMonsters[n].x
end
end
spritesWithTag调用将能够在关卡中生成一组(技术上的table)带有标签的精灵。接下来创造一个for循环语句。Lua table将从1开始进行索引(而非0)。通过数组变量的前缀#我们能够明确数组的长度。
在这个循环中,我们将创造一个新的变量,即关于之前精灵的x轴位置。因为精灵是静态的,它们并没有线性速度值。所以我们必须先明确怪物是否具有prevX属性。当我们第一次运行这一函数去访问prevX属性时总是会弹出一个错误窗口(即prevX的值为零)。
在Lua中,所有对象都是table,而我们也可以随时添加任何属性。
在第二次循环中,如果prevX存在,我们就需要测试精灵是向左移动还是向右移动(如果prevX – x是负值那就算向左,而正值则是向右)。然后我们需要相对应地设置xScale属性。最后基于当前的x轴,我们会再次设定prevX值,并准备下一次的循环。
保存并运行,现在你的怪物可以朝着移动方向而前进了。并且你必须确保已经删除了runtimeListener函数中flipMonster() 调用前的注释破折号。
胜利!
现在我们是否完成了所有工作?差不多了,而接下来我们就必须让玩家能够赢得游戏。
所以我们需要创造一个gameWon函数,并在我们到达最高关卡时运行它。
将以下函数放置在startOver() 函数之后的任何地方:
function gameWon()
print(“you win”)
timer.performWithDelay(2000, function() physics.pause() end)
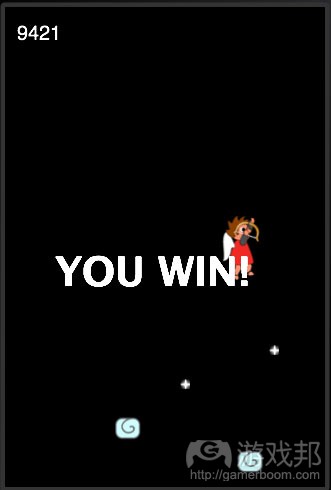
gameWonText = display.newText(“YOU WIN!”, 50, 240, native.systemFontBold, 40)
end
我们会在屏幕上显示出获胜的标志。并且在2秒钟后,我们也将暂停物理引擎的运行,从而让角色不能再继续跳跃。我们可以在lua中创造一个函数说明,并将其作为函数的相关参数。并且我们也无需为其命名。
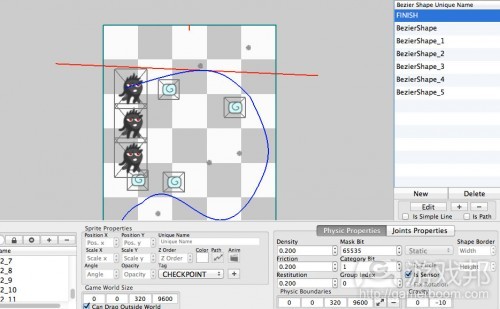
我们将创造最后的bezier路径以运行这一函数。再次回到LevelHelper并创造一个新的bezier shape。基于两点连接一条线。明确新的shape并在“Is Sensor”选项中打勾。选定CHECKPOINT标签。并确保category bit值为1。这时候的bezier shape就有自己的物理属性了。
现在,在pCollision函数(在newPlayer() 函数中)添加以下代码以调用gameWon() 函数。这一代码应该放置在the object = event.的其它行中:
if object.tag == LevelHelper_TAG.CHECKPOINT then
print(“CheckPoint”)
gameWon()
end
保存并运行,现在你便可以攀升到最高关卡并赢得游戏了!
游戏邦注:原文发表于2011年9月27日,所涉事件和数据均以当时为准。
(本文为游戏邦/gamerboom.com编译,拒绝任何不保留版权的转载,如需转载请联系:游戏邦)
How To Make a Game Like Doodle Jump with Corona Tutorial Part 2
27 SEPTEMBER 2011
Jacob Gundersen
In this tutorial series, you’ll learn how to use the Corona game engine to create a neat game like Doodle Jump.
In the previous tutorial, you learned how to use LevelHelper with Corona. We created a jumping character, different kinds of clouds, and gave him some arms.
In this second and final part of the tutorial series, we’re going to:
Give our hero the ability to shoot arrows
Create monsters and give them paths to follow
Make the level move as our player jumps upwards
Add even more epic win! :]
If you don’t have it already, here’s the example project where we left it off last time.
So fire up Level Helper and your text editor, and get ready to fire some arrows! :]
Fire It Up!
If you’ve been creating your own level with LevelHelper, open it up and drag the arrow sprite onto the gray area outside the level. Give the ‘arrow’ sprite the following attributes.
We’re now going to add a function to the player object that shoots an arrow. This code should go in the newPlayer() function, after the p:addEventListener(“collision”, p) line. Here’s
the code:
Once again we are scoping the shootArrow function within the p object. Our first line creates a table named target. In Lua, the data container is called a table. Tables are hybrid array/dictionary objects. Tables can have keys or indexes added to them. We are creating a target table so we can create our calculated destination (it will be a touch).
We will be passing in the touch coordinates from the screen when we call this function. The x coordinate will be fine, but the y coordinate will need to be translated to localGroup coordinates in order to be compared to the position of the player to calculate the angle for both the rotation of the arms and for the physics call in order to apply a force to the arrow.
We next instantiate a new copy of the arrow object with the newObjectWithUniqueName call. Our single arrow in LevelHelper is already in the level (outside of the world boundaries), but what we are doing here is creating a copy of that arrow. This call doesn’t automatically add the arrow to our localGroup display group, so we need to do that.
If we didn’t add it to the localGroup all the positioning code for the arrow will be relative to the screen or ‘stage’ (what corona calls the master parent display group that all instantiated objects are automatically added to). This would make it hard to position the arrow.
The startAnimationWithUniqueNameOnSprite is the call we use to finally use the animation we created in LevelHelper. This will cycle through the four frames of the bow to look like we are drawing and releasing the bowstring.
Next we place the arrow at the center of the player, this is the starting position of the arrow.
The next three lines calculate the distance between the x and y coordinates of the player and the touch. These values are reduced and used to set the linear velocity of the arrow. This means that a close touch applies less force to the arrow than a far touch.
The angleBetween function is a helper function that calculates the angle between two points in our game. You should place the following code at the very end of the file:
Rotating the Bow to Shoot
The rotate method on the arrow is a built in function that sets the rotation of the sprite. The next method is one we’ll define next. It rotates the arms and bow so they match up with shooting angle. That code should be placed in before the p:shootArrow function:
This function should be easy to understand. We’re flipping the player, frontarm, and backarm and rotating the arms so they point in the shooting direction.
Finally, we need to create a collision function for the arrow. This code should reside within the shootArrow function:
This should look familiar. The call to removeSpriteWithUniqueName call to the loader object is LevelHelper code that will delete and clean up after the object that the arrow collides with.
We set the arrow mask bit to 4 in LevelHelper, so the only thing that the arrow can collide with is a monster.
The LevelHelper remove functions are preferable for any sprite instantiated in our initial call to instantiateObjectsInGroup. If we remove sprites (using removeSelf()) that were created in that initial call, we will have errors later on when we try to clean up everything in the level at the end of the game.
One last thing we need to do, the arrows need to remove themselves once they fly off screen. We’ll do this with an enterFrame function on the arrow object. This code should also appear inside the shootArrow function:
That first line checks to see if localGroup still exists. In the case that we’ve been killed or fallen, an arrow may still exist. However, the localGroup may have been removed. In this case we’d throw an error. This first if statement avoids that problem.
Next, we set yStart to the negative of the localGroup.y position. We set that to negative because the arrows position is relative to the localGroup. So the y position of localGroup gets us to the position of the level relative to the screen and the negative of this value tells us how far down from the very top of the level the arrow is.
If you find that any of this positioning code is confusing, I recommend playing with it a little. A great way to do this is with the print() function. If you add the following line of code to the enterFrame function will print the y position of the level (localGroup) and the arrow:
Watch these values in the Corona Terminal window as the arrows are shot. This should give you an idea of how the y positions change as arrows move through the level and the level scrolls.
Now the player has all the required code to shoot an arrow, but we still don’t have a way to trigger it. That requires touch handling code.
Adding Touch Handling
We’re ready to move on to handling touch functions. Touch events can either be handled globally by registering the event with the Runtime object or the touch events can be directed towards specific objects. Because we are using the screen to shoot and to move the player, we are going to use the Runtime object.
We will be adding our touch code function at the root level of our program, so this code can be added anywhere as long as it’s not inside another function. Our touch code function looks like this:
This code looks long, but it’s actually the same logic repeated several times. The touch function has an argument, that we have named event. Event has several properties, including a phase property. The phase corresponds to touchBegan, touchMoved, and touchEnded events in Cocos2d or UIKit touch handling.
We want to fire one arrow each time the screen is touched, so we’ll place that code in the “began” phase of our code.
The event object inside this function has an x and y property that correspond to the touch position on the screen. We call our shootArrow method on our player property and pass in the touch coordinates. This will now shoot an arrow.
We’ll also be using touch code to move our player across the screen. This is a convenience for those who wish to play the game in the simulator, where the accelerometer isn’t available.
First we need to get the y linear velocity of the player so that we can pass that value in to retain the constant velocity of the player in the vertical dimension. The getLinearVelocity call always returns a pair of values, so we need to set the variables up as a pair, even though we won’t need the current x velocity.
Once we have the vy variable we test to see whether we touched to the left or right of our player, and based on that we set the linear velocity with our current y velocity (vy) and a strength of 70 in the x dimension toward the touch.
We apply this logic on both the touch began and the touch moved, this way we can drag the touch around and change the direction of the player. Once we release the touch, we want the player to no longer move toward the previous touch so in that case, event.phase == “ended”, we set the x velocity to 0.
That’s are touch listener. We just need to add it to the Runtime object. Add this code beneath the touch listener code:
Lets go through the anatomy of an addEventListener call. It will always be called on an object, object:addEventListener. The first argument is the event type. The event type will determine what kinds of arguments that the function will pass through to the body of the function.
The second argument is either the object or the name of the function. In the case of a listener added to a specific object, any other than Runtime, this argument will be the name of the object. If the call is on the Runtime object, then the second parameter is the name of the function without the () included.
You may wonder how the listener knows what function to call if we don’t pass a function in. In the case of a collision listener, we must set the .collision property before we call the addEventListener method. In the case of an enterFrame function, the name of the function must be called ‘enterFrame.’
Save and run now. You should be able to shoot arrows and control the movement of your character by touching (or clicking in the simulator) on the screen.
It’s starting to get pretty awesome, huh! Just a bit more to go to wrap up this game!
Gratuitous Music and Sound Effects
Lets take a quick break and do something easy, add audio. Audio calls all start with a method call to the audio object, this object is built into Corona and doesn’t require and special imports to use it.
Start by copying all of the sound files from the resources for this project into the same folder as the main.lua file.
Then go back to the top of the file and after the ‘require(“LevelHelperLoader”)’ line add the following:
Adding audio is pretty straight forward. The first line preloads the Enchanted Journey.mp3 file into memory and prepares to play it. In our second line we are calling the play method. This call takes two arguments, the first is our object we created when we preloaded the music file.
The second is actually a table (tables are like dictionaries and arrays combined in Lua). This table has a number of parameters, not all of which are included in this call. We are just giving it a channel, telling it to loop forever, and asking it to fade in over 5000 ms. We set the channel to 2 in order to reduce the volume of that channel in the next line.
The next four lines are preloading four audio sound effects that we will use to play at different events in our code. We will call audio.play() on each of these variables to play the audio event.
Place the following lines of code in the following places to add sound effects to those events:
One other thing that we want to add is a blue sky background. Add the following code to the top after the audio file loading:
These first two lines create a rectangle the size of the screen. There are a number of display functions that draw primitives, load sprites, or create groups (as you’ve seen). The newRect function takes an x and y position along with a width and height as arguments.
The second call fills the screen with the color r = 160, g = 160, and b = 255.
Finally, we create a new display object, a text label with the newText call. This function takes the string, an x and y position, the font name, and font size as its arguments.
The fonts available on the device natively are available through this call as well as additional fonts included in the folder. Additional fonts need to be added to the build.settings file which mirrors the info.plist. That discussion is beyond the scope of this tutorial.
If you run it now, it should look more like your hero is jumping around in the sky, and the score will be onscreen. We’re going to slowly change the background as we climb up the level to have fewer clouds and look more like outer space by adding stars.
Scrolling the Layer
We want to scroll the layer as the player jumps. At any give time the player should have half a screen worth of level above him. We’ll accomplish this by adding a global enterFrame function.
Add the following code after the touchListener funtion, but before the call to ‘Runtime:addEventListener(“touch”, touchListener)’:
This function accomplishes a couple of things. The first updates the score based on how far we advanced in our level.
The next if statement first checks to see if the player is above half the height of the screen. If he is, the position of localGroup.y is updated based on the player’s position.
If the player isn’t above half the height of the screen, the if statement checks if the player is below the bottom of the screen. If so, the gameOver() function is called. We haven’t built that yet so lets keep it commented out for now. Double dashes — denote a single line comment in Lua.
The next two lines calculate how far we are in the level and set the alpha of the blueSky rectangle to the percentage complete. This is to give the impression that we are ascending into outer space. Go back to LevelHelper and remove any background clouds and add stars to the last two or three screens.
Then add the following line of code to call your new runtimeListener function each frame right after the other call to addEventListener:
If you save and run you’ll now be able to climb up the level!
Monsters and Paths, Oh My!
Now that we can shoot and move through the level, we are actually pretty close to being finished. We just need to add some enemies to our level to spice it up!
One great thing about LevelHelper is the ability to add enemies and give them premade paths to follow – with no code required!
Return to LevelHelper and go to the animation pane. Create a new animation and add monster1 and monster2 to it. Make sure loop remains ticked. The standard properties are fine for the rest of the options. Click finish animation.
Double click to rename the animation ‘monster.’ Drag a monster from the animation pane into the level, I’d place him at the very top. Give him the tag ‘MONSTER’ and make sure that his physics attributes match those below.
Click on the ‘clone and align’ button and make copies. I’m gonna make 11 clones, 480 y pixels apart.
Once you’ve got your desired number of monsters, we are going to set paths up for each one. Click on the paths pane. Click ‘New’ to create a new path. Start clicking on the level. Each click will create a new point in our path.
When you’ve laid out your square path, press ‘Finish.’ Highlight the first path and tick the ‘Is Path’ box. It must be a path in order to be assignable to a monster. If your happy with a square path, you can stop here.
But, if you want a smooth curved path, you click the ‘Edit’ button, control points and path points will show up in your path. You can drag the points around to make the path curvy. If you want to add more points or remove points, click the plus and minus buttons. Each click puts you in a new mode, so you can’t move point in the add/subtract modes. When you’re happy with your path, click finish.
Now we are going to assign a path to a monster. Click on the monster you want to follow that path. Click the path button in the Sprite Properties pane. Choose the name of the path, the default is BezierShape.
The speed is how long the monster takes to move across the entire path in seconds. This time is divided up evenly across all of the path points, so if you have a five second path with five segments between points, each segment will be traversed in one second, regardless of the length of the segment, creating a monster that can potentially speed up and slow down through its path.
‘Is cyclical’ will cause the sprite to constantly move along the path, if it’s not ticked it will only make the journey once. ‘Restart at other end’ will cause the sprite to restart each cycle at the chosen end of the path. If this is not ticked it will cycle beginning to end then end to beginning.
You can choose whether the sprite starts at the beginning of the path and moves toward the end or vice versa. Paths are absolute in LevelHelper. Wherever the path is within the level, is where that sprite/monster will be, regardless of the initial placement of the sprite in LevelHelper.
If you assign multiple monsters to the same path, they will move along that path together, unless you assign different values, ie. one monster could move front to back the other back to front, one could move faster than the other, etc.
Go through and give each monster a path.
Any sprite that has a path must be of physics type ‘static’, so if you don’t give a monster a path, it will just float in the air at the initial LevelHelper position.
Once you’ve got paths for your monsters, save and run. You’ll see that your monsters are moving around and you can shoot them with your arrows to destroy them.
We need to give the player some logic when he collides with a monster. Put the following code in after the section for colliding with the clouds. The entire pCollision function should look
like this:
This should now understand what is going on here. If the collided object has a tag of MONSTER, we call the game over function. Lets go ahead and write that function now.
Game Over, Man!
Insert the game over code after the runtimeListener function:
The first line should look familiar from the very beginning of the tutorial. We’re using the display.newText function to display the text “Game Over” to the screen.
Next we create a function to remove the text, for when we restart, and we schedule that function to run after 2000 ms.
Then we start cleaning up all the objects that we’ve created. The player is removed first, with a removePlayer function that we need to build. Next all the global Runtime listeners are removed. Don’t worry about the accelerometer listener, we’ll add that in a second.
Next we use a LevelHelper function ‘removeAllSprites.’ This is a great way to remove all the objects created by LevelHelper. As stated earlier, this function will clean everything up that was initially created by LevelHelper. If we removed something without using the LevelHelper remove functions, this would throw an error.
We set localGroup to nil. This allows the garbage collector to do it’s work. It should be empty, but we do it as good practice. Finally, we call a new function, startOver. It will reinitialize our level by invoking the loadLevel function, creating a new player, etc.
Lets create the code that removes the player. The following code should appear right before the return p line in the newPlayer() function:
Most callback functions will remove themselves when the sprite is removed. However, the enterFrame function is an exception to that. It will continue to fire and throw an error if the sprite has been removed from memory (referring to a nil variable). So, we remove that first.
When that’s done we can go ahead and remove the rest of the sprites from our level.
Here’s the startOver function, you can place it before or after the gameOver() function:
This should make sense. We’re just calling the same method to load the level as we did in the first place. Then we’re adding the listeners back to the Runtime object.
One thing we haven’t done yet is create the accelerometer code that will allow us to use tilt to move our player like Doodle Jump. We can touch/click to move him, but it would be more fun if we could use the tilt. That’s an easy fix. Lets go ahead create the accelerometer function now:
The accelerometer event has an xGravity and a yGravity property. Here we are simply getting the y velocity, so we don’t interrupt the momentum in the vertical direction, and then applying the force of the e.xGravity value times 700 to the player. The 700 value is arbitrary, I just played with it until it felt about right. This provides a tilt control of our player if we are playing on a device.
In order to build for the device in corona, you must have an apple developer account. If you are using the trial version of Corona, you can use a development certificate to create an app build for the device. The resulting .app file can be installed on the device through itunes or Xcode organizer. For more information on this process go here.
Go back to the runtime listener now and remove the comment dashes before the call to gameOver(). Save and run in the simulator. You should now be able to die and restart the game by running into a monster or falling off screen.
Finishing Touches
We’re almost finished, there are just a few odds and ends left. We want to have the monsters look where they are going, currently they always look to the left. We’ll do that with a flipMonsters function in our runtimeListener function. Go ahead and uncomment that call in the runtimeListener function and add the following code before the newPlayer function towards the beginning of the file:
The spritesWithTag call will generate an array, technically a table, of any of the tagged sprites in the level. Next we create a for loop. A couple of things of note in lua. Lua tables are indexed starting with a 1 instead of 0. Any array length can be accessed by prefixing the array variable name with #.
In this loop we have to create a new variable the was the previous x position of the sprite. Because the sprites are static in type, they don’t have linear velocity values. We need to first check if the monster has a prevX attribute already populated. The first time this function runs trying to access the prevX attribut will throw an error (prevX will be nil).
In Lua, all objects are tables and we can add attributes at any time.
On the second time around, once prevX exists, we test whether the sprite is moving left or right (prevX – x is negative=left or positive=right). We then set the xScale property accordingly. Finally we reset the prevX value to the current x, in preparation for the next time around.
If you save and run now your monsters should face the direction they are moving. Make sure that you have removed the comment dashes in front of the flipMonster() call in the runtimeListener function.
Winning!
Now we’e done right? Well, almost – we have to let the user win (so Charlie Sheen can play!)
So let’s create a gameWon function and fire it when we get to the top of the level.
Here’s the function, place it somewhere after the startOver() function:
We simply print to the console and on screen that you have won. Also, after a two second delay, we pause the physics engine so you don’t keep bouncing. Notice that in lua we can create a function declaration and pass it in as an argument to a function. When we do this we needn’t give it a name.
We’ll fire this function by creating one last bezier path. Go back to LevelHelper and create a new bezier shape. A line created by two points will do. Highlight the new shape and click ‘Is Sensor.’ Also, give it the CHECKPOINT tag. Make sure it has a category bit of 1. That’s right, ladies and gents, bezier shapes can have physics properties.
Now add the following code to the pCollision function (in the newPlayer() function) to call the gameWon() function. This code should appear right after the object = event.other line:
Save and run, you should now be able to climb to the top of your level and WIN THE GAME!!! Feel the tiger blood running through your veins.
Congratulations, you have the skills to create level upon level of 2D scrolling goodness!(source:raywenderlich)





 闽公网安备35020302001549号